BATTERY INSTALLATION
Remove battery door from the back of the unit by
unscrewing the door from the timer. Install two 1.5 v
(size AA) new alkaline batteries. Test the unit turning
the
Run Time knobs to the ON position. There will be
a 1 to 5 second delay before the valve opens. The
battery indicator light will flash when the batteries are
in good condition. When the battery is low the light
will remain on and the valves will automatically shut
off. When the battery is drained, the light will go out.
TIMER INST
ALLA
TION
Your Raindrip Two Zone Timer is equipped with two
valves enabling watering in two different areas with
independent watering programs. Follow the
instructions below to program each area. To attach the
faucet, loosen the collar to allow the coupling to spin
freely. Connect to faucet by tightening the coupling.
The collar can now be tightened.
Do not use
wrenches or pliers to tighten the collars.
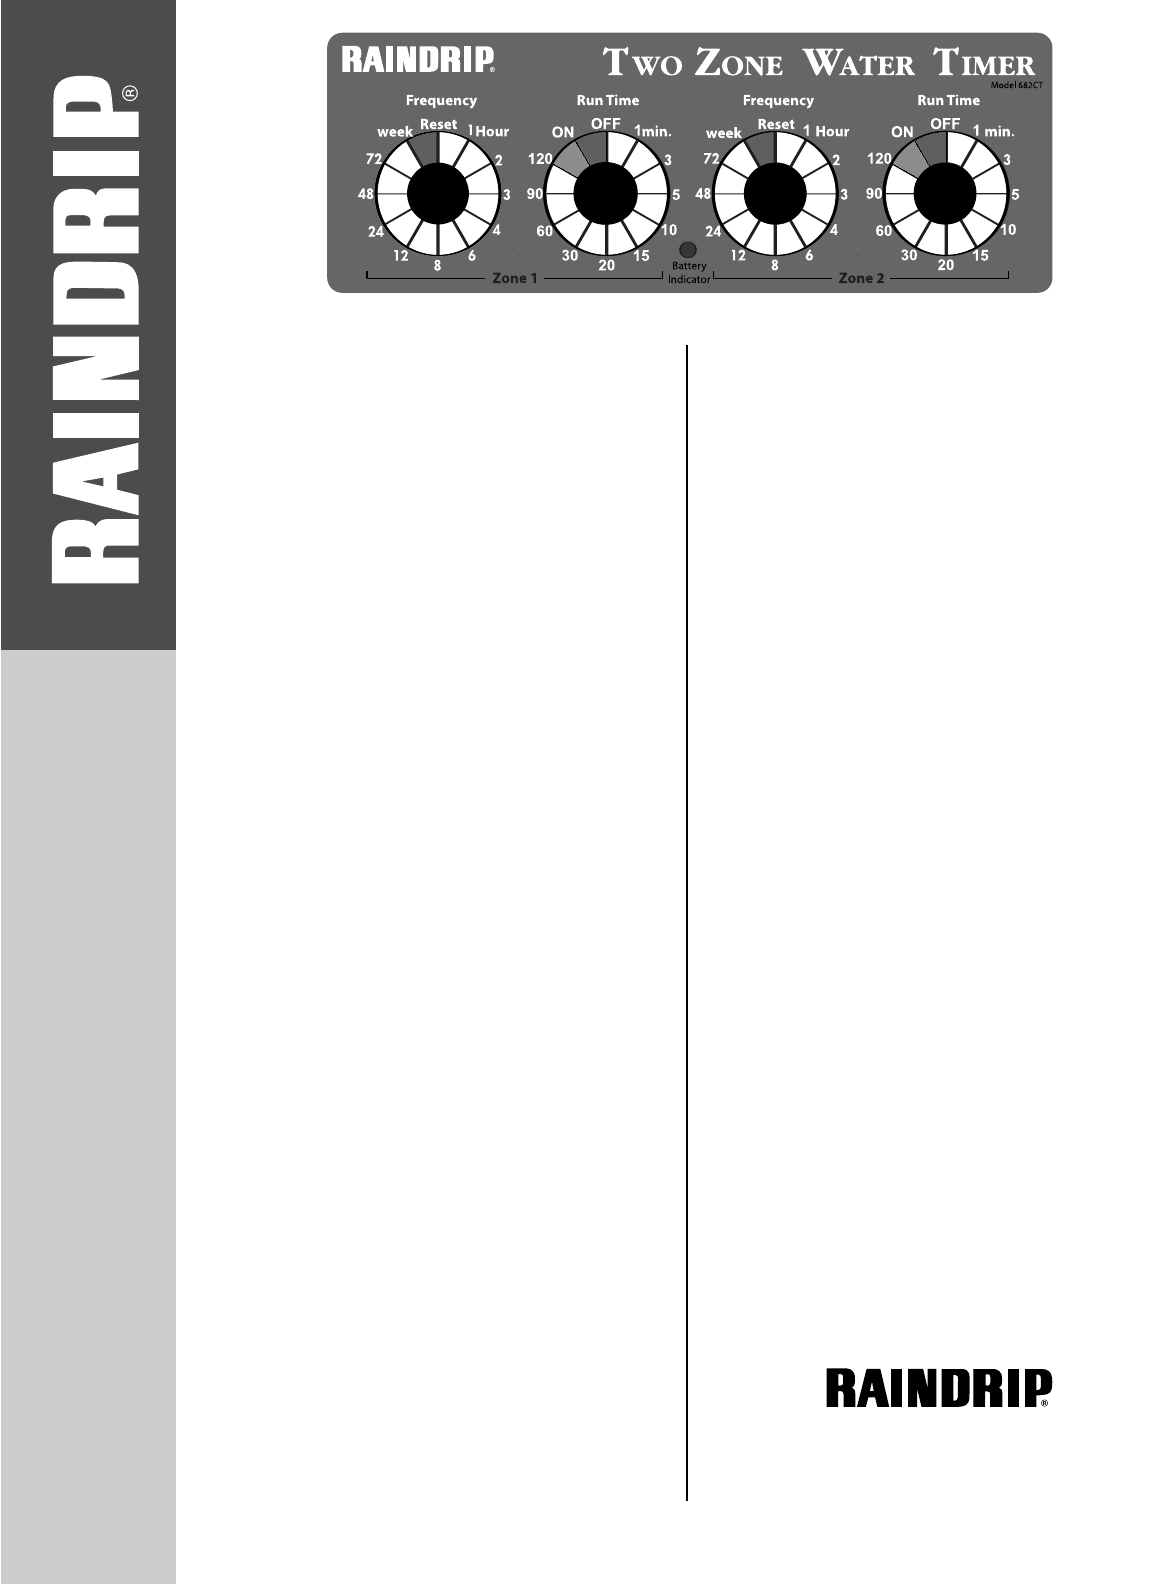
PROGRAMMING
1
Turn the Frequency knob to the required
frequency, from one to
72 hours. Turn the knob
to Week to water once per week.
2
Turn the Run Time knob to your desired duration
from one to
120 minutes. The timer will not
begin its pr
ogram until
the next period. Repeat steps
1 and 2 for the second watering zone.
3
Make a record of the date you programmed the
timer unit, the fr
equency and run time setting for
your reference.
4
Replace the water r
esistant cover after pr
ogram
-
ming, ensuring that is tightly screwed onto the timer.
NOTES
• The timer starts keeping time when you set it. For
example, if you want the timer to come on at 7AM,
you must physically set it at 7 AM.
• Y
ou may change fr
equencies and run time at any
time by just tur
ning the
Fr
equency
knob or the Run
Time knob to a new setting.
MANUAL OPERATION
Your Raindrip Timer can be turned on and off manu-
ally. Rotate the Run Time knobs to the OFF position to
suspend the current program without interrupting the
frequency setting. Rotate the
Run Time knob to the ON
position to begin watering and back to OFF to stop it.
Rotate the knob back to the desired Run Time to
continue the current program.
OPERATING TIPS
• Turn off faucet and remove the batteries if the unit
will not be used for an extended period of time.
• Use only fresh alkaline batteries. Do not use any
rechargeable batteries. Replace the batteries at the
beginning of each season.
• Do not pull on hose while attached to the unit.
TROUBLE SHOOTING GUIDE
If the water does not come on, check the following:
• Be sure the faucet/tap is turned on.
• Check that batteries are in good condition and are
installed correctly.
• Check that the frequency and run times are the same
as your record.
• Be sure that the frequency setting is longer than the
run time. For example, you cannot set the frequency
at the
1 Hour setting and have the run time set for
anything over 60 minutes.
CAUTION
Protect the timer and its par
ts fr
om fr
eezing.
Prior to the first frost or freeze, remove the timer from
the faucet and store it indoors until Spring. Remember
to r
emove the batteries fr
om the battery compartment.
Timer is for outdoor use only.
T
imer is water resistant and not water proof.
Do not install timer in a location wher
e it can be
submerged in water.
This timer has drain holes to r
emove moistur
e from
inside the case. Always install timer above ground
and away from moisture.
337 West Bedford, Fresno CA 93711
Technical Service: 888-825-4716
www.raindrip.com
Water Timer Instructions Model R682
Two Zone Timer
