
3 Actual User
(see page iii
for details)
OPERATOR’S MANUAL

© Copyright 2007 ZEVEX Incorporated
i
TABLE OF CONTENTS
TABLE OF CONTENTS ........................................................................................ i
PRODUCT OVERVIEW ...................................................................................... iii
LIST OF WARNINGS AND CAUTIONS ............................................................. iv
1. PUMP COMPONENTS .................................................................................... 1
EnteraLite Innity Enteral Feeding Pump ........................................................ 1
Keypad ............................................................................................................. 3
Display ............................................................................................................. 4
Disposable Set ................................................................................................. 5
Symbols ........................................................................................................... 6
2. DIRECTIONS FOR USE .................................................................................. 7
Priming and Loading the Disposable Set ........................................................ 7
Operating the Pump
A Single Feeding Example ......................................................................... 10
An Interval Feeding Example ..................................................................... 13
The Battery
Running on Battery Power ......................................................................... 17
Charging the Battery .................................................................................. 18
User Preference Settings ............................................................................... 19
3. ALARMS, MESSAGES, AND INDICATIONS ............................................... 21
4. TROUBLESHOOTING GUIDE ...................................................................... 28
5. CLEANING .................................................................................................... 31
6. ACCESSORIES ............................................................................................. 32
7. SPECIFICATIONS ......................................................................................... 34
8. IMPORTANT PEDIATRIC CONSIDERATIONS ............................................ 36
9. ADDITIONAL TECHNICAL INFORMATION ................................................. 37
10. WARRANTY ................................................................................................ 39
LIST OF FIGURES ............................................................................................ 40
WHO TO CALL .................................................................................................. 43
INDEX ................................................................................................................ 45
Page

EnteraLite
®
Innity
®
Operator’s Manual
ii

© Copyright 2007 ZEVEX Incorporated
iii
PRODUCT OVERVIEW
The EnteraLite
®
Innity
®
is a rotary peristaltic enteral feeding pump designed to
deliver programmed doses of enteral nutrition solutions at selectable rates. It is
easy to use with a simple user interface and keypad. ZEVEX technology allows an
accuracy rate of +/- 5% and the ability to safely operate in any orientation. The En-
teraLite Innity system includes a complete line of DEHP-free pump delivery sets
with automatic free-ow protection.
The EnteraLite Innity is designed for both hospital and alternate care use. It is
durable, water resistant, and easily carried in a ZEVEX carry pack. The EnteraLite
Innity’s size, weight, accuracy, and portability promote and support health improv-
ing physical activity.
Cover Image
Actual user, 9 year-old Kendall Hollinger. 2005 ISI World Champion Figure Skater.
2004 ISI California State Champion Figure Skater. For more information on Kend-
all, contact Kim Hollinger at [email protected].

EnteraLite
®
Innity
®
Operator’s Manual
iv
LIST OF WARNINGS AND CAUTIONS
WARNINGS
4 Use ONLY feeding solutions prescribed by the responsible physician, regis-
tered dietitian, registered nurse, or other licensed practitioner.
4 Use ONLY EnteraLite Innity Disposable Sets to ensure proper uid deliv-
ery. Others will not deliver the correct dose, may allow dangerous free-ow
conditions, and may generate hazardous uid pressures which may activate
occlusion alarms at unpredictable pressures.
4 Low ow rates, combined with high dose settings may exceed the life of the
disposable set. The disposable set must be replaced every 24 hours to main-
tain delivery accuracy, allow proper air and occlusion sensing, and prevent
growth of bacteria. DO NOT PROGRAM RATE AND DOSE COMBINATIONS
WHICH EXCEED A 24 HOUR FEED REGIMEN.
4 The battery capacity is an approximation. If you are unsure that enough ca-
pacity remains for your intended use, recharge it.
4 To avoid electrical shock, never clean pump with charger plugged into an out-
let or when pump is on.
4 Make sure the EnteraLite Innity AC Adapter/Charger is completely dry be-
fore plugging into an electrical outlet.
4 Do not use EnteraLite Innity Enteral Feeding Pump for delivery of non-
enteral solutions. Serious injury may result.
4 Proper operation of pump requires door is closed and latched. Make sure
door is closed and latched when motor is running.
4 If an error occurs (ER01 - ER99 or ERRA - ERRZ will appear in display), all
settings and volume counters should be checked and veried before starting
a feeding.

© Copyright 2007 ZEVEX Incorporated
v
CAUTIONS
4 Federal law (U.S.A.) restricts this device to sale by or on the order of a physi-
cian, registered dietitian, registered nurse, or other licensed practitioner.
4 Dispose of EnteraLite Innity Disposable Sets properly, as required by local
law.
4 If any leaks are detected in the disposable set, stop pump operation and dis-
connect set from patient and replace with a new disposable set.
4 Care should be used when manually priming delivery set to ensure cassette
is not damaged by excess force.
4 Do not overload carry packs with personal items. Pump function may be af-
fected by kinked or pinched tubing and/or unintentional button presses.

EnteraLite
®
Innity
®
Operator’s Manual
vi

© Copyright 2007 ZEVEX Incorporated
1
1. PUMP COMPONENTS
1. PUMP COMPONENTS
EnteraLite Innity Enteral Feeding Pump
1. Door
2. Pump Wheel
3. Display
4. Upstream Pressure Sensor
5. Air Sensor
6. Downstream Pressure Sensor
7. Receptacle for Cassette
8. Keypad
1
3
4
5
6
7
8
2
Figure 1-1 Pump: Front

EnteraLite
®
Innity
®
Operator’s Manual
2
1. PUMP COMPONENTS
EnteraLite Innity Enteral Feeding Pump
1. Pump Instruction Label
2. Speaker
3. Receptacle for Pole Clamp
4. Serial Number Label
5. Charger/Power Connector
1
Figure 1-2 Pump: Rear
2
3
4
5

© Copyright 2007 ZEVEX Incorporated
3
1. PUMP COMPONENTS
Keypad
Press ON/OFF key for 1.5 seconds to
either turn EnteraLite Innity on or off.
Press and hold PRIME key to rapidly
ll disposable set with uid. Release
key to stop.
Press RUN/PAUSE key to either start
pump or place it in pause mode.
Press FEED INT key to display feed
interval setting.
Press VOL/TOTAL key once to display volume delivered for current
feeding. Press key again to display total cumulative volume delivered in
all feed cycles since total volume was last cleared.
Press RATE/DOSE key to transition between rate and dose settings.
Press CLEAR key to reset displayed function to its minimum value.
Press and hold for three seconds to clear rate, dose, feed interval and
volume delivered to minimum values at the same time.
Press + key to increase displayed feed function. Press and hold key to
increase value rapidly.
Press - key to decrease displayed feed function. Press and hold key to
decrease value rapidly.
Note: The following keys only function when pump is in pause mode:
PRIME, CLEAR, +, and - .
Figure 1-3 Keypad Layout

EnteraLite
®
Innity
®
Operator’s Manual
4
1. PUMP COMPONENTS
Display
The display includes large alphanumeric char-
acters, as well as smaller symbols and words.
All segments and symbols on the display are
shown in Figure 1-4.
Settings and messages are displayed in large
alphanumeric characters (Figure 1-5).
When the large alphanumeric characters dis-
play numbers, one of the smaller words below
the characters indicates which function is be-
ing displayed (Figure 1-6).
The run symbol indicates pump is running
(Figure 1-7).
The wall plug symbol indicates the charger
is plugged in, and connected to a live power
outlet. The battery symbol indicates pump is
running on battery power only. The fuel gauge
symbol indicates how much battery charge re-
mains (Figure 1-8).
NOTE: The display light will automatically turn
off 10 seconds after the last key is pressed. The
light will also remain on for 10 seconds after the
charger is connected between pump and live
power outlet. If you would prefer the light to re-
main on when connected to an outlet, you can
change the pump light setting to ON. See the
User Preference Settings section (Page 19) for
instructions to change this setting.
Figure 1-4 Display Segments
Figure 1-5 Alphanumeric
Characters and Units
Figure 1-6 Setting Indicators
Figure 1-7 Run Indicators
Figure 1-8 Power Indicators

© Copyright 2007 ZEVEX Incorporated
5
Disposable Set
The only disposable sets approved for use with EnteraLite Innity pump are:
4 EnteraLite Innity 500 ml Bag Set - Order Number INF0500
4 EnteraLite Innity 1200 ml Bag Set - Order Number INF1200
4 EnteraLite Innity Spike Set - Order Number INF0010
1. “ ” Symbol
2. Cassette
3. Downstream Tubing
4. Upstream Tubing
5. 500ml or 1200ml Feeding Bag
6. Barbed Enteral Adapter
7. Adapter Protective Cover
8. Spike Protective Cover
9. Spike
Figure 1-9 EnteraLite Innity 500ml or 1200ml Bag Set
Figure 1-10 EnteraLite Innity Spike Set
1
2 3 4
5
6
7
8
9
1. PUMP COMPONENTS

EnteraLite
®
Innity
®
Operator’s Manual
6
1. PUMP COMPONENTS
Symbols
Brief instructions for operation of pump as
well as a brief explanation of each alarm
message which pump may communi-
cate are printed on the label attached
to pump. These are not intended to be
used in place of the Operator’s Manual.
They are simply a quick reference guide.
Please read the Operator’s Manual be-
fore operating the EnteraLite Innity.
The bag symbol is printed on pump door
over port where upstream tubing enters
pump.
The patient symbol is printed on pump
door over port where downstream tubing
exits pump.
EN 60601-1 Type BF degree of protec-
tion against electrical shock. No electrical
connection to patient. Drop from any an-
gle from height of 3 feet shall not damage
pump operation.
IEC 529 degree of protection against
water entering the enclosure. Water jets
from any direction shall have no effect.
This symbol is printed on pump delivery
sets. It indicates only one patient should
use each disposable set.
This symbol is printed on pump delivery
sets. It indicates pump delivery sets are
made with materials that do not contain
the plasticizer DEHP.
Consult
Accompanying
Documents
Figure 1-11 Consult
Accompanying Documents
Figure 1-12
Feeding Bag Connection
Figure 1-13 Patient Connection
Figure 1-14
TYPE BF Shock Protection
Figure 1-16 Single Patient Use
Figure 1-17 DEHP-free
Figure 1-15 IEC 529
IPX5

© Copyright 2007 ZEVEX Incorporated
7
2. DIRECTIONS FOR USE
2. DIRECTIONS FOR USE
Recommendation for First Use:
Since battery may not be fully charged when pump is rst received, it is recom-
mended that battery be charged for 6 hours prior to operating on battery power
(see Page 18 for additional information).
Priming and Loading the Disposable Set
Step 1:
4If you are using the spike set with a vented
bottle or pre-lled bag:
Remove protective cover from spike, and
insert spike into spike adapter of formula con-
tainer (Figure 2-1).
4 If you are using the 500ml or 1200ml dis-
posable set:
Hold bag upright and pour in feeding solution
(Figure 2-2). Close cap securely.
NOTE: Blenderized or aggressively mixed solutions
may have foam. If using this type of solution, allow
it to sit for 10 to 15 minutes before pouring into bag.
This will reduce the chance of an alarm due to air
in the tubing.
Step 2:
Remove protective cover from barbed adapter. If
using pole clamp, protective cover may be placed
in the groove on back of clamp (Figure 2-3).
NOTE: If set is to be used with a carry pack, all air
must be removed from bag and tubing. Continue
to step 3 for instructions on removing air. If set
is to be hung above pump, i.e. on an IV pole, you
may skip to step 4.
Figure 2-1 Spike Container
Figure 2-2 Fill Bag
Figure 2-3 Remove Cover from
Barbed Adapter / Place Cover
on Pole Clamp

EnteraLite
®
Innity
®
Operator’s Manual
8
2. DIRECTIONS FOR USE
Step 3:
Turn bag upside down and gently squeeze. Tilt bag
as needed to keep air at tubing port (Figure 2-4).
Step 4:
Gently pinch teal colored tubing below “ ” symbol.
Hold this position until air is removed from tubing.
Gently squeeze bag at same time to assist uid
ow. If uid does not ow, pinch may be too tight
(Figure 2-5).
NOTE: Inside the teal colored tubing, below the “ ”
symbol is the in-line occluder. The in-line occluder is
the built-in anti free-ow device. By pinching tubing
gently, the tubing moves away from the in-line occlud-
er allowing uid to ow (Figure 2-6). It is important to
only pinch the tubing below the “ ” symbol to avoid
damaging the in-line occluder.
NOTE: Air may also be removed from tubing using
the pump prime feature. See step 7 for instructions
on using the pump prime feature.
Step 5:
Loop silicone tubing around pump wheel stretching
lightly. Seat cassette into pump (Figure 2-7). Close
pump door (Figure 2-8).
NOTE: If 1200ml set is to be used with Mini Back-
pack, load set into back section of pack and thread
cassette through port in bottom corner of pack prior
to loading cassette into pump.
Figure 2-4 Squeeze Bag
Tubing
Port
Figure 2-5 Pinch Tubing
Figure 2-6 Tubing Segment
Being Pinched

© Copyright 2007 ZEVEX Incorporated
9
Step 6:
Press and hold ON/OFF key for 1.5 seconds to turn
pump on. While pump runs through a self test, dis-
play will light and an audible alarm will sound as
pump displays the nine digit serial number three
digits at a time for one second each. The display
will then show the letter ‘R’ followed by a number,
which is the software revision.
Next, all segments of display will be shown for 2
seconds. Verify all display segments and sym-
bols are active.
The self test is complete and pump will then display
last programmed rate and will be in pause mode.
If any air is still in the tubing, continue to Step 7 to
use pump prime feature.
Step 7:
Press and hold PRIME key. Alarm will sound once
and pump will begin pumping at the maximum rate
of 600 ml/hr. Display will read “TO STOP LET GO”
(Figure 2-9). Once all air is removed from tubing, re-
lease key. Pump will stop, display will revert to last
programmed rate, and pump will be in pause mode.
For pump operation instructions:
4 For a Single Feeding Example: go to Page 10.
4For an Interval Feeding Example: go to Page 13.
2. DIRECTIONS FOR USE
Figure 2-7 Seat Cassette
Figure 2-8 Close Pump Door
Figure 2-9 Priming Indication

EnteraLite
®
Innity
®
Operator’s Manual
10
2. DIRECTIONS FOR USE
Operating the Pump
A Single Feeding Example
If you want to deliver 500 ml of enteral feeding solution at a rate of 120 ml/hr and
then stop the pump:
Key Sequence for “A Single Feeding Example”
Step 1:
Prepare the disposable set with enteral feeding solution as described in the Prim-
ing and Loading the Disposable Set instructions (page 7).
Step 2:
Hang feeding bag or container so that the bottom of bag is at or above the level
of the pump door.
OR - If an EnteraLite Innity carry pack is to be used, load pump and feeding
bag into the proper compartments, securing pump, bag and tubing with the
pack’s straps (Page 32).
Step 3:
Turn pump on by pressing the ON/OFF key. After run-
ning the self test, display will show last programmed
rate.
Step 4:
Press the + or - key to change the rate to 120 ml/hr.
Hold down either key to change rapidly (Figure 2-10).
Step 5:
Press the RATE/DOSE key to display dose. Press the +
or - key until a dose of 500 ml is displayed (Figure 2-11).
120 ml/h 500 ml
Figure 2-10 Program Rate
to 120 ml/hr
Figure 2-11 Program Dose
to 500 ml

© Copyright 2007 ZEVEX Incorporated
11
2. DIRECTIONS FOR USE
NOTE: For a single feeding the feed interval setting
should be programmed to NONE (Figure 2-12). When
you have nished setting rate and dose check the
display to see if it reads FEED INTERVAL. If it does,
press the FEED INT key, then press the CLEAR key.
Display will read NONE.
Step 6
Connect barbed adapter to the patient’s enteral feeding tube.
Step 7
Press the RUN/PAUSE key. Pump will begin run-
ning. Display will show programmed rate and the arcs
around the run symbol will rotate (Figure 2-13).
While pump is running, the following may be viewed
by pressing the appropriate key: Rate, Dose, and
Feed Interval.
To view the amount delivered in the current feeding,
press the VOL/TOTAL key (Figure 2-14). This counter
will reset itself when the previously programmed dose
has been completed and a new feeding is started, or
if a feeding is interrupted and Rate, Dose or Feed In-
terval is changed.
To view the amount delivered over the course of sev-
eral feedings press the VOL/TOTAL key a second
time. Display will read TOTL then the amount. This
counter never resets itself. It can only be reset by the
user (Figure 2-15).
While pump is running, the settings cannot be changed
and the Prime feature is disabled.
If you want to stop pump at any time, press the RUN/PAUSE key. Display will show rate,
and pump will be in pause mode. Or, turn pump off by pressing the ON/OFF key.
Figure 2-14 Amount
Currently Delivered
Figure 2-15
Total Amount Delivered
Figure 2-12 Clear
Feed Interval
Figure 2-13
Pump is Running

EnteraLite
®
Innity
®
Operator’s Manual
12
2. DIRECTIONS FOR USE
When you would like to restart pump, press the ON/OFF and/or the RUN/PAUSE
key. Pump will save the memory of where it was in the feeding before stop-
ping. Press the RUN/PAUSE key and pump will restart at the point where it was
stopped.
NOTE: Any changes to pump settings during a feeding cycle will cause pump to
start a new feeding; it will not start where it left off.
Feeding Completion:
When the dose has been completely delivered, pump will stop running, and dis-
play will read DOSE DONE. Pump will be in a pause mode until it is turned off or
feeding is restarted. To clear DOSE DONE, press and hold the ON/OFF key for
1.5 seconds to turn pump off, or press the RUN/PAUSE key to put pump in pause
mode. Adjustments to settings can be made at this time, or press the RUN/PAUSE
key a second time to start another feeding using same rate, dose, and feed inter-
val settings.
If you would prefer the alarm to sound when the dose
is complete, you can change the pump dose complete
alarm setting to BEEP WHEN DONE. See the User
Preference Settings section (Page 19) for instructions
to change this setting. When set to BEEP WHEN
DONE, the pump will stop at the end of the feeding,
beep intermittently, and display will read DOSE DONE
(Figure 2-16). To silence alarm when the dose is com-
plete, press and hold the ON/OFF key for 1.5 seconds
to turn pump off, or press the RUN/PAUSE key to put
pump in pause mode.
NOTE: To program an innite dose, press and hold the + key until display reads
INF. When an innite dose has been programmed, pump will not alarm DOSE
DONE. Pump will run continuously as long as feeding solution remains in the bag.
When empty, pump will alarm NO FOOD or NO FLOW IN.
Figure 2-16 DOSE DONE

© Copyright 2007 ZEVEX Incorporated
13
2. DIRECTIONS FOR USE
Next Feeding:
Turn pump on. Previous settings for rate, dose, and feed interval will be saved in
memory. If no changes are required, verify each setting is correct and restart pump
running.
NOTE: Rate, dose, and feed interval settings can be locked so that changes can-
not be made. See the User Preference Settings section (Page 19) for instructions
to change this feature.
Operating the Pump
An Interval Feeding Example
If you want to deliver 100 ml of enteral feeding solution at a rate of 50 ml/hr, and
repeat this feeding every 6 hours:
Key Sequence for “An Interval Feeding Example”
Step 1:
Prepare the disposable set with enteral feeding solution as described in the Prim-
ing and Loading the Disposable Set instructions (Page 7).
Step 2:
Hang feeding bag or container so that the bottom of bag is at or above the level
of the pump door.
OR - If an EnteraLite Innity pack is to be used, load the pump and feeding bag into
the proper compartments, securing pump, bag and tubing with the pack’s straps
(see Page 32).
Step 3:
Turn pump on by pressing the ON/OFF key. After running the self test, display will
show last programmed rate.
50 ml/h 100 ml
6.00 hr

EnteraLite
®
Innity
®
Operator’s Manual
14
2. DIRECTIONS FOR USE
Step 4:
Press the + or - key to change the rate to 50 ml/hr.
Hold down either key to change rapidly (Figure 2-17).
Step 5:
Press the RATE/DOSE key to display dose. Press the
+ or - key until a dose of 100 ml is displayed (Figure
2-18).
Step 6:
Press the FEED INT key to display the feed interval
setting. Press the + or - key until 6.00 hr is displayed
(Figure 2-19).
NOTE: The amount of time to complete a rate and
dose combination can be gured by dividing the dose
by the rate (Dose/Rate = Time). The number of hours
to be programmed as the feed interval is the amount
of time to deliver the dose plus the amount of time
pump should pause. Example: 100 ml divided by 50
ml/hr equals 2 hours for feeding delivery, plus a pause
of 4 hours equals a feeding interval of 6 hours (100 ml
÷ 50ml/hr = 2 hours running + 4 hours pause = 6 hours
from feeding start time to start time).
Pump will calculate number of hours it will take to deliver the rate and dose com-
bination. When the FEED INT key is pressed the rst available value will be
compatible with that combination. In this example the rst available value will be
2.00 hr.
NOTE: Feed interval is displayed in hours and minutes, i.e. 5.10 = 5 hours and
10 minutes.
NOTE: Feed interval cannot be programmed if rate and dose combination requires
more than 24 hours to deliver.
Step 7:
Connect barbed adapter to patient’s enteral feeding tube.
Figure 2-17 Program Rate
to 50 ml/hr
Figure 2-18 Program Dose
to 100 ml
Figure 2-19 Program Feed
Interval 6.00 hr

© Copyright 2007 ZEVEX Incorporated
15
2. DIRECTIONS FOR USE
Step 8:
Press the RUN/PAUSE key. Pump will begin running.
Display will show programmed rate, the arcs around
the run symbol will rotate and display will read FEED
INTERVAL (Figure 2-20).
While pump is running the following may be viewed by
pressing the appropriate key: Rate, Dose, and Feed
Interval.
To view the amount delivered in the current feeding,
press the VOL/TOTAL key (Figure 2-21). This counter
will reset itself when the previously programmed dose
has been completed and a new feeding is started, or
if a feeding is interrupted and Rate, Dose or Feed In-
terval is changed.
To view the amount delivered over the course of sev-
eral feedings press the VOL/TOTAL key a second
time (Figure 2-22). Display will read TOTL then the
amount. This counter never resets itself, it can only
be reset by the user.
While pump is running, the settings cannot be changed
and the Prime feature is disabled.
If you want to stop pump at any time, press the RUN/PAUSE key. Display will show
rate, and pump will be in pause mode. Or, turn pump off by pressing the ON/OFF
key.
When you would like to restart pump, press the ON/OFF and/or the RUN/PAUSE
key. Pump will save the memory of where it was in the feeding before stop-
ping. Press the RUN/PAUSE key and pump will restart at the point where it was
stopped.
NOTE: Any changes to pump settings during a feeding cycle will cause pump to
start a new feeding; it will not start where it left off.
Figure 2-20
Pump is Running
Figure 2-21 Amount
Currently Delivered
Figure 2-22
Total Amount Delivered

EnteraLite
®
Innity
®
Operator’s Manual
16
2. DIRECTIONS FOR USE
Feeding Completion:
When the dose has been completely delivered, pump
will stop running and display will read NEXT DOSE
then give the number of hours and minutes until feed-
ing will be repeated (Figure 2-23). Display will show
the run symbol ashing without the arcs rotating
around it. Pump will repeat this cycle until disposable
set is empty or until it is stopped by user.
NOTE: When a feed interval has been programmed,
pump will not alarm DOSE DONE. Pump will cycle
continuously as long as feeding solution remains in
the bag. When empty, pump will alarm NO FOOD or
NO FLOW IN.
To stop feeding, press the ON/OFF key for 1.5 sec-
onds to turn pump off or press the RUN/PAUSE key to
put pump in pause mode. Adjustments to settings can
be made at this time.
New Feeding Cycle:
Turn pump on. Previous settings for rate, dose, and feed interval will be saved in
memory. If no changes are required, verify each setting is correct and restart pump
running.
NOTE: Rate, dose, and feed interval settings can be locked into place so that
changes cannot be made. See the User Preference Settings section (Page 19) for
instructions to change this feature.
Figure 2-23
Time Until Next Feeding

© Copyright 2007 ZEVEX Incorporated
17
2. DIRECTIONS FOR USE
The Battery
Running on Battery Power
EnteraLite Innity will run for 24 hours at a rate
of 125 ml/hr. A fully depleted battery takes ap-
proximately 6 hours to fully charge.
When pump is running on battery power the
battery symbol will appear in the display (Fig-
ure 2-24).
The segments or blocks between E and F represent the fuel gauge of the battery.
Each block represents approximately 6 hours of charge. When each bar is half
spent, it will begin to ash, indicating approximately 3 hours of charge is left for that
bar. When the last block is gone, the battery symbol will blink to indicate there is
approximately 1 hour of charge left. Display will ash LOW BATT every 3 seconds
and pump will beep every 2 seconds to remind user of low battery condition. When
battery is fully depleted pump will turn off automatically.
NOTE: The battery life is an approximation based on a fully charged battery and
a ow rate of 125 ml/hr. Higher ow rates will run the battery down faster, while
lower ow rates and interval feedings will allow the battery to last longer. Battery
life degrades over time.
Figure 2-24 Battery Power Indicator

EnteraLite
®
Innity
®
Operator’s Manual
18
2. DIRECTIONS FOR USE
The Battery
Charging the Battery
To charge the battery, insert plug from AC
Adapter/Charger into port on the left side of
pump. Plug charger into a wall outlet.
Pump will charge whether it is turned off or
running.
When charger is plugged in and charging, the
plug symbol will appear in the display and the
fuel gauge will display four bars scrolling from
E to F. This pattern continuously repeats while
pump is charging (Figures 2-25a through 2-
25e). When bars stop scrolling pump is done
charging.
To check the status of battery during charg-
ing, disconnect charger from pump and turn
on pump.
NOTE: If pump shut down due to low battery,
charging less than 10 minutes may result in an
ER99 alarm. Fully charge battery if depleted
(see page 22 to clear alarm).
a
b
c
d
e
Figure 2-25 Fuel Gauge

© Copyright 2007 ZEVEX Incorporated
19
2. DIRECTIONS FOR USE
User Preference Settings
There are four user preference settings. These set-
tings can be changed to t the user’s needs.
Alarm Volume:
The alarm has two volumes, high or low. Pump de-
fault is low (Figure 2-26).
Settings Lock:
This allows user to set a rate, dose, and feed inter-
val and then lock those settings so they cannot be
changed unintentionally. This will also lock the vol-
ume counters from being unintentionally cleared.
Pump default is unlocked (Figure 2-27).
Dose Done:
There are two settings for the DOSE DONE alarm:
MUTE WHEN DONE or BEEP WHEN DONE. Pump default is MUTE WHEN
DONE (Figure 2-28).
Backlight:
To conserve battery life, the backlight
will turn off automatically 10 seconds
after the last key has been pressed.
However, while pump is connected to
an A/C current the backlight settings
can be adjusted. The light can be set
to ON or OFF. With the ON setting the
backlight will remain on the entire time
pump is plugged in to a live power out-
let. With the OFF setting, the backlight will turn on
when a key is pressed and turn off 10 seconds after
the last key has been pressed. Pump default is ON
(Figure 2-29).
NOTE: Regardless of setting, the backlight will al-
ways turn off 10 seconds after pump is turned off.
Figure 2-26 Alarm Volume
Settings BEEP LOW
and BEEP HIGH
Figure 2-27 Settings Lock
UNLK and LOCK
Figure 2-29 Backlight Settings
LITE OFF and LITE ON
Figure 2-28 Dose Done Settings BEEP WHEN
DONE and MUTE WHEN DONE

EnteraLite
®
Innity
®
Operator’s Manual
20
2. DIRECTIONS FOR USE
To adjust these settings:
Key Sequence for “Adjusting User Preference Settings”
Step 1:
With pump turned off, press and hold for 1.5 seconds the + and the ON/OFF keys
at the same time. Pump will beep and then display the words BEEP HIGH or
BEEP LOW.
Press the + key to change to HIGH or the - key to change to LOW. Pump will give
a triple beep when the + or - keys are pressed and setting will change. If setting is
as desired, do not press either key.
Step 2:
Press the PRIME key. Display will read UNLK (unlocked) or LOCK (locked).
Press the + key to change to LOCK (locked) or the - key to change to UNLK (un-
locked). If setting is as desired, do not press either key.
Step 3:
Press the PRIME key again. Display will read MUTE WHEN DONE or BEEP
WHEN DONE.
Press the + key to change to BEEP WHEN DONE or the - key to change to MUTE
WHEN DONE. If setting is as desired, do not press either key.
Step 4:
Press the PRIME key again. Display will read LITE ON or LITE OFF.
Press the + key to change to LITE ON or the - key to change to LITE OFF. If setting
is as desired, do not press either key.
Step 5:
Press the ON/OFF to turn pump off. Setting changes will be saved automatically.
HIGH
LOW
LOCK
UNLK
MUTE
BEEP
LITE ON
LITE OFF

© Copyright 2007 ZEVEX Incorporated
21
3. ALARMS, MESSAGES, AND INDICATIONS
3. ALARMS, MESSAGES, AND INDICATIONS
Following is a list of all alarms, display messages, and indications that are used by
the EnteraLite Innity enteral feeding pump. Each alarm, message, or indication is
described in detail on the following pages:
Figure Description Page
Alarms
3-1 ER01 - ER99 (or ERRA - ERRZ) ........................................................ 22
3-2 LOAD SET ............................................................................................. 22
3-3 LOW BATT ............................................................................................ 22
3-4 NO FLOW IN ......................................................................................... 23
3-5 NO FLOW OUT ..................................................................................... 23
3-6 NO FOOD ............................................................................................. 24
3-7 PUSH RUN TO FEED .......................................................................... 24
3-8 SHUT DOOR ........................................................................................ 25
Messages
3-9 DOSE DONE ......................................................................................... 25
3-10 NEXT DOSE ......................................................................................... 25
Indications
3-11 CHEK ..................................................................................................... 26
3-12 TO STOP LET GO .............................................................................. 26
Battery Doesn’t Hold Its Charge ............................................................ 27
Battery Doesn’t Charge ......................................................................... 27
Charger Installed but No Plug Symbol Visible ....................................... 27
Should any of these alarms or indications continue after troubleshooting, contact
your healthcare provider for pump service.
EnteraLite
®
Innity
®
Operator’s Manual
22
3. ALARMS, MESSAGES, AND INDICATIONS
Alarms
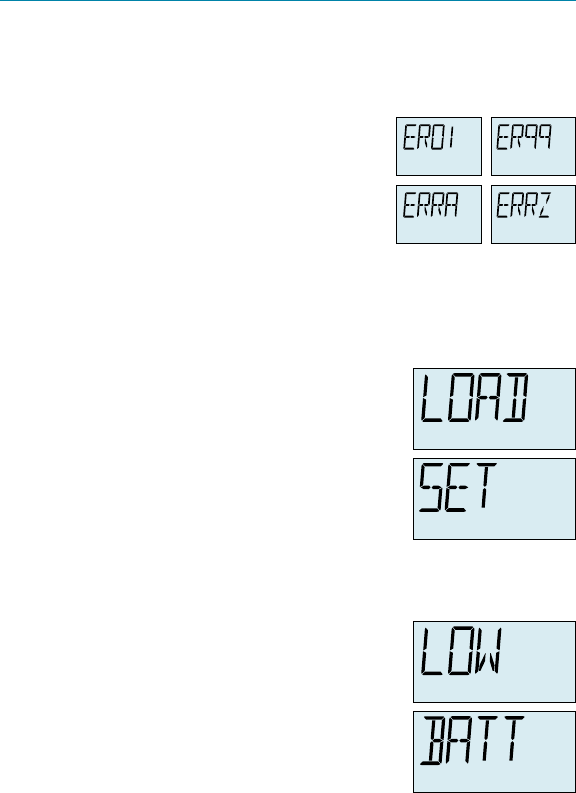
ER01 - ER99 or ERRA - ERRZ (Figure 3-1)
Pump will sound a continuous beep and display will
read ER followed by a two digit number or ERR fol-
lowed by a letter to indicate a self-test has failed.
To clear alarm: Turn the pump off and then
back on.
WARNING: If an error occurs (ER01 - ER99 or
ERRA - ERRZ will appear in display), all settings
and volume counters should be checked and veri-
ed before starting a feeding.
LOAD SET (Figure 3-2)
Pump will sound a dual tone beep repeatedly and dis-
play will read LOAD SET.
Why: This alarm will sound when pump attempted
to run with the set improperly loaded or missing.
To correct the problem: Press the RUN/PAUSE
key to silence alarm and place pump in pause
mode, then check the following:
1. An EnteraLite Innity disposable set is loaded
into pump properly and door is closed.
2. Check cassette receptacle for cleanliness, es-
pecially around pressure sensors. If cleaning is
necessary, refer to CHAPTER 5 - CLEANING
(Page 31).
LOW BATT (Figure 3-3)
When 1 hour or less of battery life is available, display
will ash LOW BATT every 3 seconds and pump will
beep every 2 seconds to indicate battery is low and
pump will soon stop running.
To correct the problem: Plug in AC Adapter/
Charger to recharge battery.
Figure 3-1 ER01 - ER99 or
ERRA - ERRZ Alarm
Figure 3-2
LOAD SET Alarm
Figure 3-3
LOW BATT Alarm

© Copyright 2007 ZEVEX Incorporated
23
3. ALARMS, MESSAGES, AND INDICATIONS
NO FLOW IN (Figure 3-4)
Pump will sound a dual tone beep repeatedly and dis-
play will read NO FLOW IN.
Why: This alarm has occurred because pump
has detected blockage in the set between pump
and bag.
To correct the problem: Press the RUN/PAUSE
key to silence alarm and place pump in pause
mode, then check the following:
1. Check tubing for kinks or formula clumps. Cor-
rect blockage.
2. Check cassette receptacle for cleanliness,
especially around the pressure sensors. If
cleaning is necessary, refer to CHAPTER 5 -
CLEANING (Page 31).
NO FLOW OUT (Figure 3-5)
Pump will sound a dual tone beep repeatedly and dis-
play will read NO FLOW OUT.
Why: This alarm has occurred because pump
has detected a blockage in the set between
pump and patient.
To correct the problem: Press the RUN/PAUSE
key to silence alarm and place pump in pause
mode, then check the following:
1. Check tubing for kinks or blockages. Remove
kink or blockage.
2. Check cassette receptacle for cleanliness, es-
pecially around pressure sensors. If cleaning
is necessary, refer to CHAPTER 5 - CLEAN-
ING (Page 31).
3. Back pressure from patient may also cause this alarm. Discuss with physician.
Figure 3-4
NO FLOW IN Alarm
Figure 3-5
NO FLOW OUT Alarm

EnteraLite
®
Innity
®
Operator’s Manual
24
3. ALARMS, MESSAGES, AND INDICATORS
NO FOOD (Figure 3-6)
Pump will sound a dual tone beep repeatedly and dis-
play will read NO FOOD.
Why: This alarm has occurred because pump
has detected air in the tubing. It takes approx-
imately 1 ml of air, which is approximately 5
inches (12.7 cm) in length entering the teal col-
ored tubing to cause an alarm.
To correct the problem: Press the RUN/PAUSE
key to silence alarm and place pump in pause
mode, then check the following:
1. Check feeding bag for food. If it is empty, rell bag and prime the set to re-
move air from the bag and tubing.
2. Check tubing for air bubbles. If bag is full but air is present in the tubing,
disconnect set from patient, press and hold the PRIME key until air bubble
has moved to the end of the tubing.
3. Check cassette receptacle for cleanliness, es-
pecially around the air sensor. If cleaning is
necessary, refer to CHAPTER 5 - CLEANING
(Page 31).
4. Check that an EnteraLite Innity disposable set is
loaded into pump properly and door is closed.
5. Check disposable set for worn tubing. If it is
worn, replace with a new set.
NOTE: Blenderized or aggressively mixed solutions
may have foam. Small foam bubbles may collect in
the air sensor area and must be cleared in order to
avoid a NO FOOD alarm. Allowing foamy solutions to
sit for 10 to 15 minutes after mixing and prior to pour-
ing into the bag will reduce the amount of foam.
PUSH RUN TO FEED (Figure 3-7)
Pump will sound a dual tone beep repeatedly and dis-
play will read PUSH RUN TO FEED.
Figure 3-6
NO FOOD Alarm
Figure 3-7 PUSH RUN TO
FEED Alarm

© Copyright 2007 ZEVEX Incorporated
25
3. ALARMS, MESSAGES, AND INDICATIONS
Why: This alarm has occurred because pump
has been in pause mode for 2 minutes.
To correct the problem: Press the RUN/PAUSE
key to silence alarm and place pump in pause
mode again. Program and use pump or press
the ON/OFF key to turn it off.
SHUT DOOR (Figure 3-8)
Pump will sound a dual tone beep repeatedly and dis-
play will read SHUT DOOR. Note: This alarm is available
only on select pumps.
Why: This alarm has occurred because the pump
door was opened while pump was running.
To correct the problem: Press the RUN/PAUSE
key to silence alarm and place pump in pause
mode then shut the door. Check door is latched
securely. If door will not stay closed, check door
latch and latch pocket on pump are not broken
or cracked.
Messages
DOSE DONE (Figure 3-8)
This message indicates a single feeding dose has
been delivered.
To clear pump: Either press the ON/OFF key to turn
pump off, or press the RUN/PAUSE key to put pump
in pause mode before starting another feeding.
NEXT DOSE (Figure 3-9)
If the interval feeding feature is in use, between feed-
ings display will read NEXT DOSE ##.## hr. (##.##,
indicates the time in hours and minutes until the next
dose begins.)
If the currently programmed feeding is not desired, either press the ON/OFF key to
turn pump off or press the RUN/PAUSE key to place pump in pause mode where
adjustments can be made to the settings.
Figure 3-8
SHUT DOOR Alarm
Figure 3-9
DOSE DONE Message
Figure 3-10
NEXT DOSE Message

EnteraLite
®
Innity
®
Operator’s Manual
26
3. ALARMS, MESSAGES, AND INDICATIONS
Indications
CHEK (Figure 3-11)
Pump will sound a dual tone beep once and CHEK,
RATE, DOSE, and FEED INTERVAL will all blink on
the display.
Why: This alarm sounds when the RATE, DOSE,
and FEED INTERVAL are not compatible. As dis-
cussed in the Interval Feeding Example (Page
13), pump divides the dose by the rate to deter-
mine the amount of time required for the dose to be delivered. Based on
the RATE and DOSE combination, when the FEED INTERVAL is being pro-
grammed, the rst value available will be the rst value that is compatible with
the RATE and DOSE settings. Should the RATE or DOSE be changed after
the FEED INTERVAL has been programmed, and the combination requires
the delivery time to be longer than the amount of time programmed as the
FEED INTERVAL, user will receive this alarm.
For example, if rate is 100 ml/hr, and dose is 200
ml, then the pump will take 2 hours to deliver the
dose. The rst available FEED INTERVAL will be
2.00 hr. However, if the dose is changed to 300
ml, the dose will now take 3 hours to deliver and
therefore 2.00 hr is an impossible FEED INTER-
VAL. If the RUN/PAUSE key is pressed before
the FEED INTERVAL has been changed (the
next available value being 3.00), the pump will
give the CHEK alarm.
To correct the problem: Press the RUN/PAUSE
key to put pump in pause mode, and reprogram
the settings.
TO STOP LET GO (Figure 3-12)
When pressing and holding the PRIME key, alarm will
sound once, pump will begin pumping at maximum rate
of 600 ml/hr and display will read “TO STOP LET GO”.
To stop priming: Release the PRIME key.
Figure 3-11
CHEK Indication
Figure 3-12
Priming Indication

© Copyright 2007 ZEVEX Incorporated
27
3. ALARMS, MESSAGES, AND INDICATIONS
Battery Doesn’t Hold Its Charge
Battery will lose its charge if stored for a long period of time or if stored at high tem-
peratures (such as in an automobile during summer).
To correct the problem: Recharge the battery. If the problem continues dur-
ing regular use, contact your healthcare provider for service.
Battery Doesn’t Charge
If the battery symbol and the E and F of the fuel gauge
(Figure 3-13) are ashing while the pump is plugged
in, the battery is not charging.
To correct the problem: Contact your health-
care provider for service.
Charger Installed but No Plug Symbol Visible
If the plug symbol does not display after the AC Adapter/Charger is plugged into
pump and a live power outlet, then charger is not charging battery.
To correct the problem: Check the following:
4 Verify that the wall outlet works by plugging in another appliance, such as
a lamp.
4 Charger is connected properly.
If this does not correct the problem, pump or charger may be damaged. Con-
tact your healthcare provider for service.
NOTE: There are no user serviceable or replaceable components inside the En-
teraLite Innity.
Figure 3-13 Battery Symbol
and the E and F of the Fuel
Gauge

EnteraLite
®
Innity
®
Operator’s Manual
28
4. TROUBLESHOOTING GUIDE
4. TROUBLESHOOTING GUIDE
NO FOOD Alarm
If re-priming of the pump delivery set is required, it is advisable to disconnect the
enteral adapter from the patient’s feeding tube while re-priming.
1. Is bag of pump de-
livery set empty?
YES
NO
Rell bag, re-prime delivery set, and resume feeding
2. Is air present in
the tubing?
NO
3. Is formula
blenderized or ag-
gressively mixed?
NO
4. Are air bubbles
trapped inside the
cassette?
YES
Has all air been removed from bag of pump delivery set?
IF NO: Manually prime tubing
by turning bag upside down,
gently squeezing lower half of
bag while pinching the teal col-
ored tubing just below the drop
symbol. Hold this position un-
til all air is removed from bag
and tubing.
IF YES: Press and
hold the PRIME
key to move air
in the tubing past
pump delivery set
cassette and re-
sume feeding.
YES
Let formula sit for 10 - 15 minutes before preparing pump
delivery set for feeding. If foam is present in tubing, ush
by priming pump delivery set either manually or with the
pump and resume feeding.
YES
Remove tubing from pump and manually prime tubing by
turning bag upside down, gently squeezing lower half of
bag while pinching the teal colored tubing just below the
drop symbol. Hold this position until all air has passed
through the teal segment of tubing.
NO
If alarm continues, contact your
healthcare provider or ZEVEX Customer Service
at (800) 970-2337 for assistance.
ERRA, ERRD, ERRF, ER01, ER02, or ER03 Alarms
1. Was pump door
open while pump
was turned on or
while running?
YES /
UNSURE
Turn pump off. Unload and reload delivery set cas-
sette. Make sure door is closed securely, then turn
pump back on.
NO
If alarm continues, contact your
healthcare provider or ZEVEX Customer
Service at (800) 970-2337 for assistance.

© Copyright 2007 ZEVEX Incorporated
29
4. TROUBLESHOOTING GUIDE
LOAD SET Alarm
1. Is door closed se-
curely?
Turn pump off. Unload and reload delivery set
cassette. Make sure door is closed securely. Turn
pump back on.
2. Is door cracked
or tab on inside of
door broken?
YES
Contact your healthcare provider or
ZEVEX Customer Service at
(800) 970-2337 to receive a new door.
NO /
UNSURE
NO
NO
Contact your healthcare provider or
ZEVEX Customer Service at
(800) 970-2337 for assistance.
NO FLOW IN or NO FLOW OUT Alarms
4 NO FLOW IN - Occlusion between delivery set and pump.
4NO FLOW OUT - Occlusion between pump and patient.
1. Is delivery set
tubing pinched,
kinked, or clogged?
YES
NO
Check delivery set for obstructions or kinks in tubing. Cor-
rect blockage and resume feeding.
2. Is tab on inside of
door broken?
YES
NO
Contact your healthcare provider or
ZEVEX Customer Service at
(800) 970-2337 to receive a new door.
3. Is pressure sensor
region of cassette
receptacle clean?
NO
YES
Clean pressure sensor area with a cotton swab, soft
cloth or dampened sponge, or wash entire pump under
running water. Do not use abrasive materials or harsh
chemicals.
4. Are there visible
signs of damage
to pressure sen-
sors area?
YES
Contact your healthcare provider or
ZEVEX Customer Service at
(800) 970-2337 to return pump for service.
NO
Disconnect from patient and ll a new delivery set with food.
Prime set and start pump. If alarm continues, contact your
healthcare provider or ZEVEX Customer Service
at (800) 970-2337 for assistance.

EnteraLite
®
Innity
®
Operator’s Manual
30
4. TROUBLESHOOTING GUIDE
Charging Problems
1. Is A/C adapter
charger plugged
into wall outlet and
pump properly?
Check connections for both wall plug and pump
adapter. Green indicator light on charger wall plug
should be illuminated and pump display should
have plug symbol with scrolling bars between E
and F of fuel gauge. When pump is fully charged,
bars will stop scrolling.
NO /
UNSURE
YES
2. Is wall outlet func-
tioning properly?
Plug another device into outlet to verify outlet is
functioning properly.
NO /
UNSURE
YES
3. Does the charger
adapter appear to
have any damage?
Contact your healthcare provider or
ZEVEX Customer Service at
(800) 970-2337 to receive a new charger.
YES
NO
4. Does the charger
port appear to
have any damage
including bent or
missing pins?
Contact your healthcare provider or
ZEVEX Customer Service at
(800) 970-2337 to return pump for service.
YES
NO
5. Is Battery Symbol
and E and F of fuel
gauge ashing?
YES
Contact your healthcare provider or
ZEVEX Customer Service at
(800) 970-2337 to return pump for service.
NO
If condition continues, contact your healthcare
provider or ZEVEX Customer Service at
(800) 970-2337 to return pump for service.

© Copyright 2007 ZEVEX Incorporated
31
5. CLEANING
5. CLEANING
WARNING: To avoid electrical shock, never clean pump or EnteraLite Innity AC
Adapter/Charger with charger plugged into an outlet or pump turned on.
WARNING: Make sure the EnteraLite Innity AC Adapter/Charger is completely
dry before plugging into an electrical outlet.
To clean the EnteraLite Innity enteral feeding pump:
Pump may be cleaned with warm soapy water (standard dish soap) and a non-
abrasive sponge or soft cloth. Use a cotton swab to clean pathways of cassette
receptacle and to remove teal silicon residue from
pump wheel roller pins.
OR - Apply one of the following solutions for ap-
proximately 10 minutes, then wipe pump clean with
a damp cloth or sponge:
4 5% bleach and water solution
4 Multipurpose household disinfectant cleaner
Rinse pump by holding under a stream of warm water.
Then, dry with a clean cloth.
NOTE: Avoid harsh cleaners/disinfectants. They may cause damage to pump
surfaces and may affect pump functionality. ZEVEX has tested the following dis-
infectants for acceptability for cleaning/disinfecting the EnteraLite Innity pump.
These cleaning products are categorized below:
Acceptable Unacceptable
Metrex CavaCide Ball Ruthless
MetriCide 28 Wex-Cide 128
Vesphene Ilse Alcohol
5% Bleach and Water Solution
Warm Soapy Water (Standard Dish Soap)
To clean the Carrying Packs:
The EnteraLite Innity packs are machine-washable. Use cold water and gentle
cycle, whenever possible. Hang to dry.
To clean the AC Adapter/Charger:
EnteraLite Innity AC Adapter/Charger normally does not require cleaning. When
desired, a dry or slightly damp cloth may be used to clean the outside surface of
AC Adapter/Charger while it is disconnected from the wall outlet.
Figure 5-1 Rinsing Pump Un-
der Stream of Water

EnteraLite
®
Innity
®
Operator’s Manual
32
EnteraLite Innity AC Adapter/Charger
Order Number INFCH01
Plug AC Adapter/Charger into a wall outlet and
plug connector into pump to operate on AC
power and/or recharge battery (gure 6-1).
EnteraLite Innity Pole Clamp
Order Number Z-11981
Thread bolt into receptacle on the back of
pump and tighten gray wheel to mount pump
on clamp. If gray wheel is slightly loosened,
pump can be rotated to snap into different po-
sitions. Retighten gray wheel when pump is in
the desired position. Tighten black wheel to
mount clamp on a pole (gure 6-3).
EnteraLite Innity
Adjustable Angle Pole Clamp
Order Number 26772-001
Thread bolt into receptacle on the back of pump
and tighten knob to mount pump on clamp. If
knob is slightly loosened, pump can be rotated
to snap into different positions. Retighten knob
when pump is in the desired position. Tighten
black wheel to mount clamp on a pole. Pull pin
to adjust angle (gure 6-3).
6. ACCESSORIES
6. ACCESSORIES
Figure 6-1 AC Adapter/Charger
Figure 6-2 Pole Clamp / Pole Clamp
with Pump Attached to IV Pole
Figure 6-3 Adjustable Angle Pole
Clamp / Adjustable Angle Pole Clamp
with Pump Attached to IV Pole

© Copyright 2007 ZEVEX Incorporated
33
6. ACCESSORIES
EnteraLite Innity Mini Backpack
Order Numbers PCK1001 (red), PCK1002 (light green and gray), PCK1003 (black
and gray), PCK1004 (specialty pack: call for current colors)
Pack holds EnteraLite Innity with a 500 ml bag in the front section or can accom-
modate a 1200 ml bag in the rear section. Pump is secured with a Velcro
®
strap. A
Velcro strap secures the neck of the 500 ml or 1200 ml bag. The tubing is loaded
into pump and any excess length of tubing can be secured with a Velcro tab. The
downstream tubing then feeds through a port at bottom of pack (either side). Also
included in this pack is a pocket that may be used to hold an ice pack. Dimensions:
13” H x 8” W x 4.5” D. Approximate weight when loaded with pump and 500ml de-
livery set lled with 500ml of water: 2.9 lbs.; 1200ml delivery set lled with 1200ml
of water: 4.5 lbs.
EnteraLite Innity Super-Mini Backpack
Order Numbers PCK2001 (black), PCK2002 (light green and gray), PCK2003
(Specialty Pack: call for current colors)
Pack holds EnteraLite Innity with a 500 ml bag. Pump is secured with a Velcro
strap. A Velcro strap secures the neck of the 500 ml bag. The tubing is loaded into
pump and any excess length of tubing can be secured with a Velcro tab. The down-
stream tubing then feeds through a port at bottom of pack (either side). Dimensions:
9.5” H x 8” W x 4” D. Approximate weight when loaded with pump and 500ml de-
livery set lled with 500ml of water: 2.3 lbs.
Figure 6-4 Mini
Backpack
Figure 6-5 Mini Backpack (Cutaway
View of Internal Compartments)
Figure 6-6 Mini Backpack (Cutaway
View of Internal Straps)
Ice Pack Pocket
500ml Bag
Compartment
Pump Compartment
1200ml Bag
Compartment
Feeding
Bag Strap
Tubing Strap
Tubing Strap
Figure 6-7 Super-Mini
Backpack
Figure 6-8 Super-Mini Backpack
(Cutaway View of Internal
Compartments
Figure 6-9 Super-Mini Backpack
(Cutaway View of Internal Straps)
500ml Bag
Compartment
Pump Location
Feeding
Bag Strap
Tubing Strap
Pump Strap

EnteraLite
®
Innity
®
Operator’s Manual
34
6. ACCESSORIES
EnteraLite Innity Waist Pack
Order Numbers PCK3001 (black and gray)
Pack holds EnteraLite Innity with a 500 ml bag. Pump is secured with an elas-
tic strap. A Velcro strap secures the neck of the 500 ml bag. The tubing is loaded
into pump and any excess length of tubing can be secured with a Velcro tab. The
downstream tubing then feeds through a port at bottom of pack (either side).
Dimensions: 7” H x 11” W x 3” D
EnteraLite Innity Backpack
Order Numbers PCK4001 (black and gray)
Pack holds EnteraLite Innity with a 500 ml bag or a 1200 ml bag. Pump is secured
with a Velcro
®
strap. A Velcro strap secures the neck of the 500 ml or 1200 ml bag.
The tubing is loaded into pump and any excess length of tubing can be secured
with a Velcro tab. The downstream tubing then feeds through a port at bottom of
pack (either side). Also included in this pack is a pocket that may be used to hold
an ice pack. Dimensions: 17” H x 8” W x 4” D.
Figure 6-10 Waist Pack Figure 6-11 Waist Pack (Cutaway View of Internal
Compartment and Straps)
Feeding
Bag Strap
Tubing
Strap
Tubing Strap
Pump
Strap
Figure 6-12 Backpack Figure 6-13 Backpack (Cutaway
View of Internal Compartments)
Figure 6-14 Backpack (Cutaway
View of Internal Straps)
Ice Pack Pocket
1200ml & 500ml
Bag Compartment
Pump Compartment
Feeding
Bag Strap
Tubing Strap
Tubing Strap

© Copyright 2007 ZEVEX Incorporated
35
7. SPECIFICATIONS
7. SPECIFICATIONS
SIZE Pump Dimensions: 1.95” H x 5.65” W x 4.05” D
Pump Weight: 14.4 oz (411.0 g)
BATTERY Type: Lithium Ion
Life: 24 hours @ 125 ml/hr
Charge Time: approximately 6 hours
Charge Level Indicator
Compact Wall Charger
DISPLAY Backlit LCD
OPERATING Any
ORIENTATION
FLOW RATE Range: 0.1 - 600 ml/hr
Increment: 0.1 ml/hr from 0.1 ml/hr to 10 ml/hr
1 ml/hr from 10 ml/hr to 600 ml/hr
Accuracy: ± 5% (see page 37)
DOSE Range: 0.1 ml to 3000 ml or innite dose
Increment: 0.1 ml from 0.1 - 10 ml
1 ml from 10 - 1000 ml
10 ml from 1000 - 3000 ml
VOLUME Current Dose Status
DISPLAY Accumulated
INTERVAL FEED Interval Feed Indication
Displays Time to Next Feed
PROGRAM When Pump is on or off
MEMORY
RETAINED
PEDIATRIC USE Yes
PRIME Yes
DISPOSABLE Automatic Free-ow Protection
SET FEATURES No Drip Chamber
DEHP-free

EnteraLite
®
Innity
®
Operator’s Manual
36
7. SPECIFICATIONS
ALARMS CHEK Programming error - Incompatible
RATE, DOSE, and
FEED INTERVAL settings
ER01 - ER99 Self-test error
or ERRA - ERRZ
LOAD SET Set not loaded properly
LOW BATT Battery Low
NO FLOW IN Upstream occlusion
-5 psi (-34 kPa)
Tolerance = ± 3psi (21 kPa)
psi (pounds per square inch)
kPa (kilopascals)
NO FLOW OUT Downstream occlusion,
12 psi (83 kPa)
Tolerance = ± 3psi (21 kPa)
psi (pounds per square inch)
kPa (kilopascals)
NO FOOD Air in tubing - bag or set may be empty
PUSH RUN TO FEED Pump unused for 2 minutes
SHUT DOOR Door opened while pump
was running
ACCESSORIES AC Adapter/Charger
Multi-position Pole Clamp (rotates 360°)
Multi-purpose EnteraLite Innity Custom Carry Packs
WARRANTY 2 years
OPERATING Temperature: 41 °F to 104 °F (5 °C to 40 °C)
ENVIRONMENT Humidity: 30% to 95% noncondensing
STORAGE Temperature: -4 °F to 149 °F (-20 °C to 65 °C)
ENVIRONMENT Humidity: 10% to 95% noncondensing
CLASSIFICATION EnteraLite Innity Enteral Feeding Pump with internal battery –
INFORMATION Type BF Applied Part
EnteraLite Innity AC Adapter / Charger – Class II

© Copyright 2007 ZEVEX Incorporated
37
8. IMPORTANT PEDIATRIC CONSIDERATIONS
8. IMPORTANT PEDIATRIC CONSIDERATIONS
EnteraLite Innity can be used on pediatric patients if the specications of pump
meet delivery requirements of the patient. The specications of primary impor-
tance are:
4 The ow rate range of EnteraLite Innity is 0.1 ml/hr to 10 ml/hr in 0.1 ml/hr in-
crements and 10 ml/hr to 600 ml/hr in 1 ml/hr increments.
4 The EnteraLite Innity pump delivers the dose at the specied rate within +/- 5%
volumetric ow rate accuracy under the following conditions:
8 utilizing ZEVEX EnteraLite Innity disposable sets
8 uid head height at +6.0 inches ± 0.3 inches (+15.24 cm ± 0.76 cm)
with respect to center of rotor.
Note: Head height affect on accuracy is shown below (gure 8-1).
If these specications meet the required feed regimen, EnteraLite Innity can be
used to deliver enteral formulas to pediatric patients. ALWAYS VERIFY RATE,
DOSE AND FEED INTERVAL BEFORE PROCEEDING TO FEED.
Figure 8-1 Head Height Affect on Accuracy
+2.5%
-2.5%
-12 in. +12 in.
Normal

EnteraLite
®
Innity
®
Operator’s Manual
38
9. ADDITIONAL TECHNICAL INFORMATION
9. ADDITIONAL TECHNICAL INFORMATION
Electromagnetic Emissions/Interference
Electromagnetic emissions may affect the operation of any electronic medical de-
vice, including enteral feeding pumps.
The EnteraLite Innity will not be affected by electromagnetic emissions in most
environments. However, some electromagnetic elds produced by personal com-
munication equipment, household appliances, or occupational tools may cause
electromagnetic interference (EMI) which can affect the pump.
Possible sources of electromagnetic interference with electronic medical devices
include, but are not limited to: cellular phones, cordless telephones, microwave ov-
ens, anti-theft/security systems, blenders, and high-powered tools (i.e. drills, saws,
chain saws). If electromagnetic emitting devices are operated within one yard/me-
ter of the EnteraLite Innity, the pump may automatically shut off and settings may
return to their default values. Check the pump regularly if operating near sources
of electromagnetic emissions.
The EnteraLite Innity can safely be operated on commercial aircraft and is de-
signed in accordance with EN 60601-1-2, EN 60601-1-4 and RTCA DO160D
standards for electromagnetic emissions and immunity.
Guidance and manufacturer’s declaration - electromagnetic emissions
The EnteraLite Innity is intended for use in the electromagnetic environment specied
below. The customer or the user of the EnteraLite Innity should assure that it is used
in such an environment.
Emissions Test
Compliance Electromagnetic environment - guidance
RF emissions
CISPR 11
Group 1
The EnteraLite Innity uses energy only
for its internal function. Therefore, its RF
emissions are very low and are not likely
to cause any interference in nearby elec-
tronic equipment.
RF emissions
CISPR 11
Class B
Harmonic emissions
IEC 61000-3-2
Class A
The EnteraLite Innity is suitable for use
in all establishments, including domestic
establishments and those directly con-
nected to the public low-voltage power
supply network that supplies buildings
used for domestic purposes.
Voltage
uctuations/icker
emissions
IEC 61000-3-3
Complies

© Copyright 2007 ZEVEX Incorporated
39
9. ADDITIONAL TECHNICAL INFORMATION
EnteraLite Innity Disposable Set Displacement
EnteraLite Innity Disposable Set displaces approximately 15ml of uid when
primed. Approximately 3.5 ml of air is drawn into the tubing before the enteral
pump detects bag is empty. Therefore, approximately 11.5 ml of uid remains in
the disposable set when pump stops feeding.
Routine Maintenance
There are no user serviceable parts or routine calibration or adjustment proce-
dures required for EnteraLite Innity. All service requests should be referred to
ZEVEX technical service.

EnteraLite
®
Innity
®
Operator’s Manual
40
10. WARRANTY
10. WARRANTY
Solely for the benet of the original buyer, ZEVEX INCORPORATED (“ZEVEX”),
warrants all new EnteraLite Innity products of its manufacture to be free from de-
fects in material and workmanship, and will replace or repair, F.O.B., at its factory
in Salt Lake City, Utah, or other location designated by ZEVEX, any EnteraLite In-
nity products returned to it within twenty-four (24) months of original purchase by
the buyer. Such repair or replacement shall be free of charge.
ZEVEX warrants to the original buyer, all repaired or replaced products to be free
from defects in material and workmanship and will replace or repair such prod-
ucts F.O.B., at its factory in Salt Lake City, Utah, or other location designated by
ZEVEX. Such repair or replacement shall carry a warranty of ninety (90) days from
the date of repair or replacement or the balance of the new product warranty as
described above, whichever is greater.
This Warranty applies to all EnteraLite Innity products manufactured by ZEVEX
and is the ONLY WARRANTY GIVEN FOR THE SALE OF PRODUCTS OR SER-
VICES. NO WARRANTIES IMPLIED IN LAW, INCLUDING, BUT NOT LIMITED
TO THE IMPLIED WARRANTIES OF MERCHANTABILITY AND FITNESS FOR
PARTICULAR PURPOSE, SHALL APPLY. ZEVEX WILL BE LIABLE, IN ANY
EVENT, ONLY FOR THE PURCHASE PRICE OF THE DEFECTIVE PRODUCT,
BUT NOT FOR ANY CONSEQUENTIAL DAMAGES.
This Warranty may not be modied, amended or otherwise changed, except by a
written document properly executed by a corporate ofcer of ZEVEX.
ZEVEX, Inc. voids the warranty if the EnteraLite Innity pump is opened or tam-
pered with in any way without prior authorization from ZEVEX, Inc.

© Copyright 2007 ZEVEX Incorporated
41
LIST OF FIGURES
LIST OF FIGURES
Figure 1-1 Pump: Front ............................................................................... 1
Figure 1-2 Pump: Rear ................................................................................ 2
Figure 1-3 Keypad Layout ........................................................................... 3
Figure 1-4 Display Segments ...................................................................... 4
Figure 1-5 Alphanumeric Characters and Units ......................................... 4
Figure 1-6 Setting Indicators ....................................................................... 4
Figure 1-7 Run Indicators ............................................................................ 4
Figure 1-8 Power Indicators ........................................................................ 4
Figure 1-9 EnteraLite Innity 500ml or 1200ml Bag Set .......................... 5
Figure 1-10 EnteraLite Innity Spike Set ...................................................... 5
Figure 1-11 Consult Accompanying Documents ........................................... 6
Figure 1-12 Feeding Bag Connection ........................................................... 6
Figure 1-13 Patient Connection ..................................................................... 6
Figure 1-14 TYPE BF Shock Protection ....................................................... 6
Figure 1-15 IEC 529 ...................................................................................... 6
Figure 1-16 Single Patient Use ..................................................................... 6
Figure 1-17 DEHP-free .................................................................................. 6
Figure 2-1 Spike Container .......................................................................... 7
Figure 2-2 Fill Bag ....................................................................................... 7
Figure 2-3 Remove Cover from Barbed
Adapter / Place Cover on Pole Clamp ................................... 7
Figure 2-4 Squeeze Bag .............................................................................. 8
Figure 2-5 Pinch Tubing .............................................................................. 8
Figure 2-6 Tubing Segment Being Pinched ................................................ 8
Figure 2-7 Seat Cassette ............................................................................. 9
Figure 2-8 Close Pump Door ...................................................................... 9
Figure 2-9 Priming Indication ....................................................................... 9
Figure Description Page

EnteraLite
®
Innity
®
Operator’s Manual
42
LIST OF FIGURES
Figure 2-10 Program Rate to 120 ml/hr ................................. 10
Figure 2-11 Program Dose to 500 ml ................................. 10
Figure 2-12 Clear Feed Interval .................................................................. 11
Figure 2-13 Pump is Running ...................................................................... 11
Figure 2-14 Amount Currently Delivered ..................................................... 11
Figure 2-15 Total Amount Delivered .......................................................... 11
Figure 2-16 DOSE DONE ............................................................................ 12
Figure 2-17 Program Rate to 50 ml/hr ....................................................... 14
Figure 2-18 Program Dose to 100 ml ......................................................... 14
Figure 2-19 Program Feed Interval 6.00 hr ................................................ 14
Figure 2-20 Pump is Running ..................................................................... 15
Figure 2-21 Amount Currently Delivered ..................................................... 15
Figure 2-22 Total Amount Delivered ............................................................ 15
Figure 2-23 Time Until Next Feeding .......................................................... 16
Figure 2-24 Battery Power Indicator ........................................................... 17
Figure 2-25 Fuel Gauge .............................................................................. 18
Figure 2-28 Dose Done Settings BEEP WHEN DONE
and MUTE WHEN DONE ........................................................ 19
Figure 2-26 Alarm Volume ........................................................................... 19
Figure 2-27 Settings Lock UNLK and LOCK .............................................. 19
Figure 2-29 Backlight Settings LITE OFF and LITE ON .......................... 19
Figure 3-1 ER01 - ER99 or ERRA - ERRZ Alarm .............................. 22
Figure 3-2 LOAD SET Alarm ..................................................................... 22
Figure 3-3 LOW BATT Alarm .................................................................... 22
Figure 3-4 NO FLOW IN Alarm ................................................................. 23
Figure 3-5 NO FLOW OUT Alarm ............................................................. 23
Figure 3-6 NO FOOD Alarm ...................................................................... 24
Figure Description Page

© Copyright 2007 ZEVEX Incorporated
43
LIST OF FIGURES
Figure 3-7 PUSH RUN TO FEED Alarm .................................................. 24
Figure 3-8 SHUT DOOR Alarm ................................................................. 25
Figure 3-9 DOSE DONE Message ............................................................ 25
Figure 3-10 NEXT DOSE Message ............................................................ 25
Figure 3-11 CHEK Indication ....................................................................... 26
Figure 3-12 Priming Indication ..................................................................... 26
Figure 3-13 Battery Symbol and the E and F of the Fuel Gauge ....... 27
Figure 5-1 Rinsing Pump Under Stream of Water ................................... 31
Figure 6-1 AC Adapter/Charger ................................................................. 32
Figure 6-2 Pole Clamp / Pole Clamp
with Pump Attached to IV Pole .............................................. 32
Figure 6-3 Adjustable Angle Pole Clamp / Adjustable Angle
Pole Clamp with Pump Attached to IV Pole ....................... 32
Figure 6-4 Mini Backpack .......................................................................... 33
Figure 6-5 Mini Backpack (Cutaway View of Internal Compartments) ... 33
Figure 6-6 Mini Backpack (Cutaway View of Internal Straps) ................ 33
Figure 6-7 Super-Mini Backpack ............................................................... 33
Figure 6-8 Super-Mini Backpack
(Cutaway View of Internal Compartments .............................. 33
Figure 6-9 Super-Mini Backpack
(Cutaway View of Internal Straps) .......................................... 33
Figure 6-10 Waist Pack ............................................................................... 34
Figure 6-11 Waist Pack
(Cutaway View of Internal Compartment and Straps) .......... 34
Figure 6-12 Backpack .................................................................................. 34
Figure 6-13 Backpack (Cutaway View of Internal Compartments) ............ 34
Figure 6-14 Backpack (Cutaway View of Internal Straps) ......................... 34
Figure 8-1 Head Height Affect on Accuracy ............................................. 37
Figure Description Page

EnteraLite
®
Innity
®
Operator’s Manual
44
WHO TO CALL
Additional Information:
YOUR HEALTHCARE PROVIDER:
_______________________________________________________________
_______________________________________________________________
_______________________________________________________________
_______________________________________________________________
_______________________________________________________________
YOUR PHYSICIAN:
_______________________________________________________________
_______________________________________________________________
_______________________________________________________________
_______________________________________________________________
_______________________________________________________________
ZEVEX Incorporated
4314 ZEVEX Park Lane
Salt Lake City, Utah 84123 USA
Customer Service and Technical Support: (800) 970-2337
www.zevex.com

© Copyright 2007 ZEVEX Incorporated
45

EnteraLite
®
Innity
®
Operator’s Manual
46
INDEX
INDEX
Symbols
+ Key 3
- Key 3
A
AC Adapter/Charger 18, 32
Accessories
32
AC Adapter/Charger 32
Adjustable Angle Pole Clamp 32
Backpack 34
Mini Backpack 33
Pole Clamp 32
Super-Mini Backpack 33
Waist Pack 34
Accuracy 35
Adjustable Angle Pole Clamp 32
Alarms 22, 36
ER01 - ER99 or ERRA - ERRZ 22
LOAD SET 22
LOW BATT 17, 22
NO FLOW IN 23
NO FLOW OUT 23
NO FOOD 24
PUSH RUN TO FEED 24
SHUT DOOR 25
Alarm Volume 19
B
Backpack 34
Battery 17
AC Adapter/Charger 18
Battery Life 17
Battery Symbol 17
Charge Time 17
Charging the Battery 18
Fuel Gauge 17
LOW BATT Alarm 17
Plug Symbol 18
Running on Battery Power 17
Blockage. See Occlusion (Blockage)
C
Carry Packs 33
Classication Information 36
Cleaning 31
Acceptable Cleaners/Disinfectants 31
To clean the AC Adapter/Charger 31
To clean the Carrying Packs 31
To clean the EnteraLite Innity Enteral
Feeding Pump 31
Unacceptable Cleaners/Disinfectants
31
CLEAR Key 3
Compact Wall Charger. See AC Adapter/
Charger
D
Decrease (-) Key. See - Key
Directions for Use 7
Loading the Disposable Set 7
Priming the Disposable Set 7
Removing Air 7
Display 4
Battery Symbol 4
Display Light 4
Fuel Gauge Symbol 4
Run Symbol 4
Wall Plug Symbol 4
Disposable Set 5
1200 ml Bag Set 5
500 ml Bag Set 5
Adapter Protective Cover 5, 7
Barbed Enteral Adapter 5, 7
Cassette 5

© Copyright 2007 ZEVEX Incorporated
47
Downstream Tubing 5
Features 35
Spike 5
Spike Protective Cover 5
Spike Set 5
Upstream Tubing 5
Disposable Set Displacement 39
Dose 10, 14, 35
E
Electromagnetic Emissions/Interfer-
ence 38
F
Feeding Completion 12, 16
Feeding Example (Interval Feeding) 13
Feeding Example (Single Feeding) 10
Feed Interval 3, 25, 26, 35
FEED INT Key 3
Flow Rate 10, 14, 35, 37
Foam 7, 24
Free-ow 35
Fuel Gauge 4, 18
I
Increase (+) Key. See + Key
Indications 26
Battery Doesn’t Charge 27
Battery Doesn’t Hold Its Charge 27
Charger Installed but No Plug Symbol
Visible 27
CHEK 26
TO STOP LET GO 9, 26
Innite Dose 12
Instructions for Use 7
Loading the Disposable Set 7
Priming the Disposable Set 7
Removing Air 7
Interval Feeding Example 13
K
Keypad 3
+ Key 3
- Key 3
CLEAR Key 3
FEED INT Key 3
ON/OFF Key 3
PRIME Key 3
RATE/DOSE Key 3
RUN/PAUSE Key 3
VOL/TOTAL Key 3
L
Less (-) Key. See - Key
Lock Settings. See Settings Lock
M
Maintenance 39
Messages 25
DOSE DONE 12, 25
NEXT DOSE 25
Mini Backpack 33
More (+) Key. See + Key
N
New Feeding Cycle 16
Next Feeding 13
INDEX

EnteraLite
®
Innity
®
Operator’s Manual
48
O
Occlusion (Blockage) 23, 36
ON/OFF Key 3
Operating Environment 36
Operating Orientation 35
P
Pediatric Considerations 37
Pole Clamp 2, 7, 32
Prime Feature 3, 8, 9, 26
PRIME Key 3, 9, 26
Program Memory 12, 16, 35
Pump Components 1
Air Sensor 1
Charger/Power Connector 2
Display 1
Door 1
Downstream Pressure Sensor 1
Keypad 1
Pump Instruction Label 2
Pump Wheel 1
Receptacle for Cassette 1
Receptacle for Pole Clamp 2
Serial Number Label 2
Speaker 2
Upstream Pressure Sensor 1
R
RATE/DOSE Key 3
Rinse
31
RUN/PAUSE Key 3
S
Self Test 9
Serial Number 2, 9
Settings Lock 19
Single Feeding Example 10
Size (Pump Specications) 35
Software Revision 9
Storage Environment
36
Super-Mini Backpack 33
Symbols 6
T
Troubleshooting Guide 28
Charging Problems 30
LOAD SET Alarm 29
NO FLOW IN or NO FLOW OUT Alarms
29
NO FOOD Alarm 28
U
User Preference Settings 19
Adjusting User Preference Settings 20
Alarm Volume 19
Backlight 19
Dose Done 19
Settings Lock 19
V
VOL/TOTAL Key 3, 11, 15
W
Waist Pack 34
Warranty 40
Water 31
INDEX

© Copyright 2007 ZEVEX Incorporated
49
NOTES

EnteraLite
®
Innity
®
Operator’s Manual
50
NOTES

OPERATOR’S MANUAL
Also available in other languages
4314 ZEVEX Park Lane
Salt Lake City, Utah 84123 USA
toll free: (800) 970-2337
tel: (801) 264-1001
fax: (801) 264-1051
www.zevex.com
NASDAQ: ZVXI
© 2007 ZEVEX Incorporated. Made in USA.
Covered under one or more of the following US Patent No’s 5,267,983, 6,523,414, 6,531,708, 6,595,950,
6,623,447, 6,659,976, 6,685,670, 6,750,468, 6,852,094, 6,907,788, 6,923,785, D455,489, D501,924,
D503,799, D503,978, D504,506, D505,199 and D507,647 and Foreign Patent No’s 40108978.9,
40209539.1, 40302879.5, ZL 01338370.1, ZL 02369422.4, 03306228.5, 015998, 701976-701985, 16,112,
2104612, 3012123, 3010564, 129,165, 129,630 and 241366. Other US and Foreign patents pending.
EnteraLite, Innity, and ZEVEX are registered trademarks of ZEVEX Incorporated.
25356-001 Rev. D
