
1
1065 South Rogers Circle • Boca Raton, FL 33487 • Phone (561) 998-9600 • Fax (561) 998-9609
Windows Driver Installation Guide
Please contact your software provider to confirm if the use of our driver is required for their ticketing software. We
recommend that the print driver is installed by either your system administrator or IT support staff.
To properly download and install the Boca Systems printer drivers, you will want to make sure you have the following:
• Administrator privileges as most Windows systems require this to download drivers.
• Access to the internet as the host computer will need to gain access to the Microsoft website to download the
necessary drivers.
If connecting to your computer via USB, do not connect the printer to the computer until instructed to do so.
1. Click on the link below to download the zip file to your host computer. It should automatically be downloaded to
the computer’s Downloads folder.
www.bocasystems.com/Boca_Systems.zip
2. Click on the Start icon. File Explorer icon on your taskbar.
Above shows Windows 10 task bar
Above shows Windows 11 task bar
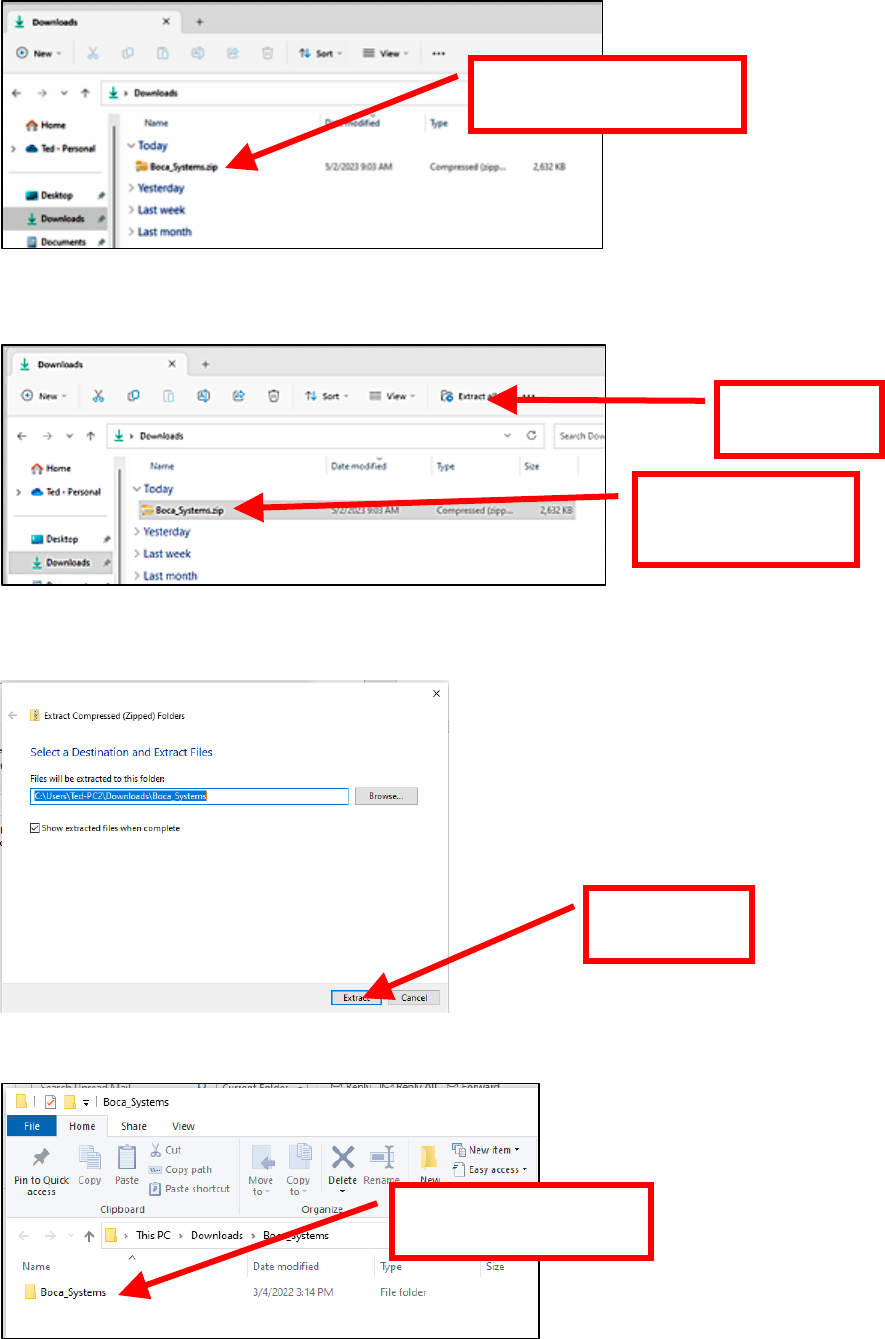
3. You will want to go to the Downloads folder. There are many ways to get to said folder, the following is one
example. Double click on the Downloads folder under Frequent folder, your quick access may look different.
Double click on
Downloads Icon
Click on the
File Explorer
icon
These print drivers are intended to be installed on 64 bit Windows PC platforms from Windows 7 forward. This
guide will cover the more common Windows versions - 10 & 11. The ARM platform is not supported
NOTE: instructions for difficult and silent installations can be found later in this document.
The following will guide you through downloading the BOCA print driver to your computer.
Standard Installation
2
4. When the Downloads pop up box comes up, click on Boca_Systems.zip file to highlight it.
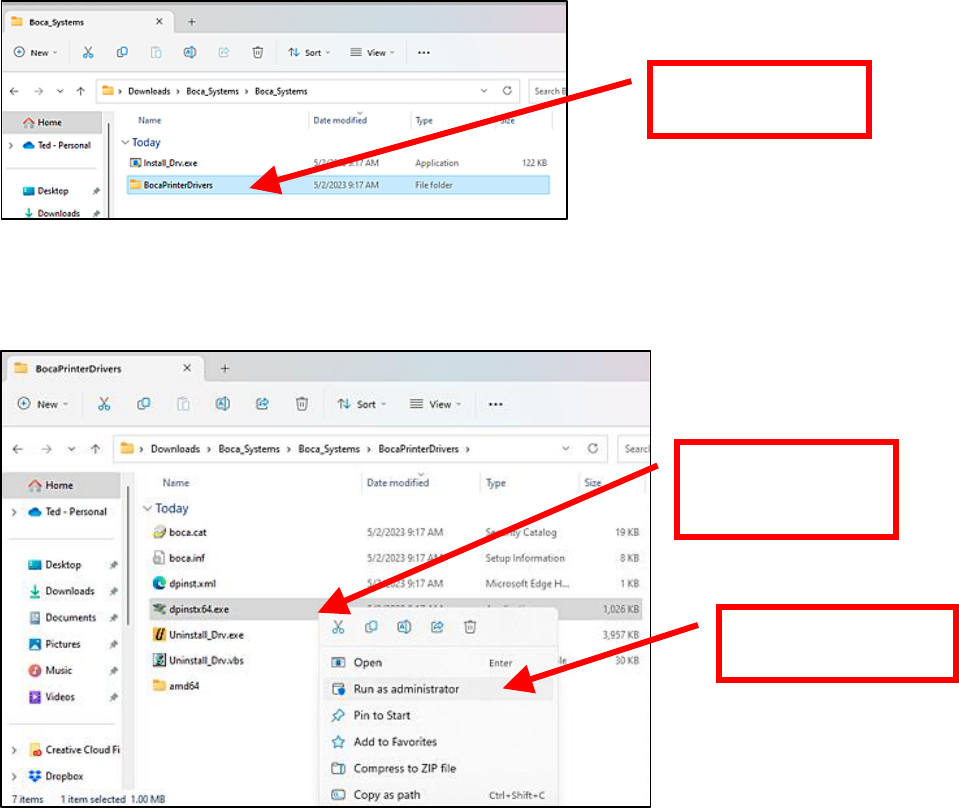
5. Click on the file name to highlight it and then click on Extract All…
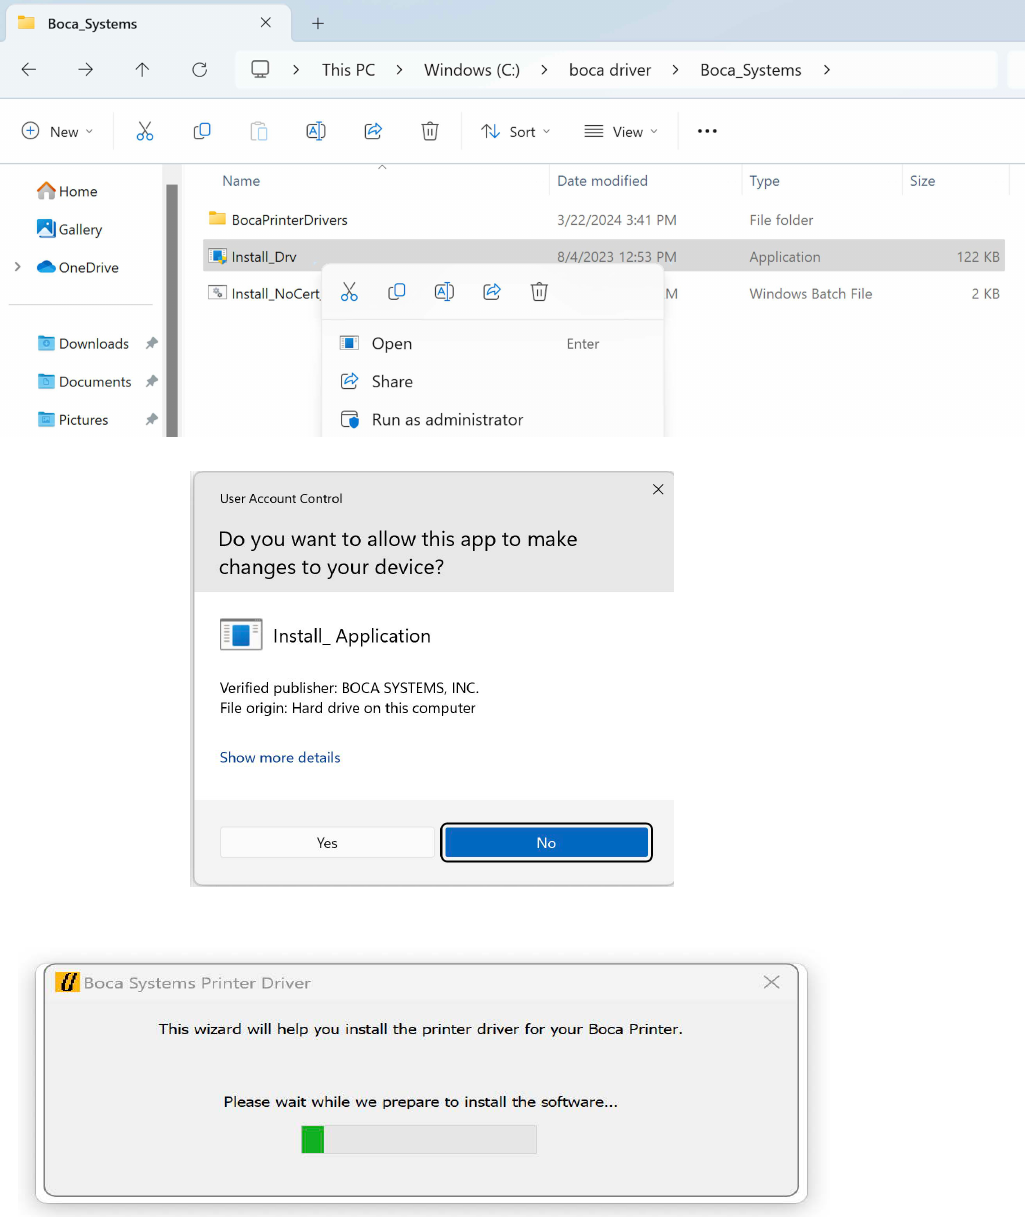
6. You will be asked where you want the files extracted to, recommend leaving as shown below. Click on the
Extract button.
7. When the below pop-up window shows up, double click on Boca_Systems folder.
Click on
Boca_Systems.zip
Click on
Extract All….
Click on
Extract button
Double click on
Boca_Systems
Click on
Folder name and
then right click
3
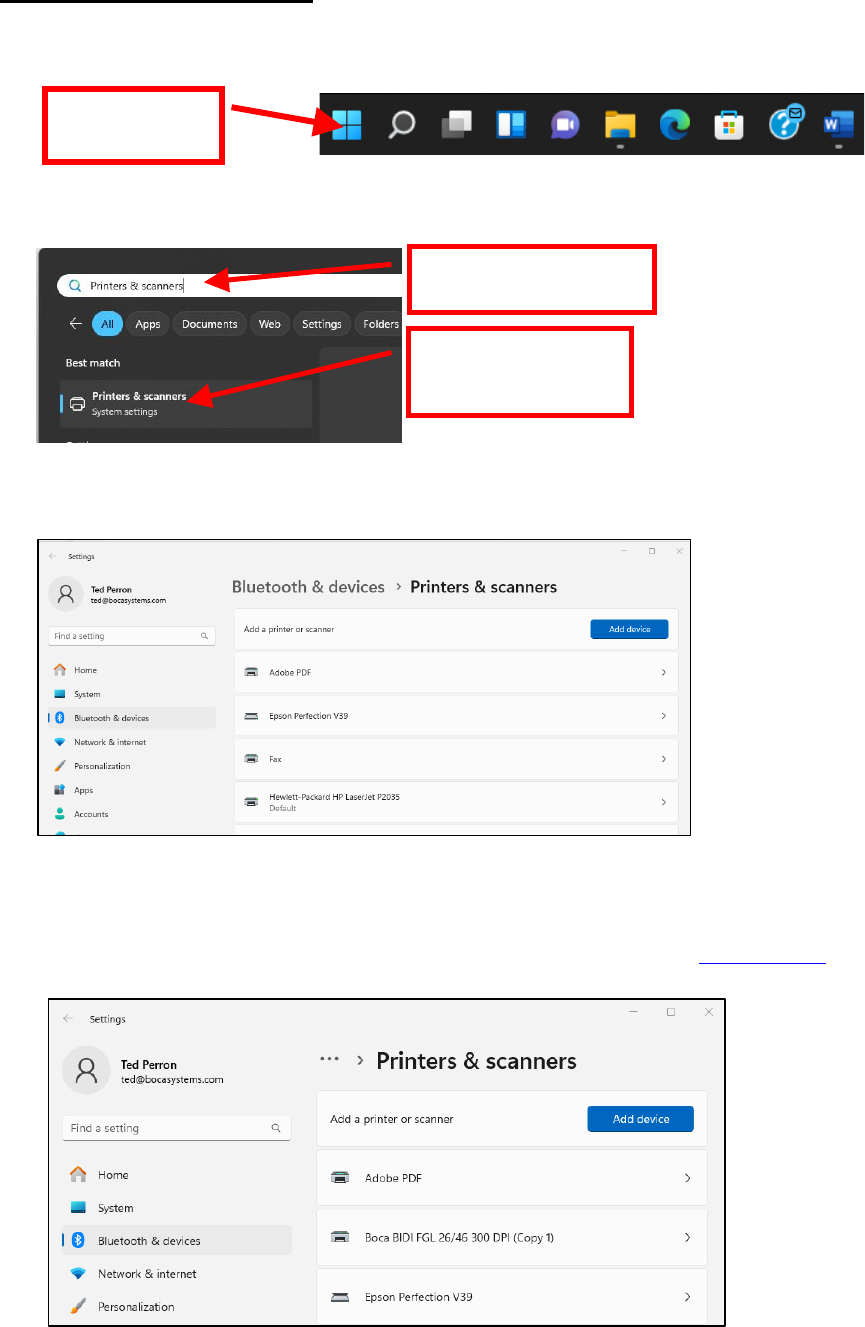
Double click on
BocaPrinterDrivers
8.
Doubl e cl ic
k on BOCAP rintDrivers f older.
Click on
file name and then
right click
Click on
Run as administrator
9.
C
lick on Dpinstx64.ext to highlight it and then right click. Click on Run as administrator.
10. When the below pop-up
box comes up, click on
Yes
button.

4
Click on
Finish button
12. Once the driver package is done being installed the Window will show up. Click on the Finish button.
13. The BOCA printer driver package has now been installed onto your host computer. Please move onto the next
section.
Once the drivers have been downloaded on the computer, you may move forward with
connecting your printer to the host computer. Skip the silent and difficult installation
sections, if you have completed the driver installation wizard, shown above.
11. Click on Next
If the standard installation fails, we suggest trying the following:
1. Follow steps 1 - 7 of the standard installation
2. Follow steps a - c from the silent driver install.
3. Follow steps 8 - 12 from the standard install.
Silent Driver Installation
Difficult Installation
The instructions on this page are to be ignored, unless you require a special installation.
Follow steps 1 - 7 of the standard installation and continue here:
NOTE: You must add the Boca Certificate to the Trusted Publishers Certificate store before performing a silent install.
a. Right click on Install_Drx.exe , then click on Run as administrator
b. Click on Yes button.
c. The below popup will be shown while the installation is cleaning out old files
5
USB INTERFACE ONLY
1. Below is one of many ways to get to the devices and printers’ menu. Below is one of many ways to get to the
devices and printers’ menu. In the search bar type Control Panel. Click on the start icon.
2. In the Type here to search bar type in Printers & scanners and then click on Control Panel app.
3. When Printer & scanners menu comes up it will show the printer drivers currently installed.
The driver’s name may vary from what is shown.
4. Connect the USB cable to the host computer and power on the printer. Windows operating system will
automatically install the necessary drivers.
5. You should notice the Boca driver icon show up in the Printer & scanners. Go to page 10
Your driver icon may look different than what is shown
Type
Printers & scanners
Click on
Printers & scanners
System settings
Click on the
Start icon
6
5
7
ETHERNET AND WI-FI ONLY
The self-test ticket that is printed when the printer’s TEST button is pressed will show the IP address that the printer has.
You will need this information later.
1. Below is one of many ways to get to the devices and printers’ menu. Below is one of many ways to get to the
devices and printers’ menu. In the search bar type Control Panel. Click on the start icon.
In the Type here to search bar type in Printers & scanners and then click on Control Panel app.
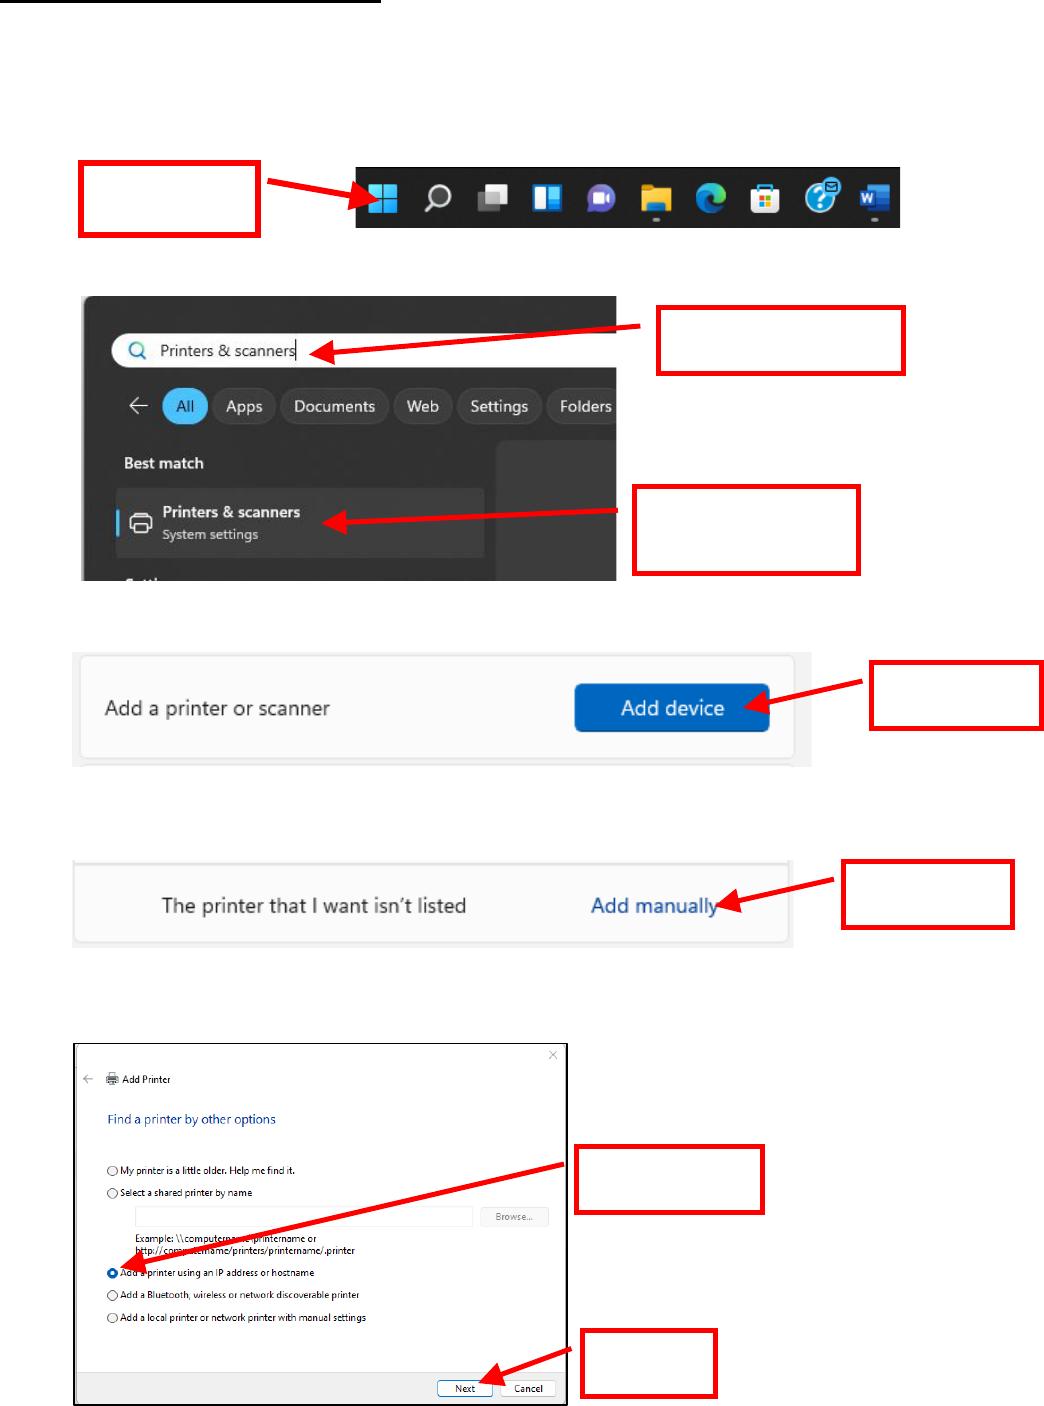
2. When the Printers & scanners menu come up, click on Add device button that should be located at the very top.
3. The computer will start looking for a printer. Scroll down until you see The printer that I want isn’t listed and click
on Add manually
4. When Add Printer popup comes up, click on Add a printer using IP address or host name radio button. Click on
next.
Click on
This radio button
Click on
Next
Type
Printers & scanners
Click on
Printers & scanners
System settings
Click on the
Start icon
Click on
Add device
Click on
Add manually
8
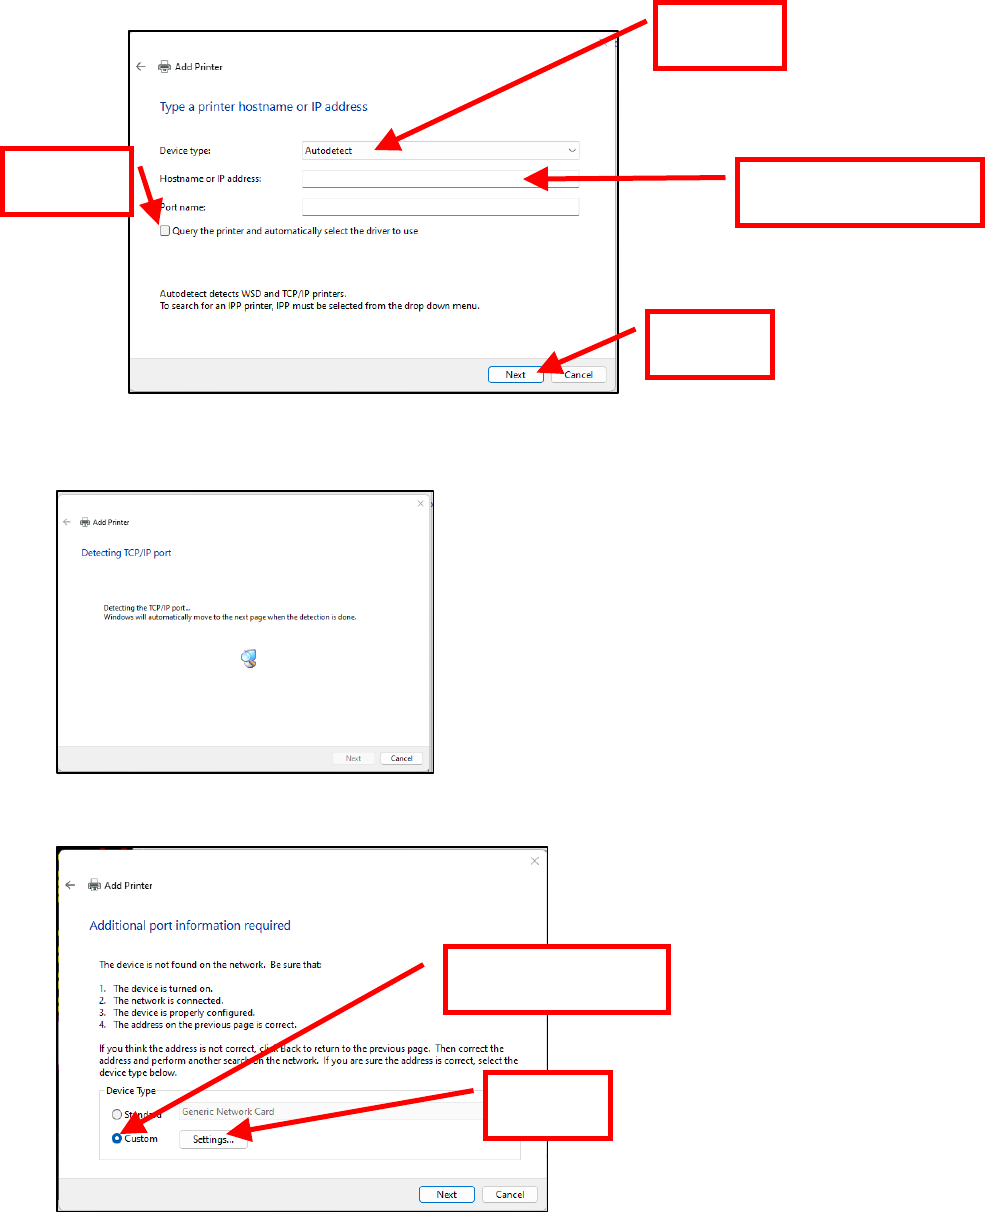
5. On next pop up:
a. Change the Device type: Autodetect
b. In Hostname or IP address: enter the IP address that is shown on the printer’s self-test ticket.
When typing in the address don’t include the leading zeroes (If IP=189.010.000.002 then type in
189.10.0.2). You also have the option of typing in a specific Port name or leave as the IP address.
c. Uncheck the “Query the printer and automatically select the driver to use” box
d. Click on the Next button.
6. The Detecting TCP/IP port will be shown while the computer searches for the IP address you entered.
7. When the below pop up comes up, click on the Next button.
Select
Autodetec
t
Type
Printer’s IP address
Click on
Next
Uncheck
this box
Click on
Settings
Click on
Custom radio button
9
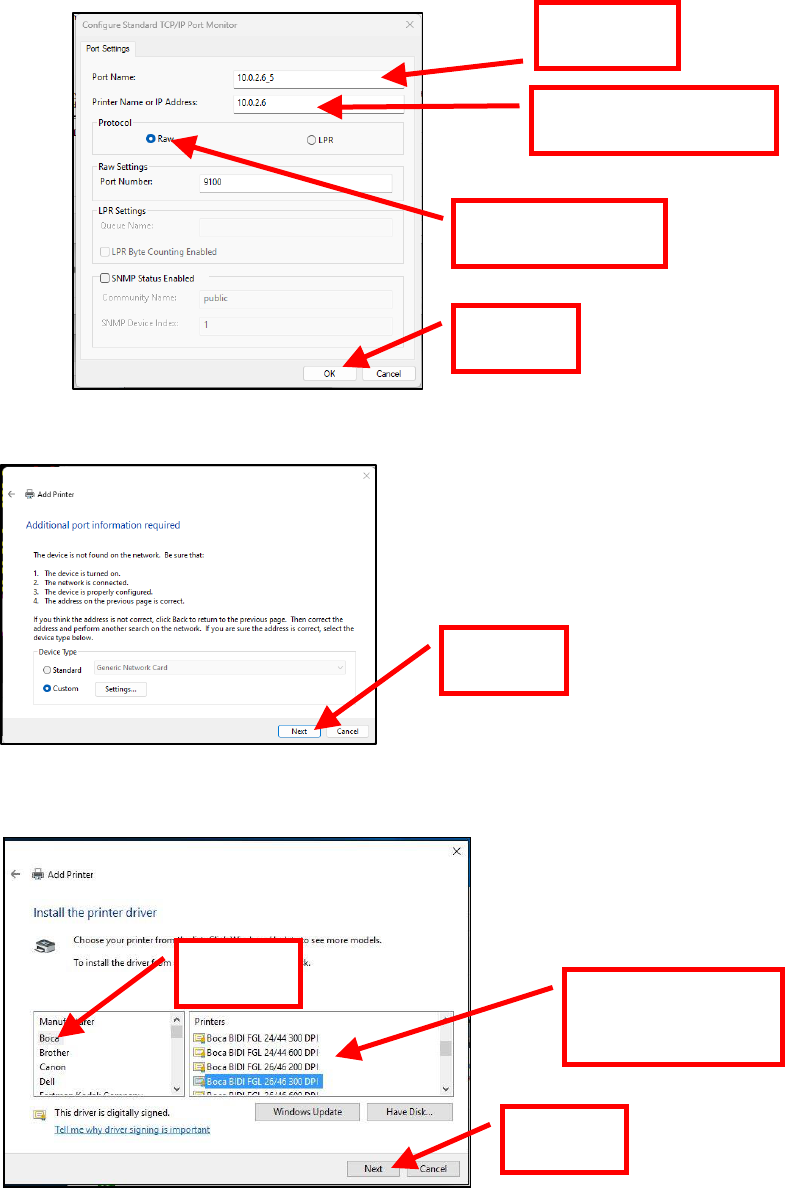
8. When the below pop comes up confirm the following:
a. Port Name: comes up it matches what you entered. Your name will be different than what is shown below
b. Printer Name or IP Address: shows the IP address you entered. Your IP address will be different than what is shown
c. Raw radio button is selected under Protocol.
d. Click on the OK button.
9. When the below pop up comes up, click on the Next button.
10. When the Install the print driver menu comes up select “Boca” under Manufacturer and the appropriate driver for
your printer. Once done click on the next button.
Click on
Next
Click on
Boca
Select
The driver that
matches your printer
Confirm
Printer’s IP address
Confirm
Port Name
Raw radio button is
selected
Click on
OK
Click on
Next
10
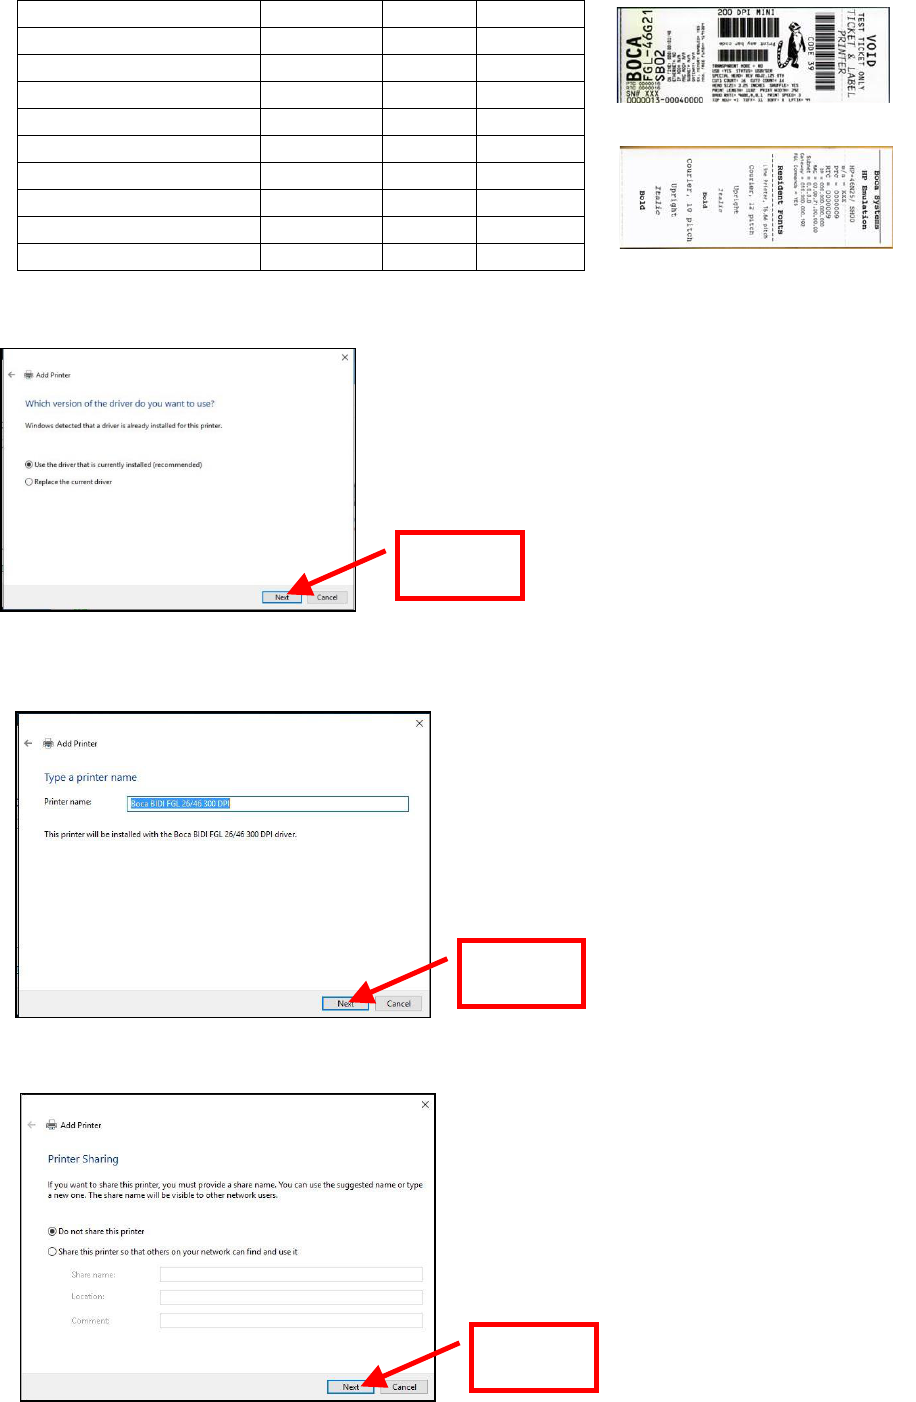
Taking a look at the printer’s serial number tag the below chart should aid in determining the correct driver to
select. Self-Test ticket is printed by pressing the printer’s center TEST button.
11. When the below menu comes up click on next.
12. When the below menu comes up click on next. You will want to denote the Printer name.
Your name may vary from what is shown below
13. At this menu screen you have the option to share or not share the printer. Click on the next button.
Driver
DPI
Firmware
PCL listed
Boca BIDI FGL 22/42 200 DPI
200
22 or 42
NO
Boca BIDI FGL 24/44 200 DPI
200
24 or 44
NO
Boca BIDI FGL 26/46 200 DPI
200, 2L, 2C
26 or 46
NO
Boca BIDI FGL 22/42 300 DPI
300
22 or 42
NO
Boca BIDI FGL 24/44 300 DPI
300
24 or 44
NO
Boca BIDI FGL 26/46 300 DPI
300/ 3L
26 or 46
NO
Boca PCL 22/42 300 DPI
300
22 or 42
YES
Boca PCL 24/44 300 DPI
300
24 or 44
YES
Boca PCL 26/46 300 DPI
300
26 or 46
YES
Click on
Next
Click on
Next
Click on
Next
Above is a typical FGL self-test ticket
Above is a typical PCL self-test ticket
11
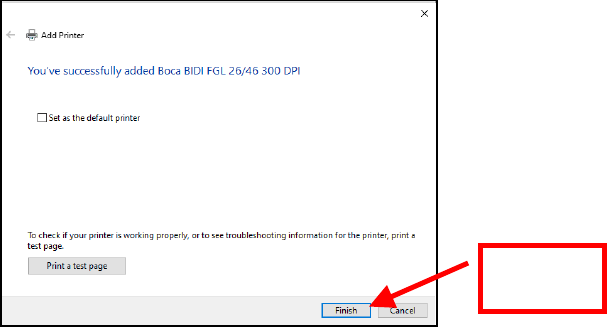
14. When the below pop-up comes up, click on the Finish button. The driver’s name may vary from what is shown.
15. Move onto printing a Windows Test page (see next page).
Click on
Finish
12
Windows Test Page
The following will guide you through doing a Windows test page to confirm the driver is communicating with the printer.
You will want to make sure the printer has stock loaded and is able to print a self-test ticket when the TEST button is
pressed. The printing of this ticket confirms that the printer is mechanically working properly. If the printer is not able to
print a self-test ticket, then consult the “4.0 Installation section of the user manual
(www.bocasystems.com/documents/lemur_manual.pdf ).
1. Below is one of many ways to get to the devices and printers’ menu. Below is one of many ways to get to the
devices and printers’ menu. In the search bar type Control Panel. Click on the start icon.
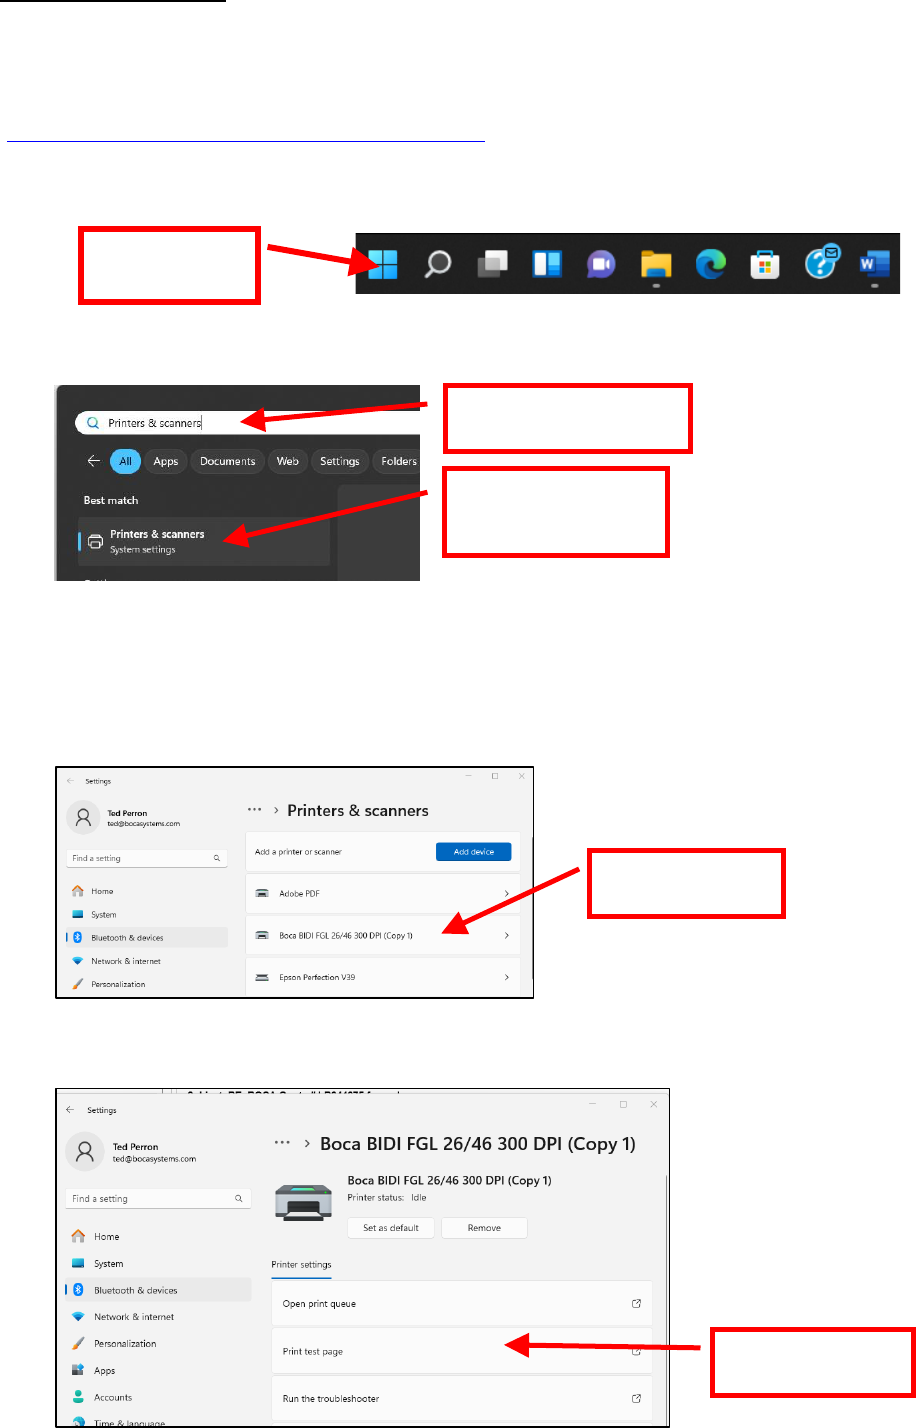
2. In the Type here to search bar type in Printers & scanners and then click on Control Panel app.
3. When Printer & scanners menu comes up search for the driver you just installed. This would have been the name
you denoted at step #10 on page 8. Click on the driver icon.
In the below example a Boca BIDI FGL 26/46 300 DPI (Copy1) is shown
The driver’s name may vary from what is shown.
4. When the printer driver menu comes up, click on Print test page.
Click on
Boca Drive icon
Click on
Printer test page
Type
Printers & scanners
Click on
Printers & scanners
System settings
Click on the
Start icon
13
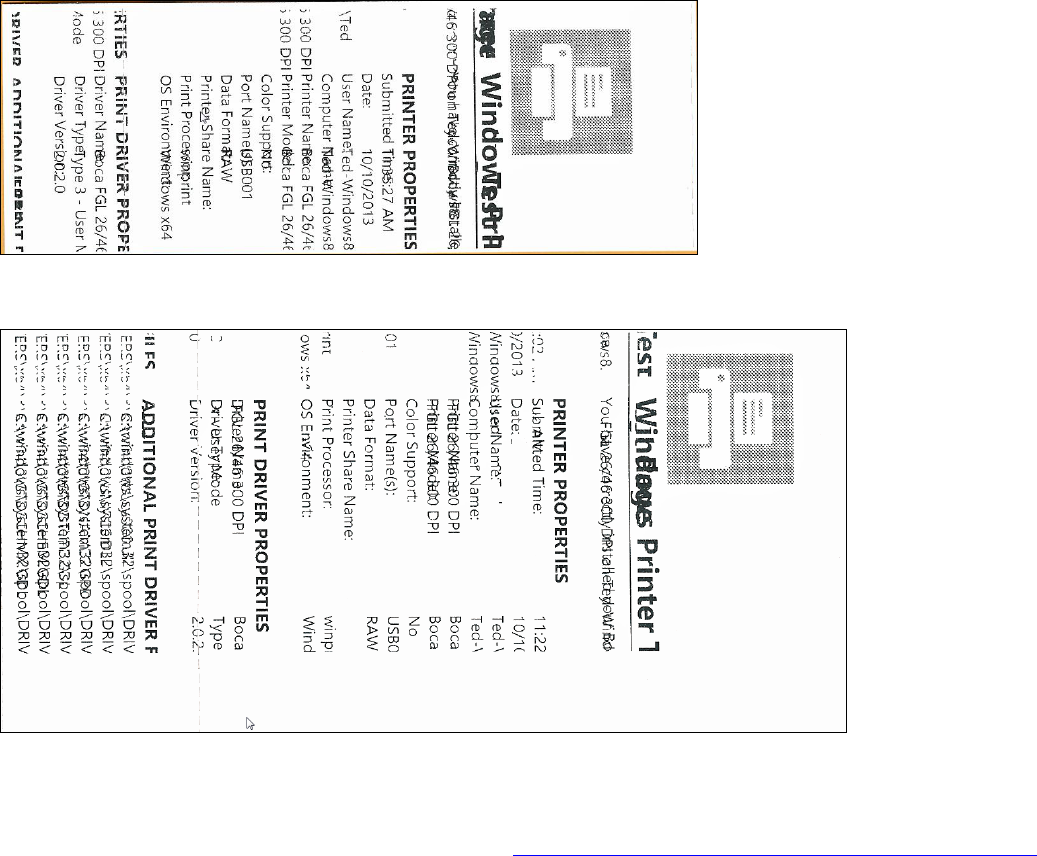
5. The printer should printout out a Windows Test page.
Below are some samples printouts for reference only and your test page may look different.
Above is from a 200DPI FGL printer with 2” x 5.5” stock
Above is from a 300DPI FGL printer with 3.25” x 6.5” stock
If you were not able to install the BOCA print driver using the above steps, please take a screenshot of the “printers and
drivers” dialog and attach it to the support form located at https://www.bocasystems.com/onlinesupportformNEW.html
Rev: 03.19.24
Click on
Print Test Page
