
ComponentOne
Excel for WinForms
GrapeCity US
GrapeCity
201 South Highland Avenue, Suite 301
Pittsburgh, PA 15206
Tel: 1.800.858.2739 | 412.681.4343
Fax: 412.681.4384
Website: https://www.grapecity.com/en/
E-mail: [email protected]
Trademarks
The ComponentOne product name is a trademark and ComponentOne is a registered trademark of GrapeCity, Inc. All
other trademarks used herein are the properties of their respective owners.
Warranty
ComponentOne warrants that the media on which the software is delivered is free from defects in material and
workmanship, assuming normal use, for a period of 90 days from the date of purchase. If a defect occurs during this
time, you may return the defective media to ComponentOne, along with a dated proof of purchase, and
ComponentOne will replace it at no charge. After 90 days, you can obtain a replacement for the defective media by
sending it and a check for $2 5 (to cover postage and handling) to ComponentOne.
Except for the express warranty of the original media on which the software is delivered is set forth here,
ComponentOne makes no other warranties, express or implied. Every attempt has been made to ensure that the
information contained in this manual is correct as of the time it was written. ComponentOne is not responsible for any
errors or omissions. ComponentOne’s liability is limited to the amount you paid for the product. ComponentOne is
not liable for any special, consequential, or other damages for any reason.
Copying and Distribution
While you are welcome to make backup copies of the software for your own use and protection, you are not
permitted to make copies for the use of anyone else. We put a lot of time and effort into creating this product, and we
appreciate your support in seeing that it is used by licensed users only.

Table of Contents
Table of Contents 1-2
Excel for .NET Overview 3
Help with WinForms Edition 3
Migrating an Excel for .NET Project to Visual Studio 2005 3-4
Key Features 5-6
Excel for .NET QuickStart 7
Step 1 of 4: Setting up the Project 7
Step 2 of 4: Adding Content to a C1XLBook 7-8
Step 3 of 4: Formatting the Content 8-9
Step 4 of 4: Saving and Opening the XLS File 9-10
Using Excel for .NET 11
Creating Documents 11-13
Worksheets 13
Rows and Columns 14
Cells 14
Styles 14
Excel for .NET Frequently Asked Questions 15
Excel for .NET Limitations 16
Excel for .NET Task-Based Help 17
Adding Content to a Workbook 17-18
Merging Cells 18-19
Formatting Cells 19-21
Copying Rows from One Book to Another 21-22
Adding an Image to a Cell 22-27
Adding a Comment to a Cell 27-28
Adding a Page Break to a Worksheet 28-29
Setting the Calculation Mode for a Workbook 29-30
Importing and Exporting OpenXml Files 30-32
Creating Subtotals 32-34
Saving and Loading CSV Files 34-36
Loading and Saving Macro enabled Excel Files 36-38
Setting Print Area in a Sheet 38
Getting Print Area from a Sheet of Existing Excel File 38-39
Copying a Sheet 39-40
Excel for WinForms 1
Copyright © 2019 GrapeCity, Inc. All rights reserved.


Excel for .NET Overview
Your Excel data is just a simple command away from any of your .NET applications with Excel for .NET you don't even
need to have Microsoft Excel installed! Create or load XLS files for Excel 97 and later. Excel for .NET supports the new
Office 2007 OpenXml format, which allows you to save smaller, compressed XLSX files.
The main component in Excel for .NET is the C1XLBook object, which represents an Excel workbook containing one
or more sheets. Use the C1XLBook to load existing Excel files or create new ones. Then add sheets, styles, hyperlinks,
images, headers and footers, page breaks and more. When you are done, save the C1XLBook to a file or a Stream and
youre done. Anyone with a copy of Excel can access your data. Its that easy!
Help with WinForms Edition
Getting Started
For information on installing ComponentOne Studio WinForms Edition, licensing, technical support, namespaces
and creating a project with the control, please visit Getting Started with WinForms Edition.
Migrating an Excel for .NET Project to Visual Studio 2005
To migrate a project using ComponentOne components to Visual Studio 2005, there are two main steps that must be
performed. First, you must convert your project to Visual Studio 2005, which includes removing any references to a
previous assembly and adding a reference to the new assembly. Secondly, the .licx file, or licensing file, must be
updated in order for the project to run correctly.
To convert the project:
1. Open Visual Studio 2005 and select File, Open Project.
2. Locate the .sln file for the project that you wish to convert to Visual Studio 2005. Select it and click Open. The
Visual Studio Conversion Wizard appears.
3. Click Next.
4. Select Yes, create a backup before converting to create a backup of your current project and click Next.
5. Click Finish to convert your project to Visual Studio 2005. The Conversion Complete window appears.
6. Click Show the conversion log when the wizard is closed if you want to view the conversion log.
7. Click Close. The project opens. Now you must remove references to any of the previous ComponentOne .dlls
and add references to the new ones.
8. Go to the Solution Explorer (View | Solution Explorer), select the project, and click the Show All Files button.
Note: The Show All Files button does not appear in the Solution Explorer toolbar if the Solution project
node is selected.
9. Expand the References node, right-click C1.Common and select Remove. Also remove c1.c1excel the same
way.
10. Right-click the References node and select Add Reference.
11. Browse and select C1.C1Excel.2.dll. Click OK to add it to the project.
To update the .licx file:
1. 1. In the Solution Explorer, right-click the licenses.licx file and select Delete.
2. 2. Click OK to permanently delete licenses.licx. The project must be rebuilt to create a new, updated version of
Excel for WinForms 3
Copyright © 2019 GrapeCity, Inc. All rights reserved.

the .licx file.
3. 3. Click the Start Debugging button to compile and run the project. The new .licx file may not be visible in the
Solution Explorer.
4. 4. Select File, Close to close the form and then double-click the Form.vb or Form.cs file in the Solution
Explorer to reopen it. The new licenses.licx file appears in the list of files.
The migration process is complete.
Excel for WinForms 4
Copyright © 2019 GrapeCity, Inc. All rights reserved.

Key Features
The following are some of the main features of Excel for .NET that you may find useful:
Save or load a workbook with one command
Excel for .NET is easy-to-use, allowing you to use a single command to load or save a workbook and
manipulate sheets as if they were grid controls.
Read and write data in individual cells
After loading or creating a C1XLBook, you can access data in individual sheets as if they were a simple grid. For
example:
XLSheet sheet = C1XLBook.Sheets[0];
sheet[0, 0].Value = DateTime.Now;
Format the data in each cell
The format associated with each cell is as easy to access as the data stored in the cell. For example:
XLStyle style = new XLStyle(c1XLBook1);
style.Format = "dd-MM-yyyy";
style.Font = new Font("Courier New", 14);
XLSheet sheet = C1XLBook.Sheets[0];
sheet[0, 0].Value = DateTime.Now;
sheet[0, 0].Style = style;
Use Excel for .NET to export to XLS files
Other ComponentOne components use Excel for .NET to export XLS files. For example, C1Report uses Excel
for .NET to create XLS versions of reports so they can be viewed and edited by anyone with a copy of
Microsoft Excel.
Reads and writes .xls and .xlsx files without using Microsoft Excel
Excel for .NET reads and writes .xls (Excel 97 and later) and xlsx (OpenXml format) files, the latter of which can
be reused and easily exchanged or compressed to create smaller file sizes. You don't even need to have
Microsoft Excel installed.
Save and load Macros enabled Excel files
Excel for .NET now supports OpenXMLMacro File Format which can be used to save/load Macros (written in
VBA code) enabled Excel files in C1Excel. It will now be possible to load/save such files from/to *.xlsm file
extension. The VBA Code can be loaded in Binary format into xlsm files.
RTF Support
Excel for .NET now fully supports the Rich Text Format (RTF) for both text and graphics interchange formats
that can be used with different operating systems, environments and output devices.
Create and position images within a cell
Not only can you add images to cells, but now you can specify the cell size, the position of the image within
the cell and whether the image is scaled, clipped, or stretched to fit the cell.
Save and load files to and from streams
Workbooks can now be directly read to and written from memory streams with new overloads for the Load and
the Save methods so you no longer have to use temporary files.
Excel for WinForms 5
Copyright © 2019 GrapeCity, Inc. All rights reserved.

Add images to the header and footer of a sheet
Use properties in the XLPrintSettings class to add images to the left, center, or right part of a sheet's header or
footer.
Support for OpenXMLMacro format is available. (Open XML format with support VBA projects, *.xlsm
extension).
Excel for WinForms 6
Copyright © 2019 GrapeCity, Inc. All rights reserved.

Excel for .NET QuickStart
This quick start guide will familiarize you with some of the features of Excel for .NET. In this quick start you will learn
how to add a C1XLBook to the project, add formatted data to the workbook, and save and open the XLS file.
Step 1 of 4: Setting up the Project
In this step you will add a C1XLBook component to your form. Each book is composed of one or more sheets.
1. Create a new .NET 2.0 project.
2. In the Toolbox, double-click the C1XLBook icon to add the C1XLBook component to your project. The
C1XLBook component will appear in the component tray below the form.
3. Double-click the form to add the Form1_Load event and switch to code view.
4. Add the Imports (Visual Basic) or using (C#) statement to the code at the top of the form so you can use all
names within the C1.C1Excel namespace.
To write code in Visual Basic
Visual Basic
Imports C1.C1Excel
To write code in C#
C#
using C1.C1Excel;
Now that you have a C1XLBook, you can begin adding content to it.
Step 2 of 4: Adding Content to a C1XLBook
While you are still in code view in the Visual Studio project, add the following code within the Form_Load event
created in Step 1 of 4. This code will add content to the Excel workbook.
To write code in Visual Basic
Visual Basic
' Add content to the sheet.
Dim i As Integer
Dim sheet as XLSheet = C1XLBook1.Sheets(0)
For i = 0 To 9
sheet(i, 0).Value = (i + 1) * 10
sheet(i, 1).Value = (i + 1) * 100
sheet(i, 2).Value = (i + 1) * 1000
Next i
To write code in C#
C#
// Add content to the sheet.
Excel for WinForms 7
Copyright © 2019 GrapeCity, Inc. All rights reserved.

int i;
C1.C1Excel.XLSheet sheet = c1XLBook1.Sheets[0];
for (i = 0; i <= 9; i++)
{
sheet[i, 0].Value = (i + 1) * 10;
sheet[i, 1].Value = (i + 1) * 100;
sheet[i, 2].Value = (i + 1) * 1000;
}
The first ten rows in the first three columns of the XLS file will be populated with numbers when you run the project.
Step 3 of 4: Formatting the Content
Next we will format the content using styles. The code in this step should be added after the code from Step 2 of 4
within the Form_Load event.
1. Add the following code to create two new styles: style1 and style2.
To write code in Visual Basic
Visual Basic
'Add style 1.
Dim style1 As New XLStyle(C1XLBook1)
style1.Font = New Font("Tahoma", 9, FontStyle.Bold)
style1.ForeColor = Color.RoyalBlue
' Add style 2.
Dim style2 As New XLStyle(C1XLBook1)
style2.Font = New Font("Tahoma", 9, FontStyle.Italic)
style2.BackColor = Color.RoyalBlue
style2.ForeColor = Color.White
To write code in C#
Title Text
// Add style 1.
XLStyle style1 = new XLStyle(c1XLBook1);
style1.Font = new Font("Tahoma", 9, FontStyle.Bold);
style1.ForeColor = Color.RoyalBlue;
// Add style 2.
XLStyle style2 = new XLStyle(c1XLBook1);
style2.Font = new Font("Tahoma", 9, FontStyle.Italic);
style2.BackColor = Color.RoyalBlue;
style2.ForeColor = Color.White;
2. Then add the following code to apply the new styles to the content.
To write code in Visual Basic
Visual Basic
For i = 0 To 9
' Apply styles to the content.
Excel for WinForms 8
Copyright © 2019 GrapeCity, Inc. All rights reserved.

If (i + 1) Mod 2 = 0 Then
sheet(i, 0).Style = style2
sheet(i, 1).Style = style1
sheet(i, 2).Style = style2
Else
sheet(i, 0).Style = style1
sheet(i, 1).Style = style2
sheet(i, 2).Style = style1
End If
Next i
To write code in C#
C#
for (i = 0; i <= 9; i++)
{
// Apply styles to the content.
if ((i + 1) % 2 == 0)
{
sheet[i, 0].Style = style2;
sheet[i, 1].Style = style1;
sheet[i, 2].Style = style2;
}
else
{
sheet[i, 0].Style = style1;
sheet[i, 1].Style = style2;
sheet[i, 2].Style = style1;
}
}
Step 4 of 4: Saving and Opening the XLS File
Finally, add the following code to save and load the Excel workbook. This code should be added after the code from
Step 3 of 4 within the Form_Load event.
To write code in Visual Basic
Visual Basic
C1XLBook1.Save("c:\mybook.xls")
System.Diagnostics.Process.Start("C:\mybook.xls")
To write code in C#
C#
c1XLBook1.Save(@"c:\mybook.xls");
System.Diagnostics.Process.Start(@"c:\mybook.xls");
Run the program and observe:
Excel for WinForms 9
Copyright © 2019 GrapeCity, Inc. All rights reserved.

Formatted content is added to the workbook.
Congratulations! You've completed the Excel for .NET quick start.
Excel for WinForms 10
Copyright © 2019 GrapeCity, Inc. All rights reserved.

Using Excel for .NET
The following topics explain how to create an XLS file, as well as describe the main Excel for .NET classes used to
create the components that make up the file, which include worksheets, rows and columns, cells and styles.
Creating Documents
To create a new XLS file using Excel for .NET, three steps are required:
1. Add a C1XLBook component to your project or create a C1XLBook object in code. Each book is composed of
one or more sheets (XLSheet objects).
2. Add content to the sheets. Each sheet contains cells (XLCell objects) that have a Value and a Style property.
3. Save the book to a file using the Save method.
For example, the following code creates a new Excel file with a single sheet containing numbers from 1 to 100. Note
that if you add the C1XLBook component to a form, you can skip the code in step 1.
To write code in Visual Basic
Visual Basic
' step 1: create a new workbook
Dim C1XLBook1 As New C1XLBook()
' step 2: write content into some cells
Dim sheet As XLSheet = C1XLBook1.Sheets(0)
Dim i As Integer
For i = 0 To 99
sheet(i, 0).Value = i + 1
Next i
' step 3: save the file
C1XLBook1.Save("c:\temp\hello.xls")
To write code in C#
C#
// step 1: create a new workbook
C1XLBook c1XLBook1 = new C1XLBook();
// step 2: write content into some cells
XLSheet sheet = c1XLBook1.Sheets[0];
for (int i = 0; i < 100; i++)
{
sheet[i, 0].Value = i + 1;
}
// step 3: save the file
c1XLBook1.Save(@"c:\temp\hello.xls");
Step 2 is the most interesting one. The code starts by retrieving an XLSheet object that represents the single
worksheet in the new Excel workbook. This sheet is created automatically when you add or create a new C1XLBook.
Then the code uses the sheet indexer to reference cells in the sheet and assign them values from 1 to 100.
Note that the indexer in the XLSheet object automatically creates cells, if necessary. This makes it easy to fill
worksheets that you create. If you want to find out the sheet dimensions, use the sheet's Rows.Count and
Excel for WinForms 11
Copyright © 2019 GrapeCity, Inc. All rights reserved.

Columns.Count properties.
Of course, you are not limited to assigning values to cells. You can also use styles to format the cells. Just create one
or more XLStyle objects and assign them to cells much like you did values. This revised version of the code above
creates a sheet where even numbers are shown in bold red characters and odd numbers in italic blue. Note that if you
add the C1XLBook component to the form, you can skip the code in step 1.
To write code in Visual Basic
Visual Basic
' step 1: create a new workbook
Dim C1XLBook1 As New C1XLBook()
' step 2: create styles for odd and even values
Dim styleOdd As New XLStyle(C1XLBook1)
styleOdd.Font = New Font("Tahoma", 9, FontStyle.Italic)
styleOdd.ForeColor = Color.Blue
Dim styleEven As New XLStyle(C1XLBook1)
styleEven.Font = New Font("Tahoma", 9, FontStyle.Bold)
styleEven.ForeColor = Color.Red
' step 3: write content and styles into some cells
Dim sheet As XLSheet = C1XLBook1.Sheets(0)
Dim i As Integer
For i = 0 To 99
Dim cell As XLCell = sheet(i, 0)
cell.Value = i + 1
If (i + 1) Mod 2 = 0 Then
cell.Style = styleEven
Else
cell.Style = styleOdd
EndIf
Next i
' step 4: save the file
C1XLBook1.Save("c:\temp\hello.xls")
To write code in C#
C#
// step 1: create a new workbook
C1XLBook c1XLBook1 = new C1XLBook();
// step 2: create styles for odd and even values
XLStyle styleOdd = new XLStyle(c1XLBook1);
styleOdd.Font = new Font("Tahoma", 9, FontStyle.Italic);
styleOdd.ForeColor = Color.Blue;
XLStyle styleEven = new XLStyle(c1XLBook1);
styleEven.Font = new Font("Tahoma", 9, FontStyle.Bold);
styleEven.ForeColor = Color.Red;
// step 3: write content and styles into some cells
XLSheet sheet = c1XLBook1.Sheets[0];
for (int i = 0; i < 100; i++)
{
XLCell cell = sheet[i, 0];
cell.Value = i + 1;
Excel for WinForms 12
Copyright © 2019 GrapeCity, Inc. All rights reserved.

cell.Style = ((i+1) % 2 == 0)? styleEven: styleOdd;
}
// step 4: save the file
c1XLBook1.Save(@"c:\temp\hello.xls");
The code is similar. The main difference is the new step 2, which creates styles for odd and even cells. The new styles
are assigned to cells in step 3, along with the cell values.
This is what the file created by the code above looks like when opened in Microsoft Excel:
Worksheets
Worksheets are the individual grids contained in an Excel file. They are represented by XLSheet objects accessible
through the Sheets property in the C1XLBook class. Each sheet has a name and contains a collection of rows and
columns. Individual cells can be accessed using the XLSheet indexer, which takes row and column indices.
The Rows and Columns collections in the XLSheet object extend automatically when you use their indexers. For
example, if you write the following code and the sheet has fewer than 1001 rows, new rows will be automatically
added, and a valid row will be returned. The same applies to XLColumn and XLCell indexers. This is different from the
behavior of most collection indexers in .NET, but it makes it very easy to create and populate XLSheet objects.
To write code in Visual Basic
Visual Basic
Dim sheet As XLSheet = C1XLBook1.Sheets(0)
Dim row As XLRow = sheet.Rows(1000)
To write code in C#
C#
XLSheet sheet = c1XLBook1.Sheets[0];
XLRow row = sheet.Rows[1000];
Excel for WinForms 13
Copyright © 2019 GrapeCity, Inc. All rights reserved.

Rows and Columns
The XLSheet object contains collections of rows and columns that expose each individual row and column on the
sheet. The exposed XLRow and XLColumn objects allow you to assign the size (column width, row height), visibility,
and style for each row and column on the sheet. If you don't assign any of these values, the sheet's defaults will be
used (see the DefaultRowHeight and DefaultColumnWidth properties).
The default dimensions for XLRow and XLColumn objects are 1, which means use the sheet's default values.
Cells
The XLSheet object also contains cells that can be accessed using an indexer that takes row and column indices. The
cells are represented by XLCell objects that contain the cell value and style.
As with rows and columns, the cell indexer also extends the sheet automatically. For example, write:
To write code in Visual Basic
Visual Basic
Dim cell As XLCell = sheet(10, 10)
To write code in C#
C#
XLCell cell = sheet[10,10];
If the sheet has fewer than 11 rows and 11 columns, rows and columns will be added and a valid XLCell object will be
returned.
Because the sheet expands automatically, this indexer will never return a null reference. If you want to check whether
a particular cell exists on the sheet and you don't want to create the cell inadvertently, use the sheet's GetCell method
instead of the indexer.
XLCell objects have a Value property that contains the cell contents. This property is of type object and it may contain
strings, numeric, Boolean, DateTime, or null objects. Other types of objects cannot be saved into Excel files.
XLCell objects also have a Style property that defines the appearance of the cell. If the Style property is set to null,
the cell is displayed using the default style. Otherwise, it should be set to an XLStyle object that defines the
appearance of the cell (font, alignment, colors, format, and so on).
Styles
The XLStyle class defines the appearance of a cell, row, or column on a sheet. XLStyle includes properties that specify
style elements such as the font, alignment, colors, and format used to display cell values. Not all style elements need
to be defined in every XLStyle object. For example, if an XLStyle specifies only a format, then the cell is displayed
using the specified format and default settings for the other style elements (font, alignment, and so on).
Excel for WinForms 14
Copyright © 2019 GrapeCity, Inc. All rights reserved.

Excel for .NET Frequently Asked Questions
The following questions were compiled from frequently asked user questions about Excel for .NET.
Does Excel for .NET support creating or adding formulas or named ranges?
Yes, Excel for .NET supports formulas and named ranges.
Full support for binary parsing and creating formulas was added in the 2009 v2 release of the ComponentOne Studio.
For example, suppose you have the following C# code:
To write code in C#
C#
private void Form1_Load(object sender, EventArgs e)
{
C1.C1Excel.XLSheet sheet = c1XLBook1.Sheets[0];
sheet[4, 1].Value = "apples and oranges";
sheet[5, 1].Value = "apples an"; // <-- result of the formula
sheet[5, 1].Formula = "LEFT(B5,9)";
c1XLBook1.Save(@"c:\mybook.xls");
System.Diagnostics.Process.Start(@"c:\mybook.xls");
}
When the program runs, the resulting spreadsheet looks like the following:
The formula gets the information stored in column B5 and nine characters starting from the left, or "apples an".
Can Excel for .NET be used on an ASP.NET 2.0 page?
Yes it can, but there is an extra step to perform in order to be able to use Excel for .NET and other non GUI .NET
controls in an ASP.NET 2.0 page. You must go to View|Component Designer from the main menu, or select "View
Component Designer" from the context menu of the design view of an .aspx page. This will display an area where you
can drag and drop the C1XLBook component to add it to your Web form.
Excel for WinForms 15
Copyright © 2019 GrapeCity, Inc. All rights reserved.

Excel for .NET Limitations
There are a few known limitations for Excel for .NET.
There is no support for the PivotTable declaration.
VBA Macro is supported now, but it is limited. Excel for .NET only supports opaque copy for Open XML
format.
When saving a formatted cell using the Fill property from an .xlsx to an .xls file, an ArgumentException is
thrown if the rows and columns in the .xlsx format are more than the maximum for the .xls format.
A chart object is not saved whenever an Excel file is loaded and saved using C1Excel, irrespective of the file
format(BIFF, OpenXml).
There is no support for the Protect Structure/Windows:
When Excel for .NET is used to load a Microsoft Excel file that is password protected for Structure/Windows: a
"Central dir not found" exception or FileLoadException may occur.
The following image shows how a workbook has been password protected for Structure and Windows in
Microsoft Excel 2010:
Excel for WinForms 16
Copyright © 2019 GrapeCity, Inc. All rights reserved.

Excel for .NET Task-Based Help
The task-based help assumes that you are familiar with programming in Visual Studio. By following the steps outlined
in the Help, you will be able to create projects demonstrating a variety of Excel for .NET features and get a good
sense of what Excel for .NET can do.
Each task-based help topic also assumes that you have created a new .NET project and added the appropriate
directives (using C1.C1Excel; for C#; Imports C1.C1Excel for Visual Basic) to the code.
Adding Content to a Workbook
To create a new workbook and add values to the first ten cells, complete the following steps:
1. Double-click the C1XLBook component in the Toolbox to add it to your form.
2. Add values to the first ten cells:
To write code in Visual Basic
Visual Basic
Dim sheet As XLSheet = C1XLBook1.Sheets(0)
Dim i As Integer
For i = 0 To 9
sheet(i,0).Value = i + 1
Next i
To write code in C#
C#
XLSheet sheet = c1XLBook1.Sheets[0];
for (int i = 0; i <= 9; i++)
{
sheet[i,0].Value = i + 1;
}
3. Save and open the book:
To write code in Visual Basic
Visual Basic
C1XLBook1.Save("c:\mybook.xls")
System.Diagnostics.Process.Start("C:\mybook.xls")
To write code in C#
C#
c1XLBook1.Save(@"c:\mybook.xls");
System.Diagnostics.Process.Start(@"C:\mybook.xls");
Excel for WinForms 17
Copyright © 2019 GrapeCity, Inc. All rights reserved.

Merging Cells
Cells can be merged using the C1Excel.MergedCells property and providing the range of cells to be merged together.
Merged cells can be used for inspecting, adding, or clearing merged ranges in a sheet. Each merged range is
represented by the C1.C1Excel.XLCellRange object. Cell merges are preserved when adding and removing rows or
columns.
To merge cells, complete the following steps:
1. Double-click the C1XLBook component in the Toolbox to add it to your form.
2. Use the following code to create two XLCellRanges (_ColRange and _RowRange) and add them to the
MergedCells collection. The code will also apply styles to the merged cells. You can add this code to the
Form1_Load event, for example:
To write code in C#
C#
private void Form1_Load(object sender, EventArgs e)
{
//Select range to Merge
XLCellRange _ColRange = new C1.C1Excel.XLCellRange(4, 6, 0, 8);
XLCellRange _RowRange = new C1.C1Excel.XLCellRange(9, 21, 3, 4);
//Set Text for Merged Cells
c1XLBook1.Sheets[0][4, 0].Value = "Merged Cells";
c1XLBook1.Sheets[0][9, 3].Value = "Merged Cells";
Excel for WinForms 18
Copyright © 2019 GrapeCity, Inc. All rights reserved.

//Merge Cells
c1XLBook1.Sheets[0].MergedCells.Add(_ColRange);
c1XLBook1.Sheets[0].MergedCells.Add(_RowRange);
//Define and Apply Styles for Merged Cells
XLStyle _Colstyle = new C1.C1Excel.XLStyle(c1XLBook1);
_Colstyle.BackColor = Color.Yellow;
XLStyle _Rowstyle = new XLStyle(c1XLBook1);
_Rowstyle.BackColor = Color.LightBlue;
c1XLBook1.Sheets[0][4, 0].Style = _Colstyle;
c1XLBook1.Sheets[0][9, 3].Style = _Rowstyle;
//Save and open the book
c1XLBook1.Save(@"c:\mybook.xls");
System.Diagnostics.Process.Start(@"C:\mybook.xls");
}
Formatting Cells
To format the cells of a book, complete the following steps:
1. Double-click the C1XLBook component in the Toolbox to add it to your form.
2. Create a new style and assign the style some properties:
To write code in Visual Basic
Visual Basic
Dim style1 As New XLStyle(C1XLBook1)
style1.ForeColor = Color.Gold
style1.BackColor = Color.Blue
style1.Format = "$ .00"
Excel for WinForms 19
Copyright © 2019 GrapeCity, Inc. All rights reserved.

To write code in C#
C#
XLStyle style1 = new XLStyle(c1XLBook1);
style1.ForeColor = Color.Gold;
style1.BackColor = Color.Blue;
style1.Format = "$ .00";
3. Add some content and apply the style to the cells in the first column of the sheet:
To write code in Visual Basic
Visual Basic
Dim sheet As XLSheet = C1XLBook1.Sheets(0)
Dim i As Integer
For i = 0 To 9
sheet(i,0).Value = i + 1
sheet(i, 0).Style = style1
Next i
To write code in C#
C#
C1.C1Excel.XLSheet sheet = c1XLBook1.Sheets[0];
int i;
for (i = 0; i <= 9; i++)
{
sheet[i,0].Value = i + 1;
sheet[i, 0].Style = style1;
}
4. Save and open the book:
To write code in Visual Basic
Visual Basic
C1XLBook1.Save("c:\mybook.xls")
System.Diagnostics.Process.Start("C:\mybook.xls")
To write code in C#
C#
c1XLBook1.Save(@"c:\mybook.xls");
System.Diagnostics.Process.Start(@"C:\mybook.xls");
Excel for WinForms 20
Copyright © 2019 GrapeCity, Inc. All rights reserved.

Copying Rows from One Book to Another
To copy the rows of a sheet from one book to a second book, complete the following steps:
1. Load an existing book:
To write code in Visual Basic
Visual Basic
Dim wb As New C1XLBook()
wb.Load("C:\test.xls")
To write code in C#
C#
C1XLBook wb = new C1XLBook();
wb.Load(@"C:\test.xls");
2. Create a new XLSheet:
To write code in Visual Basic
Visual Basic
Dim xb As New C1XLBook()
Excel for WinForms 21
Copyright © 2019 GrapeCity, Inc. All rights reserved.

xb.Sheets.Add("Test")
To write code in C#
C#
C1XLBook xb = new C1XLBook();
xb.Sheets.Add("Test");
3. Copy each row from the sheet of the existing book to new XLSheet:
To write code in Visual Basic
Visual Basic
Dim source As XLSheet = wb.Sheets(0)
Dim dest As XLSheet = xb.Sheets("Test")
Dim row As Integer, col As Integer
For row = 0 To source.Rows.Count - 1
For col = 0 To source.Columns.Count - 1
dest(row, col).Value = source(row, col).Value
Next col
Next row
To write code in C#
C#
XLSheet source = wb.Sheets[0];
XLSheet dest = xb.Sheets("Test");
for (int row = 0; row <= source.Rows.Count - 1; row++)
{
for (int col = 0; col <= source.Columns.Count - 1; col++)
{
dest[row, col].Value = source[row, col].Value;
}
}
4. Save and open the new book:
To write code in Visual Basic
Visual Basic
xb.Save("C:\test2.xls")
System.Diagnostics.Process.Start("C:\test2.xls")
To write code in C#
C#
xb.Save(@"c:\test2.xls");
System.Diagnostics.Process.Start(@"C:\test2.xls");
Excel for WinForms 22
Copyright © 2019 GrapeCity, Inc. All rights reserved.

Adding an Image to a Cell
Images can be added to a sheet or cell using one of the following methods. Click a link below for detailed steps on
performing this task.
Method 1: Assign an image directly to a cell's XLCell.Value property.
Using this method, the image is added to the sheet and kept at its original size. The upper left corner of the image
coincides with the upper left corner of the specified cell.
1. Load an existing workbook or add some content to a new workbook.
To write code in Visual Basic
Visual Basic
Dim wb As New C1XLBook
wb.Load("C:\Project\WorkBook1.xls")
To write code in C#
C#
C1XLBook wb = new C1XLBook();
wb.Load(@"C:\Project\WorkBook1.xls");
2. Specify the image and assign it to the cell's Value property.
To write code in Visual Basic
Visual Basic
Dim img As Image = Image.FromFile("C:\Project\MyImage.bmp")
Dim sheet As XLSheet = wb.Sheets("Forecasting Report")
sheet(0, 0).Value = img
To write code in C#
C#
Image img = Image.FromFile(@"C:\Project\MyImage.bmp");
XLSheet sheet = wb.Sheets("Forecasting Report");
sheet[0,0].Value = img;
3. Save and open the new book:
To write code in Visual Basic
Visual Basic
wb.Save("C:\Project\WorkBook1.xls ")
System.Diagnostics.Process.Start("C:\Project\WorkBook1.xls")
To write code in C#
C#
wb.Save(@"C:\Project\WorkBook1.xls");
Excel for WinForms 23
Copyright © 2019 GrapeCity, Inc. All rights reserved.

System.Diagnostics.Process.Start(@"C:\Project\WorkBook1.xls");
In this example, the image replaces the value in the first cell, and it appears at its original size in the first cell.
Method 2: Create an XLPictureShape object, set its properties, and assign it to a cell's XLCell.Value property.
This second method allows you to customize the image by specifying its size, rotation angle, brightness, contrast,
border, and more.
1. Load an existing workbook or add some content to a new workbook.
To write code in Visual Basic
Visual Basic
Dim wb As New C1XLBook
wb.Load("C:\Project\WorkBook1.xls")
To write code in C#
C#
C1XLBook wb = new C1XLBook();
wb.Load(@"C:\Project\WorkBook1.xls");
2. Create an XLPictureShape object, set some of its properties and assign it to a cell's Value property.
To write code in Visual Basic
Visual Basic
Dim img As Image = Image.FromFile("C:\Project\MyImage.bmp")
Dim pic As New XLPictureShape(img, 1500, 1500)
pic.Rotation = 30.0F
pic.LineColor = Color.DarkRed
pic.LineWidth = 100
' assign the pic to the first cell of the specified sheet
Dim sheet As XLSheet = wb.Sheets("Forecasting Report")
sheet(0, 0).Value = pic
To write code in C#
C#
Excel for WinForms 24
Copyright © 2019 GrapeCity, Inc. All rights reserved.

Image img = Image.FromFile(imageFileName);
XLPictureShape pic = new XLPictureShape(img, 1500, 1500);
pic.Rotation = 30.0f;
pic.LineColor = Color.DarkRed;
pic.LineWidth = 100;
// assign the pic to the first cell of the specified sheet
XLSheet sheet = wb.Sheets("Forecasting Report");
sheet[0,0].Value = pic;
3. Save and open the book.
To write code in Visual Basic
Visual Basic
wb.Save("C:\Project\WorkBook1.xls ")
System.Diagnostics.Process.Start("C:\Project\WorkBook1.xls")
To write code in C#
C#
wb.Save(@"C:\Project\WorkBook1.xls");
System.Diagnostics.Process.Start(@"C:\Project\WorkBook1.xls");
In this example, the image replaces the value in the first cell, is rotated 30°, and has a dark red border. Since we have
specified the horizontal and vertical position of the image, it does not appear in the first cell.
Method 3: Create an XLPictureShape object, set its properties, and add it to a sheet's ShapeCollection.
This method uses the XLPictureShape constructor to specify the image boundaries in sheet coordinates. The shape is
added directly to the sheet's ShapeCollection, rather than to a specific cell.
1. Load an existing workbook or add some content to a new workbook.
To write code in Visual Basic
Visual Basic
Dim wb As New C1XLBook
Excel for WinForms 25
Copyright © 2019 GrapeCity, Inc. All rights reserved.

wb.Load("C:\Project\WorkBook1.xls")
To write code in C#
C#
C1XLBook wb = new C1XLBook();
wb.Load(@"C:\Project\WorkBook1.xls");
2. Create an XLPictureShape object, set some of its properties and assign it to a sheet's ShapeCollection.
To write code in Visual Basic
Visual Basic
Dim img As Image = Image.FromFile("C:\Project\MyImage.bmp")
Dim pic As New XLPictureShape(img, 3000, 3500, 2500, 900)
pic.Rotation = 30.0F
pic.LineColor = Color.DarkRed
pic.LineWidth = 100
' add the pic to specified sheet's ShapeCollection
Dim sheet As XLSheet = wb.Sheets("Forecasting Report")
sheet.Shapes.Add(pic)
To write code in C#
C#
Image img = Image.FromFile(@"C:\Project\MyImage.bmp");
XLPictureShape pic = new XLPictureShape(img, 3000, 3500, 2500, 900);
pic.Rotation = 30.0f;
pic.LineColor = Color.DarkRed;
pic.LineWidth = 100;
// add the pic to specified sheet's ShapeCollection
XLSheet sheet = wb.Sheets("Forecasting Report");
sheet.Shapes.Add(pic)
3. Save and open the book.
To write code in Visual Basic
Visual Basic
wb.Save("C:\Project\WorkBook1.xls ")
System.Diagnostics.Process.Start("C:\Project\WorkBook1.xls")
To write code in C#
C#
wb.Save(@"C:\Project\WorkBook1.xls");
System.Diagnostics.Process.Start(@"C:\Project\WorkBook1.xls");
In this example, the shape was added to the sheet's ShapeCollection; therefore, the image does not replace the value
in the first cell. Here we specified the height and width of the image, as well as the horizontal and vertical positioning.
Excel for WinForms 26
Copyright © 2019 GrapeCity, Inc. All rights reserved.

Adding a Comment to a Cell
To add a comment to a cell, complete the following steps:
1. Double-click the C1XLBook component in the Toolbox to add it to your form.
2. Add text to a cell in the worksheet using the following code:
To write code in Visual Basic
Visual Basic
C1XLBook1.Sheets(0)(2, 3).Value = "test"
To write code in C#
C#
c1XLBook1.Sheets[0][2, 3].Value = "test";
3. Add a comment to the XLCommentCollection and create a box to show it in using the following code:
To write code in Visual Basic
Visual Basic
C1XLBook1.Sheets(0).Comments.Add(2, 3, "John", "Test comment")
C1XLBook1.Sheets(0).Comments(0).TextBox.Rectangle = New Rectangle(220, 210, 1900, 1200)
To write code in C#
C#
c1XLBook1.Sheets[0].Comments.Add(2, 3, "John", "Test comment");
c1XLBook1.Sheets[0].Comments[0].TextBox.Rectangle = new Rectangle(220, 210, 1900, 1200);
Excel for WinForms 27
Copyright © 2019 GrapeCity, Inc. All rights reserved.

4. Save and open the book:
To write code in Visual Basic
Visual Basic
C1XLBook1.Save("c:\mybook.xls")
System.Diagnostics.Process.Start("C:\mybook.xls")
To write code in C#
C#
c1XLBook1.Save(@"c:\mybook.xls");
System.Diagnostics.Process.Start(@"C:\mybook.xls");
5. Run the program. The spreadsheet will open and look similar to the following:
Adding a Page Break to a Worksheet
You can easily add page breaks in rows and columns for files in OpenXML (.xlsx) format using the PageBreak and
PageBreak properties.
1. Double-click the C1XLBook component in the Toolbox to add it to your form.
2. Add some text values and page breaks using the following code:
To write code in Visual Basic
Visual Basic
C1XLBook1.Sheets(0)(2, 3).Value = "page1"
C1XLBook1.Sheets(0).Rows(2).PageBreak = True
C1XLBook1.Sheets(0)(0, 1).Value = "test1"
C1XLBook1.Sheets(0)(0, 2).Value = "test2"
C1XLBook1.Sheets(0).Columns(1).PageBreak = True
Excel for WinForms 28
Copyright © 2019 GrapeCity, Inc. All rights reserved.

C1XLBook1.Sheets(0)(3, 3).Value = "page2"
' Save and open the .xlsx file
C1XLBook1.Save("c:\Save.xlsx")
System.Diagnostics.Process.Start("c:\Save.xlsx")
To write code in C#
C#
c1XLBook1.Sheets[0][2, 3].Value = "page1";
c1XLBook1.Sheets[0].Rows[2].PageBreak = true;
c1XLBook1.Sheets[0][0, 1].Value = "test1";
c1XLBook1.Sheets[0][0, 2].Value = "test2";
c1XLBook1.Sheets[0].Columns[1].PageBreak = true;
c1XLBook1.Sheets[0][3, 3].Value = "page2";
// Save and open the .xlsx file
c1XLBook1.Save(@"c:\Save.xlsx");
System.Diagnostics.Process.Start(@"c:\Save.xlsx");
3. Run the project to open the .xlsx file.
4. In Excel, select the Page Layout tab, and select the Print checkbox under Gridlines. The worksheet should look
similar to the following:
Setting the Calculation Mode for a Workbook
The CalculationMode property specifies the calculation mode for all formulas in the workbook. The CalculationMode
enumeration provides three options: Manual (you manually perform the calculation), Auto (the calculation is
automatically performed), or AutoNoTable (the calculation is performed except on tables).
To set the calculation mode, follow these steps:
1. Double-click the C1XLBook component in the Toolbox to add it to your form.
2. Add a simple formula using the following code:
To write code in Visual Basic
Visual Basic
Dim sheet As XLSheet = c1XLBook1.Sheets(0)
' simple formula
sheet(7, 0).Value = "Formula: 5!"
sheet(7, 1).Value = 122
sheet(7, 1).Formula = "1*2*3*4*5"
c1XLBook1.CalculationMode = CalculationMode.Auto
c1XLBook1.Save("c:\Save.xlsx")
System.Diagnostics.Process.Start("c:\Save.xlsx")
Excel for WinForms 29
Copyright © 2019 GrapeCity, Inc. All rights reserved.

To write code in C#
C#
XLSheet sheet = c1XLBook1.Sheets[0];
// simple formula
sheet[7, 0].Value = "Formula: 5!";
sheet[7, 1].Value = 122;
sheet[7, 1].Formula = "1*2*3*4*5";
c1XLBook1.CalculationMode = CalculationMode.Auto;
c1XLBook1.Save(@"c:\Save.xlsx");
System.Diagnostics.Process.Start(@"c:\Save.xlsx");
3. Run the project to open the Excel file. Notice that the value for the cell in (7,1) is 120, or the total of 1*2*3*4*5,
not 122, since we set the CalculationMode to Auto.
Importing and Exporting OpenXml Files
Excel for .NET can now read and write Microsoft Excel 2007 OpenXml files. OpenXml is an open, standards-based
format introduced by Microsoft in Office 2007. OpenXml files are easier to manipulate by applications because
OpenXml is based on XML and is publicly documented, as opposed to proprietary binary formats, such as BIFF8.
OpenXml files contain a number of XML files compressed using Zip compression. Because they are compressed,
OpenXml files are usually much smaller than traditional document files, such as .doc and .xls files.
Excel for .NET can load and save data and formatting information in OpenXml files; however, formulas are not loaded
or saved. They are copied in BIFF format as opaque. If you load files containing formulas and then save them, the
formulas will be removed. This is in contrast to the traditional .xls, or BIFF8, format, which preserves the formulas.
To support the OpenXml format, the C1XLBook Load and Save methods received overloads that take a FileFormat
parameter that is used to specify the file format to use when loading or saving files.
If the file name is not specified, then Excel for .NET infers the file format from the file name extension: files with an
"XLSX" and "ZIP" extension are loaded and saved as OpenXml files, by default. Other files are loaded and saved as
BIFF8, or .xls, format.
For example:
To write code in C#
C#
//load and save relying on file extension
c1Excel1.Load("somefile.xls"); // load biff 8 file
c1Excel1.Save("somefile.xlsx"); // save file as OpenXml
Excel for WinForms 30
Copyright © 2019 GrapeCity, Inc. All rights reserved.

c1Excel1.Save("somefile.zip"); // save file as OpenXml
// load and save specifying the FileFormat
c1Excel1.Load("somefile.xls", FileFormat.Biff8);
c1Excel1.Save("somefile.xlsx", FileFormat.OpenXml);
You can also specify the format when loading or saving files to and from streams. If the FileFormat is not specified,
then Excel for .NET uses the BIFF8 format as a default.
Note that there is a small behavior change implied here. Consider the statement below:
C1Excel1.Save("somefile.xlsx");
In previous versions of Excel for .NET, this would save a BIFF8 file (with the wrong extension). Now, this will save an
OpenXml file (with the correct extension). If you have code like this in your applications, you should change it to the
following when upgrading:
To write code in C#
C#
// deliberately save file with wrong extension
C1Excel1.Save("somefile.xlsx", FileFormat.Biff8);
To export a book to an OpenXml file, complete the following steps:
1. Load an existing book:
To write code in Visual Basic
Visual Basic
Dim wb As New C1XLBook()
wb.Load("C:\test.xlsx")
' or
Dim wb As New C1XLBook()
wb.Load("C:\test.xlsx", C1.C1Excel.FileFormat.OpenXml)
To write code in C#
C#
C1XLBook wb = new C1XLBook();
wb.Load(@"C:\test.xlsx");
// or
C1XLBook wb = new C1XLBook();
wb.Load(@"C:\test.xlsx", C1.C1Excel.FileFormat.OpenXml);
2. Export the book to an OpenXml Format file:
To write code in Visual Basic
Visual Basic
Dim wb As New C1XLBook()
' Add some content
Dim sheet As XLSheet = wb.Sheets(0)
Excel for WinForms 31
Copyright © 2019 GrapeCity, Inc. All rights reserved.

Dim i As Integer
For i = 0 To 9
sheet(i,0).Value = i + 1
Next i
' Export to OpenXml Format file
wb.Save("C:\test.xlsx")
' or
' Export to OpenXml Format file
wb.Save("C:\test.xlsx", C1.C1Excel.FileFormat.OpenXml)
To write code in C#
C#
C1XLBook wb = new C1XLBook();
// Add some content
XLSheet sheet = wb.Sheets[0];
for (int i = 0; i <= 9; i++)
{
sheet[i,0].Value = i + 1;
}
// Export to OpenXml Format file
wb.Save(@"C:\test.xlsx");
// or
// Export to OpenXml Format file
wb.Save(@"C:\test.xlsx", C1.C1Excel.FileFormat.OpenXml);
Creating Subtotals
The following code provides an example of how to format the cells of a book.
1. 1. Double-click the C1XLBook component in the Toolbox to add it to your form.
2. Select View | Code and add one of the following statements at the top of the form:
Import C1.C1Excel (Visual Basic)
using C1.C1Excel; (C#)
3. Add the following code to the Form_Load event:
To write code in Visual Basic
Visual Basic
Private Sub Form1_Load(sender As Object, e As EventArgs)
Dim book As New C1XLBook()
Dim sheet As XLSheet = book.Sheets(0)
Dim totalStyle As New XLStyle(book)
totalStyle.Font = New Font(book.DefaultFont, FontStyle.Bold)
sheet(2, 1).Value = "Number"
sheet(2, 2).Value = "ID"
sheet(3, 1).Value = 12
sheet(3, 2).Value = 17
sheet.Rows(3).OutlineLevel = 2
sheet.Rows(3).Visible = False
Excel for WinForms 32
Copyright © 2019 GrapeCity, Inc. All rights reserved.

sheet(4, 1).Value = 12
sheet(4, 2).Value = 14
sheet.Rows(4).OutlineLevel = 2
sheet.Rows(4).Visible = False
sheet(5, 1).Value = "12 Total"
sheet(5, 1).Style = totalStyle
sheet(5, 2).Value = 31
sheet(5, 2).Formula = "SUBTOTAL(9,C4:C5)"
sheet.Rows(5).OutlineLevel = 1
sheet(6, 1).Value = 34
sheet(6, 2).Value = 109
sheet.Rows(6).OutlineLevel = 2
sheet(7, 1).Value = "34 Total"
sheet(7, 1).Style = totalStyle
sheet(7, 2).Value = 109
sheet(7, 2).Formula = "SUBTOTAL(9,C7:C7)"
sheet.Rows(7).OutlineLevel = 1
sheet(8, 1).Value = "Grand Total"
sheet(8, 1).Style = totalStyle
sheet(8, 2).Value = 140
sheet(8, 2).Formula = "SUBTOTAL(9,C4:C7)"
sheet.Rows(8).OutlineLevel = 0
book.Save("c:\mybook.xls")
System.Diagnostics.Process.Start("C:\mybook.xls")
End Sub
To write code in C#
C#
private void Form1_Load(object sender, EventArgs e)
{
C1XLBook book = new C1XLBook();
XLSheet sheet = book.Sheets[0];
XLStyle totalStyle = new XLStyle(book);
totalStyle.Font = new Font(book.DefaultFont, FontStyle.Bold);
sheet[2, 1].Value = "Number";
sheet[2, 2].Value = "ID";
sheet[3, 1].Value = 12;
sheet[3, 2].Value = 17;
sheet.Rows[3].OutlineLevel = 2;
sheet.Rows[3].Visible = false;
sheet[4, 1].Value = 12;
sheet[4, 2].Value = 14;
sheet.Rows[4].OutlineLevel = 2;
sheet.Rows[4].Visible = false;
sheet[5, 1].Value = "12 Total";
sheet[5, 1].Style = totalStyle;
sheet[5, 2].Value = 31;
sheet[5, 2].Formula = "SUBTOTAL(9,C4:C5)";
sheet.Rows[5].OutlineLevel = 1;
sheet[6, 1].Value = 34;
Excel for WinForms 33
Copyright © 2019 GrapeCity, Inc. All rights reserved.

sheet[6, 2].Value = 109;
sheet.Rows[6].OutlineLevel = 2;
sheet[7, 1].Value = "34 Total";
sheet[7, 1].Style = totalStyle;
sheet[7, 2].Value = 109;
sheet[7, 2].Formula = "SUBTOTAL(9,C7:C7)";
sheet.Rows[7].OutlineLevel = 1;
sheet[8, 1].Value = "Grand Total";
sheet[8, 1].Style = totalStyle;
sheet[8, 2].Value = 140;
sheet[8, 2].Formula = "SUBTOTAL(9,C4:C7)";
sheet.Rows[8].OutlineLevel = 0;
book.Save(@"c:\mybook.xls");
System.Diagnostics.Process.Start(@"C:\mybook.xls");
}
4. Run the program. The spreadsheet will open and look similar to the following:
The SUBTOTAL formulas get the sum of the specified rows.
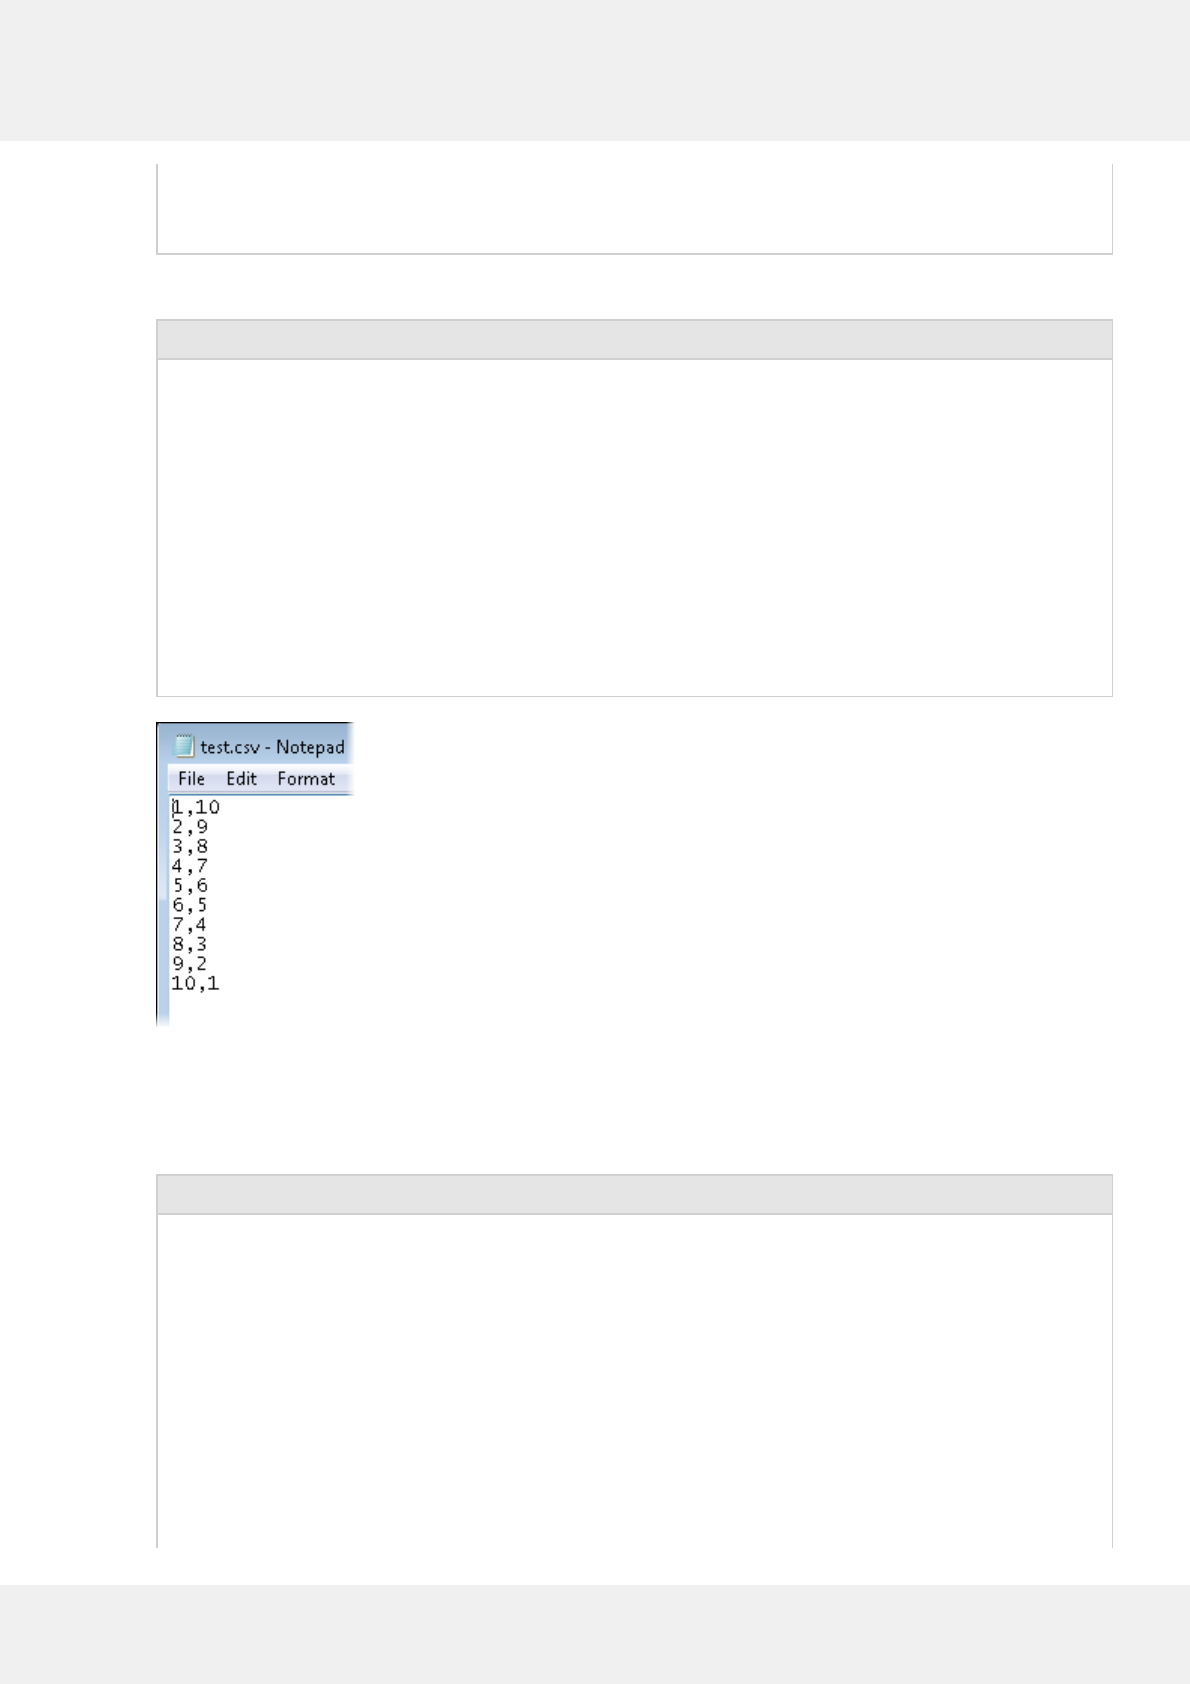
Saving and Loading CSV Files
Excel for .NET supports saving and loading comma-separated values (CSV) files. CSV is a common file format that
stores tabular data, including numbers and text, in plain text form for easy readability.
The following code provides an example of how to save and load a .csv file:
1. Double-click the C1XLBook component in the Toolbox to add it to your form.
2. Select View | Code and add one of the following statements at the top of the form:
Import C1.C1Excel (Visual Basic)
using C1.C1Excel; (C#)
3. Add the following code to the Form_Load event to create a sheet with 10 values and save the workbook to .csv
format:
To write code in Visual Basic
Visual Basic
Private Sub Form1_Load(sender As Object, e As EventArgs)
Dim sheet As XLSheet = c1XLBook1.Sheets(0)
For i As Integer = 0 To 9
sheet(i, 0).Value = i + 1
sheet(i, 1).Value = 10 – i;
Next
Excel for WinForms 34
Copyright © 2019 GrapeCity, Inc. All rights reserved.
sheet.SaveCsv("c:\test.csv")
System.Diagnostics.Process.Start("C:\test.csv")
End Sub
To write code in C#
C#
private void Form1_Load(object sender, EventArgs e)
{
XLSheet sheet = c1XLBook1.Sheets[0];
for (int i = 0; i <= 9; i++)
{
sheet[i, 0].Value = i + 1;
sheet[i, 1].Value = 10 - i;
}
sheet.SaveCsv(@"c:\test.csv");
System.Diagnostics.Process.Start(@"C:\test.csv");
}
4. Press F5 to run the project and view the .csv file:
5. Add some new values to the test.csv file. You'll need to save again in order to save the new values to the file.
You can do this by adding code for the LoadCsv and SaveCsv methods to the Form1_Load event so it now
looks like this:
To write code in Visual Basic
Visual Basic
Private Sub Form1_Load(sender As Object, e As EventArgs)
Dim sheet As XLSheet = c1XLBook1.Sheets(0)
For i As Integer = 0 To 9
sheet(i, 0).Value = i + 1
sheet(i, 1).Value = 10 – 1
Next
sheet.SaveCsv("c:\test.csv")
sheet.LoadCsv("c:\test.csv")
For i As Integer = 10 To 19
sheet(i, 0).Value = i + 1
sheet(i, 1).Value = 10 -1
Excel for WinForms 35
Copyright © 2019 GrapeCity, Inc. All rights reserved.

Next
sheet.SaveCsv("c:\test.csv")
System.Diagnostics.Process.Start("C:\test.csv")
End Sub
To write code in C#
C#
private void Form1_Load(object sender, EventArgs e)
{
XLSheet sheet = c1XLBook1.Sheets[0];
for (int i = 0; i <= 9; i++)
{
sheet[i, 0].Value = i + 1;
sheet[i, 1].Value = 10 – i;
}
sheet.SaveCsv(@"c:\test.csv");
sheet.LoadCsv(@"c:\test.csv");
for (int i = 10; i <= 19; i++)
{
sheet[i, 0].Value = i + 1;
sheet[i, 1].Value = 20 – i;
}
sheet.SaveCsv(@"c:\test.csv");
System.Diagnostics.Process.Start(@"C:\test.csv");
}
6. Press F5 to run the project again and view the .csv file:
Loading and Saving Macro enabled Excel Files
Excel for WinForms 36
Copyright © 2019 GrapeCity, Inc. All rights reserved.

Excel for .NET supports loading and saving OpenXMLMacro file format. The macro-enabled Excel files (XLSM) written
in Visual Basic Application (VBA) language can now be loaded and saved in C1Excel. XLSM is Excel Macro-enabled
spreadsheet devised by Microsoft Excel. It contains embedded macros programmed in VBA code. XLSM files are
similar to XLSX files, but with macros enabled.
The following code provides an example of how to load template xls file with VBA macro and save the files in XLSM
format:
1. Double-click Button control in the Toolbox to add it to your form. Change the Name and Text properties of
the button, for instance, Name of the button can be btnLoad and Text displayed on it can be Load.
2. Double-click C1XLBook component in the Toolbox to add it to your form.
3. Double click Button control on the form to add the btnLoad_Click event and switch to code view.
4. Add the following code to the Form to add C1.C1Excel namespace:
To write code in Visual Basic
Visual Basic
Imports C1.C1Excel
To write code in C#
C#
using C1.C1Excel;
5. Add the following code to the btnLoad_Click event to save the workbook in .xlsm format:
To write code in Visual Basic
Visual Basic
' copy the book
Dim xlsFileName As String = "..\..\XlsxTestBin.xlsm"
C1XLBook1.Load(xlsFileName)
C1XLBook1.Sheets(0)(0, 0).Value = "It is copy!"
xlsFileName = xlsFileName.Replace(".xlsm", "Modified.xlsm")
C1XLBook1.Save(xlsFileName)
' run Excel file
System.Diagnostics.Process.Start(xlsFileName)
To write code in C#
C#
// copy the book
string xlsFileName = "..\\..\\XlsxTestBin.xlsm";
c1XLBook1.Load(xlsFileName);
c1XLBook1.Sheets[0][0, 0].Value = "It is copy!";
xlsFileName = xlsFileName.Replace(".xlsm", "Modified.xlsm");
c1XLBook1.Save(xlsFileName);
// run Excel file
System.Diagnostics.Process.Start(xlsFileName);
copyCode
copyCode
Excel for WinForms 37
Copyright © 2019 GrapeCity, Inc. All rights reserved.

6. Press F5 to run the project and view the .xslm file, similar to the one given below:
Setting Print Area in a Sheet
To set print area (or range) in XLSheet, use the following code to add an instance of the required XLCellRange
to C1XLBook.NamedRanges collection.
Dim sheet As XLSheet = C1XLBook1.Sheets (0)
Dim range As XLCellRange = New XLCellRange (sheet, 0, 2, 0, 4)
C1XLBook1. NamedRanges.Add ("Print_Area", range)
XLSheet sheet = C1XLBook1.Sheets(0);
XLCellRange range = new XLCellRange(sheet, 0, 2, 0, 4);
C1XLBook1.NamedRanges.Add("Print_Area", range);
Visual Basic
C#
Getting Print Area from a Sheet of Existing Excel File
To get the print area from an Excel sheet, use the following code:
C1XLBook1.Load("..\..\InputFile.xlsx")
For Each nr As XLNamedRange In C1XLBook1.NamedRanges
If nr.Name.StartsWith("Print_Area") Then
System.Diagnostics.Debug.WriteLine(nr.Name +
nr.CellRanges.ToString())
End If
Next
C1XLBook1.Load("..\\..\\InputFile.xlsx");
foreach (XLNamedRange nr in C1XLBook1.NamedRanges)
{
if (nr.Name.StartsWith("Print_Area"))
Visual Basic
C#
Excel for WinForms 38
Copyright © 2019 GrapeCity, Inc. All rights reserved.

{
System.Diagnostics.Debug.WriteLine(nr.Name +
nr.CellRanges.ToString());
}
}
Copying a Sheet
To copy a sheet (including its print area) to another Excel sheet, use the following code:
C1XLBook1.Load("..\..\InputFile.xlsx")
Dim sheet1 As XLSheet = C1XLBook1.Sheets(0)
Dim sheet2 As XLSheet = C1XLBook1.Sheets(1)
For r As Integer = 0 To sheet1.Rows.Count - 1
Dim row As XLRow = sheet1.Rows(r).Clone()
sheet2.Rows.Insert(r, row)
Next
Dim nrPA As XLNamedRange = C1XLBook1.NamedRanges(0)
For Each nr As XLNamedRange In C1XLBook1.NamedRanges
If nr.Name.StartsWith("Print_Area") Then
nrPA = nr
End If
Next
C1XLBook1.NamedRanges.Add("Print_Area", New XLCellRange(sheet2,
nrPA.CellRange.RowFrom,
nrPA.CellRange.RowTo, nrPA.CellRange.ColumnFrom,
nrPA.CellRange.ColumnTo))
C1XLBook1.Save("..\..\OutputFile.xlsx", FileFormat.OpenXml)
C1XLBook1.Load("..\\..\\InputFile.xlsx");
XLSheet sheet1 = C1XLBook1.Sheets[0];
XLSheet sheet2 = C1XLBook1.Sheets[1];
for (int r = 0; r < sheet1.Rows.Count; r++)
{
XLRow row = sheet1.Rows[r].Clone();
sheet2.Rows.Insert(r, row);
}
XLNamedRange nrPA = C1XLBook1.NamedRanges[0];
foreach (XLNamedRange nr in C1XLBook1.NamedRanges)
{
if (nr.Name.StartsWith("Print_Area"))
{
nrPA = nr;
Visual Basic
C#
Excel for WinForms 39
Copyright © 2019 GrapeCity, Inc. All rights reserved.

}
}
C1XLBook1.NamedRanges.Add("Print_Area", new XLCellRange(sheet2,
nrPA.CellRange.RowFrom,
nrPA.CellRange.RowTo, nrPA.CellRange.ColumnFrom,
nrPA.CellRange.ColumnTo));
C1XLBook1.Save("..\\..\\OutputFile.xlsx", FileFormat.OpenXml);
Excel for WinForms 40
Copyright © 2019 GrapeCity, Inc. All rights reserved.

Excel for .NET Samples
Please be advised that this ComponentOne software tool is accompanied by various sample projects and/or demos
which may make use of other development tools included with the ComponentOne Studio.
Please refer to the pre-installed product samples through the following path:
Documents\ComponentOne Samples\WinForms
Click one of the following links to view a list of Excel for .NET samples:
To write code in Visual Basic
Sample Description
AutoSizeColumns The sample loops through all cells measuring their contents, then sets the column widths
based on the widest entry. This sample takes into account the cell contents, format and font.
It does not account for content wrapping or merging. This sample uses the C1XLBook
component.
CellBorders The sample allows you to create borders around arbitrary ranges. You can control border
width, style, color, and so on When you are done creating the borders, click the last button
on the toolbar to export the grid to Excel, including the custom borders. This sample uses
the C1FlexGrid, C1XLBook, and the Microsoft ImageList components.
CombineSheets This sample scans all the .xls files in a folder, clones the first sheet, renames it with the file
name, and adds the cloned sheets to a master workbook. It then saves the combined
workbook into a file and opens that. This sample uses the C1XLBook component.
ExcelPictures This sample creates a workbook with several sheets: "Images" shows a random collection of
images. "Types" shows images of different types. "Borders" shows images with different
border styles. "Alignment" shows how to align and scale images within cells. "Properties"
shows the effect of additional image properties such as brightness, grayscale, and so on. This
sample uses the C1XLBook component.
FlexGridExcel Demonstrates how to load and save XLS files. This sample uses the C1FlexGrid and
C1XLBook components.
HelloWorld This sample actually does more than save a "Hello World" document. It shows how to create
workbooks, assign names to the worksheets, create styles and assign them to cells, assign
content to cells, and save workbooks.. This sample uses the C1XLBook component.
PrintSettings This sample has a Load button that opens an existing XLS file and shows the print settings
for the first sheet. You can modify the print settings, then click the Save button to save a new
file (in the c:\temp folder). The new file is then displayed in Excel . This sample uses the
C1XLBook component.
To write code in C#
Sample Description
AutoSizeColumns The sample loops through all cells measuring their contents, then sets the column widths
based on the widest entry. This sample takes into account the cell contents, format and
font. It does not account for content wrapping or merging. This sample uses the
C1XLBook component.
CellBorders The sample allows you to create borders around arbitrary ranges. You can control border
Excel for WinForms 41
Copyright © 2019 GrapeCity, Inc. All rights reserved.

width, style, color, and so on When you are done creating the borders, click the last
button on the toolbar to export the grid to Excel, including the custom borders. This
sample uses the C1FlexGrid, C1XLBook, and the Microsoft ImageList components.
CombineSheets This sample scans all the .xls files in a folder, clones the first sheet, renames it with the file
name, and adds the cloned sheets to a master workbook. It then saves the combined
workbook into a file and opens that. This sample uses the C1XLBook component.
ExcelFormulas This sample illustrates creating a simple Excel worksheet, creating formulas in the sheet,
and setting calculated values of the cells.
ExcelPictures This sample creates a workbook with several sheets: "Images" shows a random collection
of images. "Types" shows images of different types. "Borders" shows images with
different border styles. "Alignment" shows how to align and scale images within cells.
"Properties" shows the effect of additional image properties such as brightness,
grayscale, and so on. This sample uses the C1XLBook component.
FlexGridExcel Demonstrates how to load and save XLS files. This sample uses the C1FlexGrid and
C1XLBook components.
HelloWorld This sample actually does more than save a "Hello World" document. It shows how to
create workbooks, assign names to the worksheets, create styles and assign them to cells,
assign content to cells, and save workbooks.. This sample uses the C1XLBook component.
PrintSettings This sample has a Load button that opens an existing XLS file and shows the print
settings for the first sheet. You can modify the print settings, then click the Save button
to save a new file (in the c:\temp folder). The new file is then displayed in Excel . This
sample uses the C1XLBook component.
OpenXmlMacroCopy This sample loads the template xls file with VBA macro in a folder, clones the workbook,
adds comment about copy, renames it with the file name. It then saves the new
workbook into a file and opens that. It works only for XLSM files (Open XML format with
VBA macro).
Excel for WinForms 42
Copyright © 2019 GrapeCity, Inc. All rights reserved.
