
Juniper Mist Automaon Guide
Published
2024-08-22

Juniper Networks, Inc.
1133 Innovaon Way
Sunnyvale, California 94089
USA
408-745-2000
www.juniper.net
Juniper Networks, the Juniper Networks logo, Juniper, and Junos are registered trademarks of Juniper Networks, Inc.
in the United States and other countries. All other trademarks, service marks, registered marks, or registered service
marks are the property of their respecve owners.
Juniper Networks assumes no responsibility for any inaccuracies in this document. Juniper Networks reserves the right
to change, modify, transfer, or otherwise revise this publicaon without noce.
Juniper Mist Automaon Guide
Copyright © 2024 Juniper Networks, Inc. All rights reserved.
The informaon in this document is current as of the date on the tle page.
YEAR 2000 NOTICE
Juniper Networks hardware and soware products are Year 2000 compliant. Junos OS has no known me-related
limitaons through the year 2038. However, the NTP applicaon is known to have some diculty in the year 2036.
END USER LICENSE AGREEMENT
The Juniper Networks product that is the subject of this technical documentaon consists of (or is intended for use
with) Juniper Networks soware. Use of such soware is subject to the terms and condions of the End User License
Agreement ("EULA") posted at hps://support.juniper.net/support/eula/. By downloading, installing or using such
soware, you agree to the terms and condions of that EULA.
ii

Table of Contents
1
Overview
Introducon to Juniper Mist Automaon | 2
2
REST API
RESTful API Overview | 4
API Endpoints and Global Regions | 9
Determine Your API Endpoint | 9
List of API Endpoint URLs | 10
Create API Tokens | 10
Create an Organizaon Token in the Mist Portal | 11
Create a User Token in the Mist Portal | 14
Create a User or Organizaon Token Using the REST API Explorer | 15
REST API HTTP Response Codes | 17
Use the Django Web Interface to Make API Changes | 18
RESTful API Paginaon Example | 19
Mist API Metrics | 22
SLE API Documentaon | 24
Automac Site-Creaon (Use Case) | 36
Renaming Access Points (Use Case) | 36
BLE Import (Use Case) | 41
API with Wired Assurance | 47
Demo: A Non-Programmer Approach to API | 50
Addional RESTful API Documentaon | 50
3
Webhooks
iii

Webhooks Overview | 52
Webhook Message Flow | 53
Webhook Source Addresses | 54
Webhook Hierarchy | 55
Webhook Hierarchy Overview | 55
Organizaon Webhooks | 56
Site Webhooks | 56
Webhook Topics | 58
Webhooks and Alerts | 63
Webhook Messages | 69
Message Format | 70
Infrastructure Payload Examples | 71
Locaon Payload Examples | 76
Conguring Webhooks from the API | 81
Create Webhooks from the API | 83
Update a Webhook from the API | 84
Delete Webhooks from the API | 85
Congure Device-Updowns Disconnecon Sensivity | 86
Conguring Webhooks in the Juniper Mist Portal | 86
Add a Webhook in the Juniper Mist Portal | 87
Update a Webhook in the Juniper Mist Portal | 89
Delete a Webhook in the Juniper Mist Portal | 89
Congure Zone Entry and Exit Events (Use Case) | 90
Tesng Webhooks | 91
4
WebSocket
WebSocket API Overview | 94
Stream Device Data with a WebSocket (Use Case) | 97
Communicate with a MIST WebSocket Endpoint | 97
iv


Introducon to Juniper Mist Automaon
Read this guide to learn about automaon and integraon with Juniper Mist™.
You can automate many Juniper Mist processes by using the RESTful API, webhooks, and the
WebSocket API.
As a network administrator, you can use this guide to get familiar with essenal concepts and available
tools. You’ll also walk through several use cases that illustrate the impact of automaon.
Get started with these overviews:
• RESTful API Overview
• Webhooks Overview
• WebSocket API Overview
2

2
CHAPTER
REST API
RESTful API Overview | 4
API Endpoints and Global Regions | 9
Create API Tokens | 10
REST API HTTP Response Codes | 17
Use the Django Web Interface to Make API Changes | 18
Mist API Metrics | 22
SLE API Documentaon | 24
Automac Site-Creaon (Use Case) | 36
Renaming Access Points (Use Case) | 36
BLE Import (Use Case) | 41
API with Wired Assurance | 47
Demo: A Non-Programmer Approach to API | 50
Addional RESTful API Documentaon | 50

RESTful API Overview
IN THIS SECTION
Juniper Mist API Architecture | 4
RESTful API Requests | 5
API Endpoint URL Format | 6
JSON Payload | 7
API Rate Liming | 7
API Authencaon Opons | 7
A Simple API Example | 8
The 100% API architecture of Juniper Mist backs every visible feature in the Juniper Mist portal.
Anything that you can do in the portal, you can automate at scale by using the API. Representaonal
State Transfer (REST) is a stateless client-server architecture with a uniform interface. Since machines
have no use for a user interface, APIs allow for a dened and faster way for machines to communicate
with each other. APIs also enable you and other users to create your own way of interacng with
systems and applicaons. You can even create custom features.
The Juniper Mist API is available to any customer with a Juniper Mist account.
Juniper Mist API Architecture
Juniper Mist uses REST APIs, which use HTTP methods (GET, POST, PUT, and DELETE) to transfer data
in JavaScript Object Notaon (JSON) format.
4

As shown below, you can interact with Mist using the RESTful APIs in mulple ways.
RESTful API Requests
Using RESTful APIs follows a similar pracce to the CRUD (CREATE, READ, UPDATE, DELETE)
methodology used in development. These are the four basic acons or funcons used when working
with data.
Table 1: Basic CRUD
Acons
CRUD HTTP/REST
Create POST
Read GET
Update PUT
Delete DELETE
REST commands include:
• POST: Create an object.—POST overwrites any exisng values with those contained in the payload.
Values that are not specied in the POST payload are reverted to their original values.
• GET: List objects.—GET returns the value of a resource or a list of resources, depending on whether
an idener is specied.
5

• GET /api/v1/orgs/:org_id/site
returns a list of sites belonging to the
:org_id
.
• GET /api/v1/sites/:site_id
returns informaon about the site specied by the
:site_id
.
• PUT: Update an object.—PUT modies all specied values in the payload. Any elds not specied in
the payload are le intact.
• DELETE: Remove an object.—DELETE removes a resource.
To perform any of the above commands on the REST API, you need to fulll a few requirements in each
request, such as:
• Authencaon: You can use an API token, Juniper Mist login credenals, or an external OAuth2
provider
NOTE: If you are already logged in on manage.mist.com, you can simply open a new browser
tab and go to hps://api.mist.com/api/v1/self/apitokens and click the POST buon. This will
automacally create a new api user token.
See "Create API Tokens" on page 10 for more informaon about tokens.
• HTTP Header: This header species the content and the authorizaon type, as follows:
• For Juniper Mist, the content type is always applicaon/json.
• The authorizaon can be a token or a cookie (including CSRF token and session ID).
• "API Endpoint" on page 6
• "JSON Payload" on page 7
API Endpoint URL Format
The API endpoint URL has two parts:
• API Endpoint—The endpoint for the global region that your Juniper Mist organizaon is associated
with. See "API Endpoints and Global Regions" on page 9.
• Funcon—Everything aer the API endpoint represents the funcon that the API will call.
Example
6

https://<api-endpoint>/api/v1/sites/:<site-id>/stats/devices/:<device_id>.
NOTE: You would replace the bracketed items with the actual values for your API endpoint, site
ID, and device ID.
Everything aer <api-endpoint> is the funcon. The call goes to the global cloud and requests the
stascs for the specied device at the specied site.
JSON Payload
Dierent funcons require dierent elements in the JSON payload. You can view the required details in
the API documentaon.
How to view the API documentaon:
1. Log in to your Juniper Mist portal.
2. Click the Help buon (near the top right corner of the screen).
3. Click API Documentaon.
API Rate Liming
Juniper Mist limits API calls to 5,000 per hour. If you need a higher rate limit, contact Juniper support
about your use case.
NOTE: To prevent brute-force aacks, the login API (/api/v1/login) is rate-limited aer three
login failures.
API Authencaon Opons
The Juniper Mist API allows three opons for requesng authencaon:
• Basic Authencaon—Token
7

• Secure it like a password.
• For instrucons about creang an API token, see "Create API Tokens" on page 10.
• HTTP Login— Username and Password
• Is like a dashboard login.
• Can be two-factor authencaon.
• OAuth2
• Account must be linked to an OAuth provider.
• Requires browser access.
A Simple API Example
Using the Django API interface, you can make your rst API call. Aer logging in to Mist, open a new
window using the same browser and enter the URL https://api.mist.com/api/v1/self.
This is equivalent to making this API call GET /api/v1/self.
8

The result, shown above, displays the privileges assigned to you for the organizaons and sites you are
associated with.
RELATED DOCUMENTATION
Addional RESTful API Documentaon | 50
API Endpoints and Global Regions
SUMMARY
API endpoints vary by global region. You need to use
the correct API endpoint for the region that your
Juniper Mist organizaon is associated with.
IN THIS SECTION
Determine Your API Endpoint | 9
List of API Endpoint URLs | 10
Determine Your API Endpoint
You can determine the correct API endpoint URL for your organizaon by looking in the address bar of
the Juniper Mist portal.
1. Log in to the Juniper Mist portal.
2. In the address bar, noce the rst part of the URL, starng with the word
manage
and ending with
com
.
Example: hps://manage.ac2.mist.com/admin/?org_id=xxxxxxx-xxxx-xxx
Your API endpoint is similar but starts with
api
instead of
manage
.
In the above example, the resulng API endpoint URL is api.ac2.mist.com.
TIP: The portal URL also contains your organizaon ID. In the URL, the organizaon ID
secon starts with these characters:
org_id=
9

List of API Endpoint URLs
Table 2: Endpoints by Global Region
Global 01 Global 02 Global 03 Global 04 Europe 01
api.mist.com api.gc1.mist.com api.ac2.mist.com api.gc2.mist.com api.eu.mist.com
Create API Tokens
IN THIS SECTION
Create an Organizaon Token in the Mist Portal | 11
Create a User Token in the Mist Portal | 14
Create a User or Organizaon Token Using the REST API Explorer | 15
API tokens contain authencaon informaon and are bound to specic users or an enre organizaon.
API tokens send idencaon informaon about the user or organizaon to the API server to indicate
whether or not the user has access to the API, to ensure security.
Like many other API providers, Juniper Mist oers a way to generate API tokens for authencaon (in
the HTTP header). When considering tokens, Juniper Mist uses the terms
token
and
key
interchangeably.
The following characteriscs pertain to user API tokens:
• The API token assumes the same privileges as the assigned user’s account privileges.
• Juniper Mist automacally removes an API token that has not been used for 90 consecuve days.
• The base Uniform Resource Idener (URI) for the Juniper Mist API is {api_endpoint}/api/v1/.
NOTE: In place of {api_endpoint}, you need to use the API endpoint for your global region.
See "API Endpoints and Global Regions" on page 9.
10

In Juniper Mist, there are two types of API tokens:
• Organizaon Token
• The token persists under the Mist organizaon.
• The token is not bound to any specic user, meaning the access does not depend upon any user’s
access to the organizaon.
• Supports
N
org tokens, which can have dierent privileges.
• The token can only be used for that specic organizaon.
• Rate liming is done by the individual token. For example, if OrgToken1 consumes 5000 API calls
and reaches the rate limit, OrgToken2 is not impacted.
• User Token
• The token persists to a specic user account.
• The token is bound to the specic user, meaning the access directly correlates to the user’s access
to the organizaon.
• The token can be used for any Managed Service Provider (MSP) or organizaon that the user has
access to.
• Supports
N
tokens, which all have the same privilege as the user account.
• Rate liming is done by the account that is ed to the user. For example, if UserToken1 consumes
5000 API calls and reaches the rate limit, UserToken2 AND account log in to the GUI are
impacted.
You can create API tokens through the Mist Portal or REST API Explorer.
Create an Organizaon Token in the Mist Portal
1. From the le menu of the Juniper Mist portal, select Organizaon > Admin > Sengs.
2. Scroll down to the API Token secon and click Create Token.
3. Select an Access Level to dene the permissions for the token.
11

4. Click Generate.
5. Click the copy buon next to the Key eld and store it somewhere for safekeeping.
12

NOTE: The only me you will see the enre, untruncated key is upon creaon. You will not be
able to see the full key ever again. If you misplace the key, you will have to create a new key.
13

6. Click Done at the boom of the window.
7. Click Save near the top-right corner of the page.
Create a User Token in the Mist Portal
You can generate an API user token from the My Account page in the Mist portal.
To generate an API user token:
1. At the top-right corner of the Juniper Mist portal, click the Juniper Mist Account icon, and then click
My Account.
2. In the API Token secon, click Create Token. If you have enabled single sign-on for your organizaon,
you will not be able to create API user tokens.
3. Enter a name for the token and click Generate. The generated key is the user API token.
4. Click the copy buon next to the Key eld.
14

Ensure to store the key somewhere for safekeeping as you will not be able to see the full key again. If
you misplace the key, you’ll need to create a new key.
5. Click Done.
NOTE: If you need to delete a user token, click the token in the API Token secon of the My
Prole page, and then click Delete in the Edit Token page.
Create a User or Organizaon Token Using the REST API Explorer
1. Log in to the Juniper Mist portal.
15

NOTE: You must be logged into the portal to use the REST API Explorer.
2. Open a new browser window and paste your URL: {api_endpoint}/api/v1/self/apitokens.
NOTE: In place of {api_endpoint}, you need to use the API endpoint for your global region.
See "API Endpoints and Global Regions" on page 9.
The REST API Explorer is the API page for token control. Here you can create, read, update, and
delete tokens and token informaon. This page inially displays the tokens that you have already
created.
This page also enables you and other users to make an API call directly from the browser. With Media
type: applicaons/json already selected as the default, a GET request will be performed to show you
a list of your tokens. A truncated key will display for any previously created tokens.
3. Click POST.
16

The response will be similar to this example:
{
"id": "437de3bf-acd2-4bed-****-cbba973b91f8",
"last_used": null,
"key": "L0kN12lkn4lkn***nklnqlkewnrsFTJ",
"created_time": 1596821422
}
4. Copy the key (token) and store it for safekeeping.
NOTE: The Juniper Mist API will never again display the actual token (
key
) in full, anywhere,
aer creang the key. Aer you navigate away from this page and come back, the key will
appear but in a truncated version. You should treat this key as a password and store it in a
safe place. If you lose this key, you will need to create a new one.
REST API HTTP Response Codes
Here’s the full list of HTTP response codes and denions: hps://www.rfc-editor.org/rfc/rfc9110.html
Juniper Mist uses the following response codes:
Table 3: HTTP Response Codes
Status Descripon
200 OK
400 Bad Request. The API endpoint exists but its syntax/
payload is incorrect, detail may be given
401 Unauthorized
403 Permission Denied
404 Not found. The API endpoint doesn’t exist, or the
resource doesn’t exist.
17

Use the Django Web Interface to Make API Changes
IN THIS SECTION
RESTful API Paginaon Example | 19
The Juniper Mist API is built on a Django Representaonal State Transfer (REST) framework. This
architecture allows for a browsable API. This API allows for increased usability and exibility by enabling
you and other users to perform CRUD operaons within the API. In a sense, the Django interface acts
like a RESTful client. This funcon is handy for execung CRUD operaons on a single API object.
To make a change to a conguraon object, you must be logged in to the Juniper Mist portal and know
the URL API path of the object. Consult the API documentaon, for details and parameters for changing
objects. You will nd the URL API paths for all objects available.
This task walks you through how to get device informaon from an access point (AP) and rename the AP
directly from the Django interface.
To use the Django web interface to make API changes:
1. Log in to the Juniper Mist portal.
2. Open the API URL for a specic device: hps://<api-endpoint>/api/v1/sites/<site_id>/devices?
name=<device name>. The device name is case-sensive.
NOTE: Replace the placeholders with the correct API endpoint, site ID, and device name.
In this case, the URL will look like this (porons of the site_id are omied): hps://<api-
endpoint>/api/v1/sites/c1947558-268d-4d31-xxxx-xxxxxxxxxxxx/devices?name=TEST-rename
The browser issues a GET /api/v1/sites/c1947558-268d-4d31-xxxx-xxxxxxxxxxxx/devices?
name=TEST-rename command through the Django interface.
Juniper Mist assigns every device a unique idener, which is typically based on the MAC address
(00000000-0000-0000-1000-<device_mac>). In the context of the device API, it is called id. You
need to reference the AP using id so the API knows which specic device to rename.
3.
To make the change, insert the device ID (id) into the API call and display it in the browser.
The new call will look like this: hps://api.mist.com/api/v1/sites/c1947558-268d-4d31-xxxx-
xxxxxxxxxxxx/devices/00000000-0000-0000-1000-5c5b3xxxxxxx. The output is the same as the
18

previous request; however, the API context now enables you to make a change to the specic device
based on the id and not the name. (Noce the lack of enclosing “[ ]” brackets.)
4. Enter the JavaScript Object Notaon (JSON)-formaed text in the Content input box for the
intended AP rename call. You do not need to include the unique device ID (id) because the id context
exists in the URL.
{
"name": "RENAMED"
}
5. Once complete, press PUT to push the request to Juniper Mist. The results should look like this,
indicang that the AP has been renamed:
{
"id": "00000000-0000-0000-1000-5c5b3xxxxxx",
"name": "RENAMED",
"site_id": "c1947558-268d-4d31-xxxx-xxxxxxxxxxxx",
"org_id": "3f12cb79-fb5e-4d4b-xxxx-xxxxxxxxxxxx",
"created_time": 1685989351,
"modified_time": 1686321430,
"map_id": null,
"mac": "5c5b3xxxxxxxx",
"serial": "A07451xxxxxxx",
"model": "AP43",
"hw_rev": "C02",
"type": "ap",
"tag_uuid": "3f12cb79-fb5e-4d4b-xxxx-xxxxxxxxxxxxxx",
"tag_id": 3056xxx,
"evpntopo_id": null,
"deviceprofile_id": null
}
For more informaon, see the Site secon of the API Documentaon site.
RESTful API Paginaon Example
Some organizaons have inventories with thousands of APs. This can be challenging when you want to
view them all with an API GET request because by default, the response will be returned without
19

paginaon on a single page. You can enable paginaon to the returned data by adding HTTP header
parameters for X-Page-Limit and X-Page-Page to the API GET request.
The X-Page-Limit denes the maximum number of results per page while the X-Page-Page denes the
maximum number of page results. The example below shows the format of a GET request that includes
paginaon:
Request URL: https://api.mist.com/api/v1/orgs/:org_id/inventory
Request Method: GET
Status Code: 200 OK
Date: Thu, 16 May 2019 04:22:05 GMT
Request Headers:
X-Page-Limit: 1000
X-Page-Page: 35
The response you receive from Mist when making the request in the Django web interface, will look like
this:
20

21

Refer to our API document for more informaon on usage: hps://api.mist.com/api/v1/docs/
Overview#query (Juniper Mist login required)
RELATED DOCUMENTATION
Addional RESTful API Documentaon | 50
API Endpoints and Global Regions | 9
Mist API Metrics
IN THIS SECTION
SLE APIs | 23
Insights APIs | 23
Mist Assurances with APIs | 24
When you use the Juniper Mist portal to monitor the operaon of your network, you gain insight into
what’s happening before it becomes an issue. You can see the network from mulple viewpoints:
wireless, wired, WAN, and others. Addionally, you can use the tools that Juniper Mist provides to
troubleshoot and correct potenal issues.
The primary Mist dashboard at Monitor > Service Levels presents the results of the predicve analycs
and correlaon engine (PACE), in the form of Service Level Expectaon (SLE) metrics. SLEs leverage
machine learning and the Mist PACE in the Juniper Mist cloud. Using these resources, SLEs turn
streaming telemetry from the access points (APs) into visualizaons represenng end users' network
experience in near real me. For more informaon about SLEs, see the Juniper Mist AI-Nave
Operaons Guide.
As with everything seen in the Mist GUI, SLEs and Insights informaon are also available from the API.
22

SLE APIs
It may be useful for you to gather informaon on specic SLEs to use for historical reporng purposes
or to trigger other automaon. Like other API calls, you begin by determining which endpoint you want
to gather data from. Below, we show an example of the API GET request for the
getSiteSleClassifierDetails endpoint:
GET
api/v1/sites/{site_id}/sle/{scope}/{scope_id}/metric/{metric}/classifier/{classifier}/
summary
Insights APIs
Insights provide an overview of network experience across the Enre Site, Access Points or wireless
Client. It’s a great place to start when checking into a site.
You can nd Insight informaon by making a GET call to one of the following Insights endpoints:
• GetSiteInsightMetrics
• GetSiteInsightMetricsForDevice
• GetSiteInsightMetricsForClient
The GET call would look like this:
GET
/api/v1/sites/{site_id}/insights/client/{client_mac}/{metric}
To view examples of available Insight metrics, log in to the Mist portal and open this link in a new tab
from the same browser:
https://api.mist.com/api/v1/const/insight_metrics
Using the previous example, you would add your desired metric at the end of the call.
23

Mist Assurances with APIs
Mist oers many cloud-based assurance services to help you idenfy the cause of poor user
experiences on the network. The assurances are automated Mist tools that provide insight into users’
connecon data and can even proacvely make conguraon adjustments to the network. Mist oers
services such as Wireless Assurance, Wired Assurance, WAN Assurance, IoT Assurance, and Access
Assurance. SLEs and Insights are two features that are included in each of these licensed oerings.
The APIs associated with Wired Assurance allow you to congure devices using Network Templates and
individual switch sengs. Wireless Assurance allows you to congure wireless templates or individual
access points. You can also get wireless SLE and Insights data from the API.
API Use Case Examples
Source of Truth
As network operaons connue to evolve, the Source of Truth (SoT) is becoming a more important
concept. This SoT allows you to describe to an external soware applicaon how the network should be
congured and have it directly interact with Mist for device conguraon.
The source of truth can be something as simple as a set of YAML or JSON data les or as sophiscated
as a dedicated applicaon or a suite of applicaons that manage and automate your enre network.
Conguring sites and devices via the API, based on data in the SoT, provides a level of control and can
keep conguraons consistent across sites and devices.
Service Oriented Conguraon
Change management is a large part of network operaons. Manual changes are both error prone and
me consuming. Integraon of change management into a plaorm like ServiceNow helps simplify
common change management requests by leng changes ow through proper change management
processes as well as reduce the human error of making the changes. The API for Wired Assurance
enables these integraons between service plaorms and the wired network conguraon.
SLE API Documentaon
IN THIS SECTION
Metrics/Classiers | 25
24

API Endpoints | 26
Calculang SLE Percentages | 29
Monitoring SLEs | 35
Many endpoints used on the Juniper Mist™ WiFi Service Levels dashboard can be found in the API docs:
hps://api.mist.com/api/v1/docs/Site#insights (requires valid login) or hps://api.ac2.mist.com/api/v1/
docs/Site#insights.
Those endpoints which may not be found in the API docs are noted below.
Metrics/Classiers
Juniper Mist SLEs support metrics and classiers. Metrics track whether the service level meets the
congured threshold value. If a metric does not meet the threshold, then this failure may be aributed
to one of the classiers to further understand where the failure occurred.
The currently supported metrics and their classiers are as follows:
AP Upme: ap-availability
• AP Reboot: ap-reboot
• AP Unreachable: ap-unreachable
• Site Down: site-down
Capacity: capacity
• AP Load: AP-load
• Non WiFi Interference: non-wi-interference
• WiFi Interference: wi-interference
Coverage: coverage
• Asymmetry Downlink: asymmetry-downlink
• Asymmetry Uplink: asymmetry-uplink
• Weak Signal: weak-signal
25

Roaming: roaming
• Failed to Fast Roam: No-Fast-Roam
• Slow 11r Roams: Subopmal-11r-roam
• Slow OKC Roams: Subopmal-okc-roam
• Slow Standard Roams: Slow-Roam
Successful Connects: failed-to-connect
• Associaon: associaon
• Authorizaon: authorizaon
• DHCP: DHCP
Throughput: throughput
• Capacity: capacity
• Coverage: coverage
• Device Capability: device-capability
• Network Issues: network-issues
Time to Connect: me-to-connect
• Associaon: associaon
• Authorizaon: authorizaon
• DHCP: DHCP
• Internet Services: IP-Services\u000C
API Endpoints
The UI ulizes a number of API endpoints to display the SLE data. Most of these endpoints are
supported for the Site, AP, or Client scopes.
The key endpoints are as follows:
Metric List: Get the list of metrics for the given scope
• Endpoint: /api/v1/sites/:site_id/sle/scope/:scope_id/metrics
26
• Site: /api/v1/sites/:site_id/sle/site/:site_id/metrics
• AP: /api/v1/sites/:site_id/sle/ap/:ap_id/metrics
• Client: /api/v1/sites/:site_id/sle/client/:client_mac/metrics
Metric Threshold: Process the SLE threshold
• EP: /api/v1/sites/:site_id/sle/:scope/:scope_id/metric/:metric/threshold
• • Site: /api/v1/sites/:site_id/sle/site/:site_id/metric/:metric/threshold
• AP: /api/v1/sites/:site_id/sle/ap/:ap_id/metric/:metric/threshold
• Client: /api/v1/sites/:site_id/sle/client/:client_mac/metric/:metric/threshold
Metric Histogram: Get the histogram for the SLE metric
• EP: /api/v1/sites/:site_id/sle/:scope/:scope_id/metric/:metric/histogram
• • Site: /api/v1/sites/:site_id/sle/site/:site_id/metric/:metric/histogram
• AP: /api/v1/sites/:site_id/sle/ap/:ap_id/metric/:metric/histogram
• Client: /api/v1/sites/:site_id/sle/client/:client_mac/metric/:metric/histogram
• Parameters:
• start
(ie: 1540591200)
• end
(ie: 1540594800)
Metric Summary: Get the summary for the SLE metric
• EP: /api/v1/sites/:site_id/sle/:scope/:scope_id/metric/:metric/summary
• Site: /api/v1/sites/:site_id/sle/site/:site_id/metric/:metric/summary
• AP: /api/v1/sites/:site_id/sle/ap/:ap_id/metric/:metric/summary
• Client: /api/v1/sites/:site_id/sle/client/:client_mac/metric/:metric/summary
• Parameters:
• start
• end\u000C
Metric Impact Summary: Get impact summary counts oponally ltered by classier and failure type
• EP: /api/v1/sites/:site_id/sle/:scope/:scope_id/metric/:metric/impact-summary
• Site: /api/v1/sites/:site_id/sle/site/:site_id/metric/:metric/impact-summary
27
• AP: /api/v1/sites/:site_id/sle/ap/:ap_id/metric/:metric/impact-summary
• Parameters:
• start
• end
• elds=wlan,device_type,device_os,band
• classier=:classier
(oponal)
Classier Summary: Get SLE classier details
• EP: /api/v1/sites/:site_id/sle/:scope/:scope_id/metric/:metric/classier/:classier/summary
• Site: /api/v1/sites/:site_id/sle/site/:site_id/metric/:metric/classier/:classier/summary
• AP: /api/v1/sites/:site_id/sle/ap/:ap_id/metric/:metric/classier/:classier/summary
• Parameters:
• start
• end
Metric Impacted Ap List: Get impacted APs oponally ltered by classier and failure type
• EP (Site): /api/v1/sites/:site_id/sle/site/:site_id/metric/:metric/impacted-aps
• Parameters:
• start
• end
• classier=:classier
(oponal)
Metric Impacted User List: Get impacted users oponally ltered by classier and failure type
• EP: /api/v1/sites/:site_id/sle/:scope/:scope_id/metric/:metric/impacted-users
• Site: /api/v1/sites/:site_id/sle/site/:site_id/metric/:metric/impacted-users
• AP: /api/v1/sites/:site_id/sle/ap/:ap_id/metric/:metric/impacted-users
• Parameters:
• • start
• end
• classier=:classier
(oponal)
28

Calculang SLE Percentages
The SLE metric success rate is calculated as a percentage of how oen the threshold was met during the
selected meframe. Classiers are also calculated as percentages, but these values indicate their impact
towards the parent failure.
For example, the below screenshot shows Time to Connect succeeded 96% of the me; all clients who
successfully connected from 3:00-4:00pm completed the connecon process within the 4 second
threshold.
This metric’s success rate (%) is derived from the “Metric Summary” API endpoint:
/api/v1/sites/:site_id/sle/site/:site_id/metric/time-to-connect/summary?
start=1540591200&end=1540594800
{
“start”: 1540591200,
“end”: 1540594800,
29

“sle”: {
“x_label”: “seconds”,
“y_label”: “seconds”,
“interval”: 600,
“name”: “time-to-connect”,
“samples”: {
“degraded”: [
0.0,
0.0,
3.0,
0.0,
3.0,
0.0
],
“total”: [
19.0,
14.0,
34.0,
8.0,
20.0,
43.0
]
30

}
}
}
The metric failure rate is calculated by dividing the failures (
sle.samples.degraded
) by the total
(
sle.samples.total
). This is then translated to the success rate percentage. Using the above API response
payload, the calculaon would look as follows:
ceil(1-[(0.0+0.0+3.0+0.0+3.0+0.0)/(19.0+14.0+34.0+8.0+20.0+43.0)])*100=
ceil(1-[6/138])*100=
ceil(1-0.04347826086)*100=
ceil(0.95652173914)*100=
0.96*100=
=96%
This screenshot shows classiers that contributed to the metric failures:
31

The classier’s impact (%) is derived from the same “Metric Summary” API endpoint:
/api/v1/sites/:site_id/sle/site/:site_id/metric/time-to-connect/summary?
start=1540591200&end=1540594800
{
“start”: 1540591200,
“end”: 1540594800,
“classifiers”: [
{
“name”: “DHCP”,
“samples”: {
“degraded”: [
0,
32

0,
0,
0,
1.0,
0
]
}
},
{
“name”: “authorization”,
“samples”: {
“degraded”: [
0,
0,
0,
0,
0,
0
]
}
},
{
33

“name”: “association”,
“samples”: {
“degraded”: [
0,
0,
3.0,
0,
1.0,
0
]
}
},
{
“name”: “IP-Services”,
“samples”: {
“degraded”: [
0,
0,
0,
0,
1.0,
34

0
]
}
}
]
}
The classier impact is calculated by dividing the classier’s failures (
classiers[n].samples.degraded
) by
the sum of all failures (
classiers[].samples.degraded
). This is then translated to a percentage. Using the
above API response payload, the calculaon for DHCP would look as follows:
ceil([0+0+0+0+1.0+0]/[(0+0+0+0+1.0+0)+(0+0+0+0+0+0)+(0+0+3.0+0+1.0+0)+(0+0+0+0+1.0+0)])*100=
ceil(1/[1.0+0+4.0+1.0])*100=
ceil(1/6)*100=
ceil(0.16666666666)*100=
0.17*100=
=17%
Monitoring SLEs
SLE data is updated every 10 minutes. However, the SLEs are prone to uctuaons when monitoring at
this granularity. Thus it is recommended to query for 1-hour intervals using the explicit start/end me,
and polling only once per hour.
35

Automac Site-Creaon (Use Case)
Automaon in a Juniper Mist network enables you and other administrators to make system changes
automacally, while minimizing human error. It also enables you to make massively scalable changes that
simply cannot be made from a GUI.
The video below shows an example of a script that creates ve hundred sites in less than 5 minutes
using a CSV le for input, a Juniper Mist device template, the Juniper Mist API, and Python:
Video: Automac Site Creaon Use Case
Renaming Access Points (Use Case)
At mes, you and other wireless administrators need to rename Juniper Mist network access points
(APs) at a specic site. Consistent naming helps provide order and consistency in network inventory
documentaon. For example, a site may physically move to a new locaon and take on a new naming
convenon.
To perform this renaming task, in the Juniper Mist portal you can perform a bulk renaming acon using a
regular expression. This opon is easy and readily available, but it can become complex if you have many
devices to rename.
Another opon is to create a Python script to rename the APs. This opon simplies the task of
renaming many devices. The example script below illustrates the Python script renaming sequence. The
script renames specic APs that have already been claimed to a site. The script uses three les, as
follows:
• The rst le (cong.json) contains the conguraon variables.
• The second le (ap-names.csv) is a CSV le that contains the MAC address of the AP to be renamed
as well as the AP’s new name.
• The third le (main-rename-ap.py) is the Python script itself, which takes informaon from the other
two les.
To use the script, you place all three les in the same working directory.
36

The rst le, which contains the JavaScript Object Notaon (JSON) formaed conguraon, includes
variables needed to connect to the API to make the required calls to nd and rename the specied APs.
{
"api": {
"org_id": "xxxxxxxx-xxxx-xxxx-xxxx-xxxxxxxxxxxx",
"token": "ApUYc...hsO",
"mist_url": "https://<api-endpoint>.mist.com/api/v1/"
},
"site": {
"id": "<site-id>"
}
}
NOTE: In place of <api-endpoint>, use the API endpoint for your global region. See "API
Endpoints and Global Regions" on page 9.
The Python script uses the contents of the CSV le to idenfy the AP (by the MAC address) and then
rename it to the new name ap-names.csv.
name,mac
<ap-name1>,aabbcc001122
<ap-name2>,aabbcc001123
<ap-name3>,aabbcc001124
By default, when you inially claim an AP, the AP takes the name of its own MAC address. The main
Python script does the actual work of nding and renaming of the AP, which consists of the following
funcons:
1. (def)—Get the MAC address of the AP to rename.
2. Find the AP on the site.
3. Rename the AP.
The main funcon (def) uses the other funcons to complete the task and loops, as necessary.
37

This is what the main-rename-ap.py script looks like:
#!/usr/bin/env python3
"""
The format of the MAC address part of this CSV file must be the following:
aabbccddeeff
"""
import argparse
import time
import json
import requests
import csv
from pprint import pprint
def is_ap_in_site(configs: dict, ap_mac: str):
"""
This function checks for an AP assigned to a site.
Parameters:
- configs: dictionary containing all configuration information
- site_id: ID of the site we will to assign the AP to
Returns:
- the ID of the AP if the AP is assigned to the site
- the current name of the AP
"""
api_url = f"{configs['api']['mist_url']}sites/{configs['site']['id']}/devices"
headers = {'Content-Type': 'application/json',
'Authorization': 'Token {}'.format(configs['api']['token'])}
response = requests.get(api_url, headers=headers)
if response.status_code == 200:
devices = json.loads(response.content.decode('utf-8'))
for device in devices:
if device['mac'] == ap_mac:
return (device['id'], device['name'])
else:
print('Something went wrong: {}'.format(response.status_code))
return (None, None)
38

def rename_ap(configs: dict, ap_id: str, new_ap_name: str, ap_old_name: str):
"""
This function renames an AP.
Parameters:
- configs: dictionary containing all configuration information
- ap_id: ID of the AP device object
- new_ap_name: name to apply to the AP
- ap_old_name: current name of the AP
"""
api_url = f"{configs['api']['mist_url']}sites/{configs['site']['id']}/devices/{ap_id}"
headers = {'Content-Type': 'application/json',
'Authorization': 'Token {}'.format(configs['api']['token'])}
body = {}
body['name'] = new_ap_name
response = requests.put(api_url, headers=headers, data=json.dumps(body))
if response.status_code == 200:
device = json.loads(response.content.decode('utf-8'))
print(f"{device['mac']} renamed from {ap_old_name} to {device['name']}")
else:
print(f"AP ID: {ap_id}\tSomething went wrong: {response.status_code}")
def retreive_ap_mac_list(csv_filename: str) -> dict:
"""
This function converts the content of the CSV file to a Python dictionary.
Parameters:
- csv_filename: the name of the comma separated value file.
Returns:
- A dictionary containing the content of the CSV file
"""
ap_csv = csv.DictReader(csv_filename)
ap_list = []
for line in ap_csv:
ap_list.append(line)
return ap_list
39

def main():
"""
This script batch renames the APs listed in a CSV file.
"""
parser = argparse.ArgumentParser(description='Configures a Mist AP for an APoS site survey')
parser.add_argument('config', metavar='config_file', type=argparse.FileType(
'r'), help='file containing all the configuration information')
parser.add_argument('ap_list', metavar='aps_names', type=argparse.FileType(
'r'), help='csv file containing new AP names')
args = parser.parse_args()
configs = json.load(args.config)
ap_mac_list = retreive_ap_mac_list(args.ap_list)
for ap in ap_mac_list:
ap_id, ap_old_name = is_ap_in_site(configs, ap['mac'])
if ap_id:
rename_ap(configs, ap_id, ap['name'], ap_old_name)
else:
print(f"AP {ap['name']} is not part of site {configs['site']['id']}")
if __name__ == '__main__':
start_time = time.time()
print('** Start the batch renaming of APs...\n')
main()
run_time = time.time() - start_time
print("\n** Time to run: %s sec" % round(run_time, 2))
To run the script, call the main-rename-ap.py script and provide the cong.json lename and the ap-
names.csv lename as arguments. For example:
user@linux-host> python main-rename-ap.py config.json ap-names.csv
Aer you run the script, the output should look something like this:
** Start the batch renaming of APs...
aabbcc001121 renamed from OLD-AP-01 to NEW-AP-01
aabbcc001122 renamed from OLD-AP-02 to NEW-AP-02
aabbcc001122 renamed from OLD-AP-03 to NEW-AP-03
40

** Time to run: 3.24 sec
You can also check the Juniper Mist portal and verify the changes by checking the device’s inventory.
Automaon is not limited to RESTful APIs and Python. You can nd other automaon opons such as
WebSocket and webhook API usage and tools to help in the development process.
RELATED DOCUMENTATION
RESTful API Overview | 4
No Link Title
REST API HTTP Response Codes | 17
hps://www.rfc-editor.org/rfc/rfc9110.html
BLE Import (Use Case)
IN THIS SECTION
Main.py Script | 42
Mist_client.py Script | 45
Assets.csv | 46
This Juniper Mist use case shows you how to eciently import your Bluetooth Low Energy (BLE) assets
with their names using the power of Juniper Mist Asset Visibility.
When you set up and acvate locaon-based services with Juniper Mist Asset Visibility, admins like you
can see all BLE clients and assets. You can also see their precise locaons, right on an indoor oor plan
or map.
For sites that use BLE asset tags, it’s handy to track these devices by giving them easily readable names
that provide some context. You can add and display these names individually within the Juniper Mist
portal, but if you have a lot of assets to manage, doing it one by one can be quite me consuming. An
easier way to do this is to run a script to import BLE assets and assign them a name in bulk.
For this use case, you need to:
41

• Enable Asset Visibility in the Site Sengs for each site.
• Make sure that you have an acve license for Asset Visibility.
• Make sure that you have placed compable APs on the oor plan.
This use case involves two scripts: main.py and mist-client.py. A third le, a CSV le called assets.csv,
contains the BLE assets and their corresponding names.
Here's the order of steps you follow when you need to import BLE assets:
1. Start by updang the main.py script with your Mist API token, Mist site universally unique idener
(UUID), and the region (or cloud) in which your organizaon is hosted.
2. Next, you add, remove, or inspect the BLE devices and their names within the assets.csv le.
3. Run the main.py script, which will use the CSV content to create the assets in Juniper Mist.
Main.py Script
A lot happens behind the scenes in the main.py script. The script imports the data from the CSV le and
converts the data into JSON format. Then, for each device, the script creates a BLE asset and triggers
the mist-client.py script. This mist-client.py script does the work of making all the necessary calls to the
Juniper Mist API.
#!/usr/bin/python
#
# main.py
#
# Update main.py with your Mist API Token and Juniper Mist site UUID.
#
# Inspect the "assets.csv" file to update the PSKs being created, then run this exercise to
automatically create BLE assets from CSV.
import sys, csv, json, re
from mist_client import Admin # Import the Juniper Mist client
mist_api_token = '' # Your Juniper Mist API token goes here. Documentation: https://
api.mist.com/api/v1/docs/Auth#api-token
site_id = '' # Your Site ID goes here
42

csv_file = 'assets.csv'
# Convert CSV file to JSON object.
def csv_to_json(file):
csv_rows = []
with open(file) as csvfile:
reader = csv.DictReader(csvfile)
title = reader.fieldnames
for row in reader:
csv_rows.extend([ {title[i]: row[title[i]] for i in range(len(title))} ])
return csv_rows
# Creates BLE assets using the given CSV file and the Juniper Mist API
def create_assets(admin, data):
for d in data:
try:
mac = re.sub(r'[^0-9a-fA-F]', '', d.get('MAC', '')).lower()
assert len(mac) == 12
assert mac.isalnum()
except:
print('Invalid MAC {}, skipping this Asset.'.format(d.get('MAC', '(none)')))
continue
# Build the asset payload
payload = {'name': d['Name'].strip(), 'mac': mac}
# Create the BLE Asset and note the targeted region (or cloud)
api_url = 'https://api.mist.com/api/v1/sites/{}/assets'.format(site_id)
(success, result) = admin.post(api_url, payload)
# Add the new PSK to the return list
if result == None:
print('Failed to create BLE Asset {}'.format(mac))
else:
if success:
print('Created BLE Asset \"{}\" ({})'.format(result.get('name', '(unnamed)'),
result['mac']))
else:
43

print('BLE Asset \"{}\" already exists with MAC Address {}'.format(d.get('Name',
'(unnamed)'), mac))
# Main function
if __name__ == '__main__':
# Check for required variables
if mist_api_token == '':
print('Please provide your Mist API token as mist_api_token')
sys.exit(1)
elif site_id == '':
print('Please provide your Mist Site UUID as site_id')
sys.exit(1)
# Create Mist client
admin = Admin(mist_api_token)
print()
print('Converting file {} to JSON...\n'.format(csv_file))
# Convert CSV to valid JSON
data = csv_to_json(csv_file)
if data == None or data == []:
print('Failed to convert CSV file to JSON. Exiting script.')
sys.exit(2)
print(json.dumps(data, indent=4, sort_keys=True))
print('\n=====\n')
# Create the WLAN PSKs from CSV file
print('Creating BLE Assets...\n')
create_assets(admin, data)
print()
44

Mist_client.py Script
The mist_client.py script funcons like a regular RESTful client for interacng with the Juniper Mist API.
The script makes API calls based on the input from the CSV le and the output of the main.py script.
The mist-client.py script also error-checks the HTTP response from the API and displays the output, as
follows:
#!/usr/bin/python
#
# mist_client.py
#
# Mist API client session.
import json, requests
# Mist CRUD operations
class Admin(object):
def __init__(self, token=''):
self.session = requests.Session()
self.headers = {
'Content-Type': 'application/json',
'Authorization': 'Token ' + token
}
def get(self, url):
session = self.session
headers = self.headers
print('GET {}'.format(url))
response = session.get(url, headers=headers)
if response.status_code != 200:
print('Failed to GET')
print('\tURL: {}'.format(url))
print('\tResponse: {} ({})'.format(response.text, response.status_code))
return False
return json.loads(response.text)
45

def post(self, url, payload, timeout=60):
session = self.session
headers = self.headers
#print('POST {}'.format(url))
response = session.post(url, headers=headers, json=payload)
if response.status_code == 400:
return (False, response.text)
elif response.status_code != 200:
'''
print('Failed to POST')
print('\tURL: {}'.format(url))
print('\tPayload: {}'.format(payload))
print('\tResponse: {} ({})'.format(response.text, response.status_code))
'''
return (False, None)
return (True, json.loads(response.text))
Assets.csv
In this example, the assets.csv le resides in the same directory as the mist_client.py and main.py les.
The following example shows how to format the CSV le with the name of the BLE asset and its
associated MAC address:
Name,MAC
Amber Badge,aa:bb:cc:dd:ee:ff
Mark Badge,11-22-33-44-55-66
Invalid MAC,xx.yy.zz.xx.yy.zz
Automaon goes beyond just using RESTful APIs and Python. Other opons like WebSocket and
webhook APIs are available. You can explore these other opons for automaon purposes.
46

API with Wired Assurance
IN THIS SECTION
Network Templates | 47
Site Sengs | 48
Switch Sengs | 48
API Use Cases | 49
There are primarily three main URI endpoints of interest with respect to Wired Assurance:
• Network Templates
• Site Sengs
• Switch Sengs
Network Templates
Documentaon is located just below RF Templates here: hps://api.mist.com/api/v1/docs/Org#rf-
template
• Create Network Template
• POST: hps://api.mist.com/api/v1/orgs/:org_id/networktemplates
• Payload: JSON Formaed Payload
• Required: name
• Get List of Network Templates
• GET: /api/v1/orgs/:org_id/networktemplates
• Payload: None
• Filters: id, name
• Get Network Template
47

• GET: /api/v1/orgs/:org_id/networktemplates/:networktemplate_id
• Payload: None
• Update Network Template
• PUT: /api/v1/orgs/:org_id/networktemplates/:networktemplate_id
• Payload: JSON Formaed Payload (only changes/addions needed)
• Delete Network Template
• DELETE: /api/v1/orgs/:org_id/networktemplates/:networktemplate_id
• Payload: None
Site Sengs
Documentaon is located here: hps://api.mist.com/api/v1/docs/Site#site-seng
• Get Site Sengs
*Includes both switching and non-switching related sengs*
• GET: /api/v1/sites/:site_id/seng
• Payload: None
• Update Site Sengs:
• PUT: /api/v1/sites/:site_id/seng
• Payload: JSON Formaed Payload (only changes/addions needed)
• To link this site to a template, add the “networktemplate_id” key with the value of the ID for the
network template to apply.
• Note: There is no POST or DELETE for site sengs. The only way to create site sengs is to create a
new site, and the only current way to delete them is to delete the site.
Switch Sengs
Switch Sengs
Documentaon is located here: hps://api.mist.com/api/v1/docs/Site#device
48

• Get Switch Sengs:
• GET: /api/v1/sites/:site_id/devices/:device_id
• Payload: None
• Update Switch Sengs:
• PUT: /api/v1/sites/:site_id/devices/:device_id
• Payload: JSON Formaed Payload (only changes/addions needed)
• Reset Switch Sengs:
• POST: /api/v1/sites/:site_id/devices/:device_id
• Payload: None or JSON
• This eecvely deletes the conguraon dened at the switch sengs and replaces it with either
nothing, or whatever is passed in the payload. Great for if you messed up and need to reset the
sengs before reconguring.
• NOTE: This is currently missing from the API documentaon. We are currently working to get it
re-added. You can nd it in the django API browser.
• Get Switch Cong Commands:
This returns the cong set commands that Mist will push to the switch. Note, this does not include
the basic connecvity (browneld cong snippet, or greeneld cong), just the sengs that are
pushed via the Template/Site/Switch conguraon from Mist.
• GET: /api/v1/sites/:site_id/devices/:device_id/cong_cmd
• Payload: None
• Super useful in both browneld deployments as well as learning and tesng EX in Mist.
API Use Cases
Source of Truth
As network operaons connues to evolve, the Source of Truth (SoT) is becoming a more important
construct. These SoTs allow us to describe how the network should be congured in an external
soware applicaon and have that SoT talk directly with Mist to congure.
The source of truth can be something as simple as a set of YAML or JSON datales or as sophiscated
as dedicated applicaons such as Netbox or NSOT. Conguring sites and switches via the API based on
49

data in the SoT provides a level of control and can keep conguraon consistent across sites and
devices.
Service Oriented Conguraon
Change management is a large part of network operaons. Manual changes are both error prone and
me consuming. Integraon of change management into ITSM plaorms like ServiceNow helps simplify
common change management requests by leng changes ow through proper change management
processes as well as reduce the human error of making the changes. The API for Wired Assurance
enables these integraons between ITSM plaorms and the wired network conguraon.
Connuing Eorts
While the API gives us some immediate opportunies to programmacally congure EX Switching, work
is already progressing for addional funconality. For example, automang the migraon Cisco IOS
conguraons as well as the automated migraon of exisng Juniper EX congs to the Mist plaorm
using exisng soware libraries and opensource tools.
Demo: A Non-Programmer Approach to API
This video shows the non-programmer way to approach the Juniper Mist™ API. Even though this
example involves switching, you can use the same approach with everything covered in the Juniper Mist
API, both wired and wireless.
In this example, Andy shows you how to use the Chrome developer tools to gure out exactly which API
endpoint is being called and how to take advantage of that in Postman.
Video: Automaon for Access Switching
Addional RESTful API Documentaon
To access API reference informaon, including parameter descripons, go to hps://www.juniper.net/
documentaon/us/en/soware/mist/api/hp/geng-started/how-to-get-started
50

Webhooks Overview
IN THIS SECTION
Webhook Message Flow | 53
Webhook Source Addresses | 54
Webhook Hierarchy | 55
Webhook Topics | 58
Webhooks and Alerts | 63
Webhook Messages | 69
You can congure webhooks to get real-me nocaons as events happen across your Juniper Mist
organizaon or within a parcular Juniper Mist site.
You may know webhooks as user-dened HTTP callbacks, HTTP posts, or HTTP nocaons. These
nocaons include event details that you can use in your own applicaons or third-party soware.
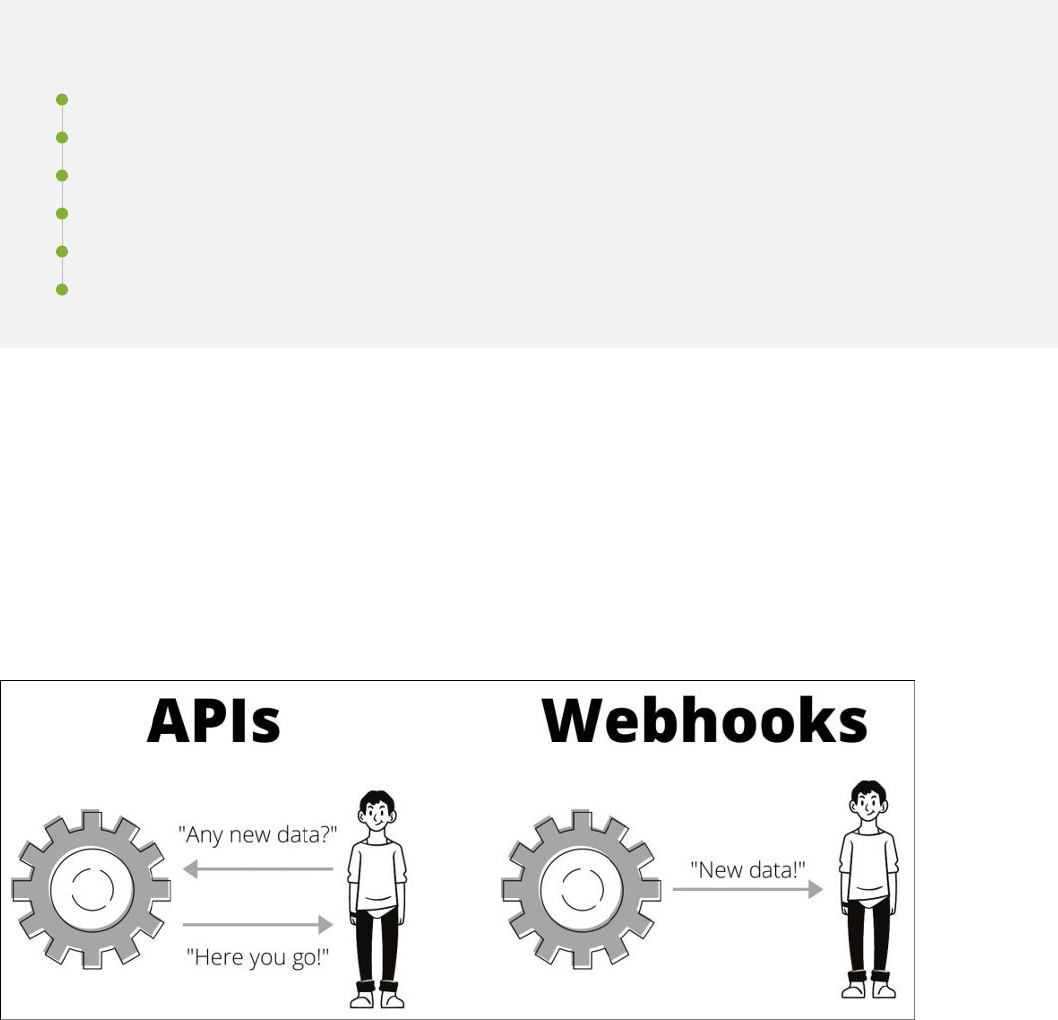
As you begin working with webhooks, it can be helpful to compare them with APIs. APIs work on a pull
or polling model. You create an API call, and Juniper Mist responds with the requested data. In contrast,
webhooks work on a push model. Aer you congure a webhook, you receive data as events occur.
52

Table 5: REST APIs and Webhooks Comparison
REST APIs Webhooks
Model Pull or polling model Push model
Limit 5000 per organizaon per hour No limit
Operaons Pull stascs, create conguraon,
update conguraon
Push alerts and key stascs
Coverage 100 percent Alerts, key events, or locaon
Recommended use cases Automaon, conguraon Integraon with third-party
monitoring tools or business
applicaons
NOTE: The concepts of alerts and alarms are considered interchangeable. However, when
conguring an alert, you should make note of the alert or alarm syntax and use what is displayed.
Webhook Message Flow
As opposed to clients polling and pulling informaon from the API, Juniper Mist pushes webhooks to a
target webhook URL. There, underlying services can collect, store, or parse the message for specic data
and then perform acons on the infrastructure automacally.
This image shows the stages of data ow for webhooks.
53

1. An event occurs on a network device that Juniper Mist manages.
2. Juniper Mist processes the event and checks the current webhook conguraon for a match.
3. If Juniper Mist nds a match, it sends the webhook to the endpoint URL as congured.
4. If mulple events for a specic topic occur within a certain meframe, Juniper Mist aggregates the
events and sends them in a single message.
Webhook Source Addresses
IN THIS SECTION
IP Source Addresses for Juniper Mist Cloud Instances | 54
IP Source Addresses for Juniper Mist Cloud Instances
When you congure webhooks to use in your Juniper Mist network, you need to specify the URL of a
public-facing webhook receiver where Mist can send messages.
To ensure that your server receives the HTTP messages from the Juniper Mist cloud, congure your
rewall to allow trac from these source addresses:
54

Table 6: Regional Cloud IP Addresses
Global 01 Global 02 Global 03 Global 04 Europe 01
54.193.71.17 34.94.226.48/28
(34.94.226.48 -
34.94.226.63)
34.231.34.177 34.152.4.85 3.122.172.223
54.215.237.20 35.236.34.24 54.235.187.11 35.203.21.42 3.121.19.146
35.236.92.224 18.233.33.230 34.152.7.156 3.120.167.1
You can use the Juniper Mist webhook ping to test connecvity from your Mist cloud through your
network infrastructure. For more informaon, see "Tesng Webhooks" on page 91 .
Webhook Hierarchy
SUMMARY
Understand the relaonship between
organizaonal- and site-level webhooks. Get
familiar with the webhook topics that you can
congure at each level.
IN THIS SECTION
Webhook Hierarchy Overview | 55
Organizaon Webhooks | 56
Site Webhooks | 56
Webhook Hierarchy Overview
Juniper Mist has two conguraon hierarchies for webhooks: the organizaon level and site level. The
conguraon method is the same for both; however, not all webhooks are available at both levels.
• All webhooks that are available at the organizaon level are also available for specic site-level
webhooks.
• The available site-level webhooks are not available at the organizaon level.
Be aware of the hierarchy when conguring webhooks.
As an example, if you have two sites and you congure the Alerts webhook at the organizaon level,
you will receive all organizaon-level alerts for both sites.
55

Conversely, if you do not congure the Alerts webhook at the organizaon level and only congure the
Alerts webhook on one of the two sites, you will receive alerts only for that single site.
Finally, if you congure the Alerts webhook at the organizaon level and a single site, the webhook
receiver will receive duplicate messages (assuming they are sent to the same receiver URL).
You can congure mulple webhook receivers for a single webhook (and its topics) from the API. It is
recommended to have a single webhook that includes all the available topics and then parse the
informaon that you want from messages received by the webhook receiver.
Organizaon Webhooks
You can congure these topics at the organizaon level:
• Alerts—Juniper Mist-dened alarm events congurable on a per-site basis in the alert framework.
• Audits—A topic that tracks conguraon changes made from the Juniper Mist dashboard.
• Client Join—The webhook that Juniper Mist triggers whenever a client joins a wireless network.
• Client Sessions—The webhook that includes informaon about each specic client.
• Device Events—A topic that is specic to events that occur on devices (currently AP, switch, and
gateway).
• Device Up/Downs—The topic that generates a message when a device starts up or goes down.
• Juniper Mist Edge Events—The topic that generates messages for a Juniper Mist Edge port and link
status changes and link aggregaon control protocol (LACP) port and link changes.
Site Webhooks
IN THIS SECTION
Locaon Webhooks | 57
Network Service Webhooks | 57
Infrastructure Webhooks | 57
You can congure these topics at the site level:
56

Locaon Webhooks
To use locaon webhooks, you must upload a oorplan with accurate AP placement through the Juniper
Mist portal to correlate the client data. For more informaon, see the
Floorplan Setup Overview
in the
Juniper Mist Locaon Services Guide.
• Locaon Coordinates—Data sent at regular intervals of less than one per second.
• Zone—Data pushed any me a client enters or exits one of the dened areas.
• Occupancy Alerts—Alerts on a congured zone occupancy threshold being exceeded.
• RSSI Zones—Alerts based upon a WLAN’s minimum RSSI value of a client’s signal strength in
relaon to the site’s APs.
• SDK Client Scan Data—Specic data about a client that isn’t available without installing an
applicaon (using the SDK) on the client itself.
• Virtual Beacon Entry and Exit Events—Data pushed any me a client enters or exits one of these
areas.
• Zone Entry and Exit Events—Data pushed any me a client enters or exits one of these areas.
Network Service Webhooks
• Latency—A webhook that provides DHCP, DNS, and authencaon latency informaon aggregated
across all the client devices at the site level.
NOTE: You'll need a Marvis subscripon to subscribe to this webhook.
Infrastructure Webhooks
• Alerts—Juniper Mist-dened alarm events congurable on a per-site basis in the alert framework.
• Audits—A topic designed to track conguraon changes made from the Juniper Mist portal.
• Client Join—This Juniper Mist webhook triggers whenever a client connects to a wireless network.
• Client Sessions—The webhook that includes informaon about each specic client.
• Device Events—The topic that is specic to events that occur on devices (currently AP, switch, and
gateway).
• Device Updowns—The topic that generates a message when a device starts up or goes down.
57

• Juniper Mist Edge Events—The topic that generates messages for the Juniper Mist edge port and
link status changes and for an LACP port (if congured) and link changes.
Webhook Topics
Aer you've enable webhooks at the organizaon, site, or both levels, select the topics that you want to
receive messages for.
Use the following tables to learn more.
Table 7: Both Organizaon and Site Topics
Topic Purpose and Payload Details
alerts (alarms) User-selected alarms for devices and infrastructure,
Marvis acons, and security. To nd alerts in the
Juniper Mist portal, select Monitor > Alerts > Alerts
Conguraon from the le menu.
Examples
• Devices and infrastructure: Device down, device
restarted, VPN peer down, ARP failure, DNS
failure.
•
Marvis: Faulty cable, failed AP health check, poor
Wi-Fi coverage, port apping, bad WAN uplink
•
Security: KRACK aack, TKIP ICV aack, rogue
client, rogue AP, honeypot
Depending on the type of alarm, the payload includes
details such as the IDs of the organizaon and site, the
event type, the severity, and the count of each event
type during the aggregaon interval.
To see which alarms are available and get examples of
their payloads, from a REST API client, issue the
following API call: GET /api/v1/const/alarm_defs
58

Table 7: Both Organizaon and Site Topics
(Connued)
Topic Purpose and Payload Details
audits A topic that all Mist conguraon changes trigger this
topic.
The payload includes details such as the
administrator’s name and username, the device ID, the
type of change, and the mestamp for the change.
client-join Client connecons only.
The payload includes details such as the IDs of the
organizaon and site; the MAC address and name of
the AP that the client connected to; and the WLAN ID,
band, SSID, RSSI, and mestamp for the connecon.
client-sessions Client session informaon.
The payload includes details such as the MAC address
and name of the AP that the client roamed to or
disconnected from, the WLAN ID, the band, the device
family (“Mac,” “iPhone,” “Apple watch”), the client
manufacturer and model, the mestamps for the
connecon and disconnecon, the oat duraon, the
RSSI, and the terminaon reason.
device-events Events aecng access points, switches, and gateways.
This topic includes events such as port up or down, AP
power changes, and channel changes.
The payload includes details such as the IDs of the
organizaon and site, the MAC address and name of
the device, and the mestamp of the event.
To see which alarms are available and get examples of
their payloads, issue the following API call from a REST
API client: GET /api/v1/const/device_events
59

Table 7: Both Organizaon and Site Topics
(Connued)
Topic Purpose and Payload Details
device-updowns Device disconnects, reconnects, and restarts.
The payload includes details such as the IDs of the
organizaon and site, the type of event, and the
device’s MAC address and name.
To congure device-updowns in the Juniper Mist portal,
select Monitor > Alerts > Alerts Conguraon from the
le menu. Here you can congure more granular
control of the types of devices and alert thresholds.
mxedge-events Juniper Mist Edge physical and LACP link status.
ping A ping event that goes to the webhook URL.
The payload includes the site ID, the webhook ID and
name, and the mestamp.
Table 8: Site-Only Topics
Topic Purpose and Payload Details
asset-raw-rssi Replaces deprecated topic named asset-raw.
Raw data from packets emied by named and ltered
assets.
The payload includes details such as the IDs of the
organizaon, site, map, AP, antenna, and asset; the AP
locaon; the RSSI; the beacon UUID and
manufacturer; the service packets; and data.
discovered-raw-rssi Raw data from packets emied by passive BLE.
The payload includes details such as the IDs of the
organizaon, site, map, reporng AP, and antenna; the
MAC address; the asset ID, manufacturer, and UUID of
the asset/beacon; and the RSSI.
60

Table 8: Site-Only Topics
(Connued)
Topic Purpose and Payload Details
locaon Locaon data for Juniper Mist SDK clients, wireless
clients, and assets.
Data includes details such as the site and map IDs, X
and Y coordinates, mestamp, the type of client, and
the client ID or MAC address.
nac-accounng This webhook triggers with any Juniper Mist network
access control (NAC) account event
(ACCOUNTING_START, ACCOUNTING_STOP,
ACCOUNTING_UPDATE). The payload includes details
such as mestamp, AP, client_ip, SSID, username,
client_type, client_mac, nas_vendor, site_id, rx_pkts,
and tx_pkts.
occupancy-alerts Occupancy status based on the congured occupancy
limits.
The payload includes details such as the IDs of the
organizaon, site, map, and zone; the event
(“COMPLIANCE-VIOLATION” or “COMPLIANCE-
OK”); the mestamp; the occupancy limit; and the
current occupancy.
rssi-zone Devices near an access point.
This topic provides informaon about devices entering
or exing a zone around an AP where the RSSI
received by the AP is above a congurable threshold.
You can create a new RSSI zone for each AP and
include the RSSI Zone name and an RSSI Zone
threshold.
sdkclient-scan-data Locaon data for Juniper Mist SDK clients.The data
includes details such as the band, channel, SSID,
BSSID, and RSSI for the connecon; the AP’s MAC
address; list of neighboring APs; the mestamp when
the client was last seen; and the mestamp for the
scan.
61

Table 8: Site-Only Topics
(Connued)
Topic Purpose and Payload Details
vbeacon Devices near a virtual beacon.
This topic provides informaon about devices in
proximity to a congured vbeacon. Use this webhook
with the Juniper Mist SDK.
wi-conn-raw
wi-unconn-raw
Raw data from packets emied by connected and
unconnected devices.
The payload includes details such as the IDs of the
organizaon, site, map, and reporng AP; the locaon
coordinates of the AP; the RSSI and band; and the
payload from the Wi-Fi beacon. It does not include the
client’s locaon data.
zone Locaon data for virtual beacons on your oorplan,
pushed when a client enters or exits a zone.
The data includes details such as the site, map, and
zone IDs, the mestamp, the trigger (enter or exit), the
client type (SDK client, wireless client, or asset), and
the ID or MAC address of the client.
client-latency DHCP, DNS, and authencaon latency informaon
aggregated across all the client devices at the site level.
Latency data is provided for a 10-minute window at
10-minute intervals. We recommend that you use this
webhook to receive network latency data instead of
polling through the API.
NOTE: You'll need a Marvis subscripon to subscribe
to this webhook.
62

Webhooks and Alerts
IN THIS SECTION
Conguring Alerts | 63
Alert Details | 64
Event Aggregaon | 69
Conguring Alerts
You can congure alerts for an enre organizaon, single sites, or mulple sites from the Alerts
Conguraon page in the portal.
NOTE
: To nd this page, select Monitor > Alerts > Alerts Conguraon from the le menu of the
Juniper Mist portal.
All the alerts visible here are available to send an alert webhook by simply enabling the alert.
The alerts are broken down by color based upon severity, as follows:
• Red—Crical
• Orange—Warning
63
• Blue—Informaonal
The alarms are also categorized into these groups:
• Infrastructure—Infrastructure alarms don’t keep state. They are based directly o device events.
When you monitor devices from infrastructure alarms, you typically either treat each event as a
standalone event, or you match stateful device changes.
• Marvis—Marvis events are events idened under Marvis Acons. These events are generally
stateful. Inside their payload is a key called details. Under details you can see state and the values:
open or validated.
• open means this issue is currently happening.
• validated means that Marvis has validated that the issue is resolved. Aer the issue is deemed to
be validated, the same webhook type will be set with the updated state.
Because of the AI nature of Marvis acons, Marvis requires sucient data to ensure that these
alarms are accurate and aconable. Marvis needs to accumulate enough data to eliminate false
posives. This requirement results in a varying number of mes for the events to arrive.
• Security—Most of the events in security are single-me events. These alerts will detect only specic
aacks and don’t determine if the aack is acve. Rogue APs are rate-limited to reporng once every
10 hours. Rogue clients and Honeypot AP events are sent once every 10 minutes.
The following alerts also have congurable failure thresholds:
• ARP Failure
• DHCP Failure
• DNS Failure
• Device Oine
For informaon about conguring alerts, see the Alert Conguraon informaon in the Juniper Mist
Network Monitoring Guide.
Alert Details
The table presents detailed informaon about each alert.
64

Table 9: Webhook Alerts Table
Alert/Webhook Name Group Category Descripon Triggering
Mechanism
Comments
ap_bad_cable marvis ap Bad Ethernet cable
connected to a
Juniper AP
Based on AP
frequent
ethernet
disconnects,
restarts,
increasing
ethernet errors,
connecng at
100Mbps
Req SUB-
VNA
ap_oine marvis ap Oine (Marvis) Site down: all
APs lose
connecon
around the same
me. Switch
down/issue: all
APs on the same
switch lose
connecon
around the same
me. Locally
online: AP is
heard locally but
lost cloud
connecon.
Locally oine:
AP is not heard
locally & lost
cloud
connecon
Req SUB-
VNA
arp_failure marvis connecvity Site-wide wireless
connecon failures
Sudden increase
in failures across
the site OR
100% failures
on a server/
WLAN/AP
Req SUB-
VNA
65

Table 9: Webhook Alerts Table
(Connued)
Alert/Webhook Name Group Category Descripon Triggering
Mechanism
Comments
authencaon_failure marvis connecvity Site-wide wireless
and wired
connecon failures
Sudden increase
in failures across
the site OR
100% failures
on a server/
switch/WLAN/
VLAN/AP
Req SUB-
VNA
OR SUB-
SVNA
bad_cable marvis switch Faulty cable
connected to a
Juniper switchport
Based on port
errors, power
draw without
ethernet link,
increase in bytes
out and 0 in
(and vice versa)
Req SUB-
VNA
bad_wan_uplink marvis Router Underperforming/
problemac
interface (SRX, SSR)
Latency, jier,
packet loss,
output drops &
drop in transmit
packets
Req SUB-
WNA
dhcp_failure marvis connecvity Site-wide wireless
and wired
connecon failures
Sudden increase
in failures across
the site OR
100% failures
on a server/
WLAN/
VLAN/AP
Req SUB-
VNA
OR SUB-
SVNA
dns_failure marvis connecvity Site-wide wireless
connecon failures
Sudden increase
in failures across
the site OR
100% failures
on a server/
WLAN/AP
Req SUB-
VNA
66

Table 9: Webhook Alerts Table
(Connued)
Alert/Webhook Name Group Category Descripon Triggering
Mechanism
Comments
gw_bad_cable marvis Router Faulty cable
connected to a
Juniper gateway
(SRX only) port
Interface stat
errors, input/
output bytes
being 0
Req SUB-
WNA
gw_negoaon_mismatch marvis Router Dierence in MTU
packet size seen in
the network (SRX
only)
Packets being
fragmented,
MTU errors
Req SUB-
WNA
health_check_failed marvis ap Unhealthy APs to
be replaced
Aer all auto-
remediaon/
self-healing on
the AP fails,
Marvis indicates
a proactve RMA
to replace the
AP
Req SUB-
VNA
insucient_capacity marvis ap AP(s) with low Wi-
Fi capacity
Aer RRM
makes changes,
a single client or
a set of clients
have heavy
consumpon
resulng in high
AP channel
ulizaon
Req SUB-
VNA
insucient_coverage marvis ap Areas around AP(s)
with consistent
poor Wi-Fi
coverage
Aer RRM
makes changes,
clients are sll
seen with low
RSSI
consistently
Req SUB-
VNA
67

Table 9: Webhook Alerts Table
(Connued)
Alert/Webhook Name Group Category Descripon Triggering
Mechanism
Comments
missing_vlan marvis switch VLAN congured
on AP missing on
switch port or
upstream
AP observes
trac on each
vlan and
compares
between APs on
the same switch
& other APs in
the site. Doesn't
require a Juniper
switch
Req SUB-
VNA
OR SUB-
SVNA
negoaon_mismatch marvis switch Dierence in
sengs between a
wired client &
connected port
Duplex
mismatch
and/or auto-
negoaon
failing
Req SUB-
VNA
non_compliant marvis ap APs with
mismatched
rmware
APs in a given
site deviang
from the
rmware
version seen on
majority APs
(same model) at
that site
Req SUB-
VNA
port_ap marvis switch Port constantly
going up & down
Port apping
with high
frequency &
connuously
Req SUB-
VNA
sw_alarm_chassis_psu infrastructure switch Junos Power
Supply Alarm
power supply
missing event
will trigger this
alert
68

Table 9: Webhook Alerts Table
(Connued)
Alert/Webhook Name Group Category Descripon Triggering
Mechanism
Comments
switch_stp_loop marvis switch Same frame is seen
by a switch mulple
mes
Frequent STP
topology
changes along
with sudden
increase in tx/rx
Req SUB-
VNA
vpn_path_down marvis Router VPN peer path
down (SSR only)
100% failure of
a peer path
Req SUB-
WNA
Within each alarm is contextual data that you can extrapolate for event correlaon comparing mulple
devices. You can nd examples of all the exisng alert (alarm) denions with the funcon /api/v1/const/
alarm_defs (requires you to be logged in to Juniper Mist).
Event Aggregaon
Juniper Mist aggregates events based on topics that you’ve set up. If mulple events occur for the same
topic during the specied aggregaon window, Juniper Mist will group them into a single message.
Because of message aggregaon, you will need to parse the events from each message when they are
received.
Webhook Messages
SUMMARY
Get familiar with the message format and the
payloads for various webhook topics.
IN THIS SECTION
Message Format | 70
Infrastructure Payload Examples | 71
Locaon Payload Examples | 76
69

Message Format
IN THIS SECTION
Payload Structure | 70
Each webhook topic can have a slightly dierent format.
Most webhooks have the following structure where the event_details are the payload of events, as
follows:
{
"topic": "webhook-topic",
"events": [
{"EVENT DETAILS": "...."},
{"EVENT DETAILS": "....",
...
]
}
Payload Structure
Each webhook can have drascally dierent elds in the payloads (message body). However, several
elds are common: alarms, device-events, and audit topics.
All webhook messages are in JavaScript object notaon (JSON) format and include the following
informaon in the header, which describes the conguraon of the message itself. The header
informaon appears before the payload in the message. If you congure a custom header in the
webhook conguraon, it also appears here.
POST /uri/... HTTP/1.1
Host: hooks.abc.com:443
User-Agent: Mist-webhook
Content-Type: application/json
Content-Length: 382
X-Mist-Signature: ce3af7760f1289d02bf6a7ad19f3xxxxxxxxxx
70

Infrastructure Payload Examples
IN THIS SECTION
Alert | 71
Audit | 72
Client Join | 73
Client Sessions | 73
Device Events | 74
Device Updowns | 75
Juniper Mist Edge Events | 75
Take a look at some webhook examples, starng with the infrastructure webhooks.
Alert
This alert (alarm) example displays a detected rogue AP, the count (number of mes Juniper Mist
detected it), and the AP and the basic service set idener (BSSIDs) that detected it.
{
"topic": "alarms",
"events": [
{
"aps": [
"5c5b35xxxxxx"
],
"bssids": [
"00024axxxxxx",
"5c5b3xxxxxx",
"000f2xxxxxx",
"c03f0exxxxxx",
"e091f5xxxxxx",
"e894f6xxxxxx",
"40169fxxxxxx",
"40169fxxxxxx",
"c03f0exxxxxx",
"5c5b35xxxxxx"
71

],
"count": 16,
"id": "95193bda-1fef-4ea6-xxxx-xxxxxxxxxxxx",
"last_seen": 1549068720,
"ssids": [
"qwerty",
"A-Dot",
"xfinity",
"alpha"
],
"timestamp": 1549068202,
"type": "rogue-ap-detected",
"update": true,
"org_id": "2818e386-8dec-2562-xxxx-xxxxxxxxxxxx",
"site_id": "4ac1dcf4-9d8b-7211-xxxx-xxxxxxxxxxxx"
}
]
}
Audit
This example is an audits alert indicang that John Doe updated a device. It shows the organizaon
(org_id) and site (site_id) the device belongs to.
{
"topic": "audits",
"events": [
{
"admin_name": "john doe [email protected]",
"device_id": "00000000-0000-0000-1000-5c5b35xxxxxx",
"id": "8e00dd48-b918-4d9b-xxxx-xxxxxxxxxxxx",
"message": "Update Device \"Reception\"",
"org_id": "2818e386-8dec-2562-xxxx-xxxxxxxxxxx",
"site_id": "4ac1dcf4-9d8b-7211-xxxx-xxxxxxxxxxxx",
"src_ip": "xx.xx.xx.xx",
"timestamp": 1549047906.201053
}
]
}
72

Client Join
This client-join message displays the MAC address of the client that joined. It also displays the
associated connecon details the instant a client joins a wireless network.
{
"topic": "client-join",
"events": [
{
"ap": “5c5b35d0xxxx",
"ap_name": “AP43 Test",
"band": "5",
"bssid": "5c5b35dfxxxx",
"connect": 1592333828,
"connect_float": 1592333828.324,
"mac": "70ef0071xxxx",
"org_id": "6748cfa6-4e12-11e6-xxxx-xxxxxxxxxxx",
"rssi": -54,
"site_id": "d761985e-49b1-4506-xxxx-xxxxxxxxxxx",
"site_name": "Test",
"ssid": "Mist",
"timestamp": 1592333828,
"version": 2
"wlan_id": "6c0c0b07-0d77-44d1-xxxx-xxxxxxxxxxxx",
}
]
}
Client Sessions
The client-sessions payload displays detailed informaon regarding the enre session from a client to a
single AP.
{
"topic": "client-sessions",
"events": [
{
"ap": “5c5b352fxxxx",
"ap_name": “AP43 Test",
"band": "5",
"bssid": "5c5b352bxxxx",
73

"client_family": "iPhone",
"client_manufacture": "Apple",
"client_model": "8+",
"client_os": "13.4.1",
"connect": 1592333548,
"connect_float": 1592333548.117,
"disconnect": 1592333828,
"disconnect_float": 1592333828.589,
"duration": 279.835049793,
"mac": "70ef00xxxxxx",
"next_ap": "5c5b35d0xxxx",
"org_id": "6748cfa6-4e12-11e6-xxxx-xxxxxxxxxxxx",
"rssi": -87,
"site_id": "d761985e-49b1-4506-xxxx-xxxxxxxxxxx",
"site_name": "Test",
"ssid": "Mist",
"termination_reason": 3,
"timestamp": 1592333828,
"version": 2
"wlan_id": "6c0c0b07-0d77-44d1-xxxx-xxxxxxxxxxxx",
}
]
}
Device Events
The device-events payload displays details about the device experiencing the event with the reason.
{
"topic": "device-events",
"events": [
{
"audit_id": "a8ec4d8a-4da6-4ead-xxxx-xxxxxxxxxxx",
"ap": "5c5b35xxxxxx",
"ap_name": "AP41 Near Lab",
"device_name": "AP41 Near Lab",
"device_type": "ap/switch/gateway",
"ev_type": "NOTICE",
"mac": "5c5b35xxxxxx",
"org_id": "2818e386-8dec-2562-xxxx-xxxxxxxxxxxx",
"reason": "power_cycle",
74

"site_id": "4ac1dcf4-9d8b-7211-xxxx-xxxxxxxxxxxx",
"site_name": "Site 1",
"text": "event details",
"timestamp": 1461220784,
"type": "AP_RESTARTED"
}
]
}
Device Updowns
The device-updowns webhook is a subset of the device-events webhook. It sends only the basic
informaon of the device and reason (type) it went down.
{
"topic": "device-updowns",
"events": [
{
"org_id": "2818e386-8dec-2562-xxxx-xxxxxxxxxxxx",
"site_id": "4ac1dcf4-9d8b-7211-xxxx-xxxxxxxxxxxx",
"type": "AP_RESTARTED",
"ap": "5c5b35xxxxxx",
"ap_name": "AP01",
"site_name": "Site1"
"timestamp": 1461220784
}
]
}
Juniper Mist Edge Events
The mxedge-events webhook payload can contain basic informaon about an event occurring on an
individual Juniper Mist Edge device similar to device-events.
{
"topic": "mxedge-events",
"events": [
{
"audit_id": "03a65fa8-f74b-4c82-xxxx-xxxxxxxxxxxx",
"mxcluster_id": "27558fe2-a0e5-4236-xxxx-xxxxxxxxxxxx",
75

"mxedge_id": "00000000-0000-0000-1000-xxxxxxxxxxxx",
"mxedge_name": "ME1",
"org_id": "dfb3a656-2a21-4ea5-xxxx-xxxxxxxxxxxx",
"timestamp": "1692974834.308884",
"type": "ME_CONFIG_CHANGED_BY_USER"
}
]
}
Locaon Payload Examples
IN THIS SECTION
Locaon Coordinates | 76
Occupancy Alerts | 77
RSSI Zone | 79
SDK Client Scan Data | 79
Virtual Beacon Entry and Exit Event | 80
Zone Entry and Exit Events | 81
The next group is the Locaon webhooks, which are available only for sites (not organizaons).
Locaon Coordinates
The locaon webhook payload correlates client informaon to a locaon on a map (oorplan) uploaded
to Juniper Mist. An accurately scaled map and use of the SDK client are requirements for this webhook.
{
"topic": "location",
"events": [
{
"site_id": "4ac1dcf4-9d8b-7211-xxxx-xxxxxxxxxxxx",
"map_id": "845a23bf-bed9-e43c-xxxx-xxxxxxxxxxxx",
"x": 13.5,
"y": 3.2,
"timestamp": 1461220784,
76

// for SDK client
"type": "sdk",
"id": "de87bf9d-183f-e383-xxxx-xxxxxxxxxxxx",
"name": "optional",
// for WIFI
"type": "wifi",
"mac": "5684daxxxxxx",
// Optional for wifi
"wifi_beacon_extended_info": [
{"frame_ctrl": 776, "seq_ctrl": 772, "payload": "............"},
]
// for ASSET
"type": "asset",
"mac": "7fc293xxxxxx",
"ibeacon_uuid": "f3f17139-704a-f03a-xxxx-xxxxxxxxxxxx",
"ibeacon_major": 13,
"ibeacon_minor": 138,
"eddystone_uid_namespace": "2818e3868decxxxxxxxx",
"eddystone_uid_instance": "5c5b35xxxxxx",
"eddystone_url_url": "https://www.abc.com",
"mfg_company_id": 935,
"mfg_data": "648520a1020000",
"battery_voltage": 3370
}
]
}
Occupancy Alerts
The occupancy-alerts webhook displays informaon about specic zones if they exceed the congured
occupancy_limit.
{
"topic": "occupancy-alerts",
"events": [
{
"alert_events": [
{
77

"current_occupancy": 10,
"map_id": "f5d26c7f-1670-4921-xxxx-xxxxxxxxxxxx",
"occupancy_limit": 5,
"org_id": "6748cfa6-4e12-11e6-xxxx-xxxxxxxxxxxx",
"timestamp": 1594861457,
"type": "COMPLIANCE-VIOLATION",
"zone_id": "b83312a7-7269-4ae1-xxxx-xxxxxxxxxxxx",
"zone_name": "PLM and Leadership"
},
{
"current_occupancy": 20,
"map_id": "f5d26c7f-1670-4921-xxxx-xxxxxxxxxxxx",
"occupancy_limit": 10,
"org_id": "6748cfa6-4e12-11e6-xxxx-xxxxxxxxxxxx",
"timestamp": 1594861457,
"type": "COMPLIANCE-VIOLATION",
"zone_id": "80acf542-e863-43cf-xxxx-xxxxxxxxxxxx",
"zone_name": "CSQA"
},
{
"current_occupancy": 9,
"map_id": "f5d26c7f-1670-4921-xxxx-xxxxxxxxxxxx",
"occupancy_limit": 4,
"org_id": "6748cfa6-4e12-11e6-xxxx-xxxxxxxxxxxx",
"timestamp": 1594861457,
"type": "COMPLIANCE-VIOLATION",
"zone_id": "a4c7a7c2-880e-4a0e-xxxx-xxxxxxxxxxxx",
"zone_name": "Marketing & Sales Ops"
}
],
"site_id": "67970e46-4e12-11e6-xxxx-xxxxxxxxxxxx",
"site_name": "MIST OFFICE"
}
]
}
78

RSSI Zone
The rssizone webhook payload displays devices that have exceeded a congured minimum RSSI
threshold across a site.
{
"topic":"rssizone",
"events":[
{
"mac":"500291xxxxxx",
"map_id":"f5d26c7f-1670-4921-xxxx-xxxxxxxxxxxx",
"rssizone_id":"e38f8e76-40db-4144-xxxx-xxxxxxxxxxxx",
"site_id":"f5fcbee5-fbca-45b3-xxxx-xxxxxxxxxxxx",
"timestamp":1694158990.986472,
"trigger":"enter",
"type":"wifi"
}
]
}
SDK Client Scan Data
The SDK Client Scan Data webhook payload displays specic data about a client that isn’t available
without installing an applicaon (using the SDK) on the client itself.
{
"events": [
{
"connection_ap": "5c5b35xxxxxx",
"connection_band": "2.4",
"connection_bssid": "5c5b35xxxxxx",
"connection_channel": 11,
"connection_rssi": -87,
"last_seen": 1592333828,
"mac": "70ef00xxxxxx",
"scan_data": [
{
"ap": "5c5b35xxxxxx",
"band": "2.4",
"bssid": "5c5b35xxxxxx",
"channel": 11,
79

"rssi": -87,
"ssid": "mist-wifi",
"timestamp": 1592333828
},
{
"ap": "5c5b35xxxxxx",
"band": "5",
"bssid": "5c5b35xxxxxx",
"channel": 36,
"rssi": -75,
"ssid": "mist-wifi",
"timestamp": 1592333828
}
],
"site_id": "d761985e-49b1-4506-xxxx-xxxxxxxxxxxx"
}
],
"topic": "sdkclient-scan-data"
}
Virtual Beacon Entry and Exit Event
The vbeacon webhook is triggered when a mobile device running the Juniper Mist SDK is entering or
exing the area dened by a virtual beacon.
{
"topic":"vbeacon",
"events":[
{
"mac":"10521cxxxxxx",
"map_id":"5a8b84e6-cc7b-xxxx-xxxxxxxxxxxx",
"site_id":"f5fcbee5-fbca-45b3-xxxx-xxxxxxxxxxxx",
"timestamp":1694166602.662786,
"trigger":"enter",
"type":"wifi",
"vbeacon_id":"ca301fd7-07af-4d42-xxxx-xxxxxxxxxxxx"
}
]
}
80

Zone Entry and Exit Events
The zone webhook is triggered when a device enters or exits a dened zone.
{
"topic":"zone",
"events":[
{
"mac":"10521cxxxxxx",
"map_id":"5a8b84e6-cc7b-xxxx-xxxxxxxxxxxx",
"site_id":"f5fcbee5-fbca-45b3-xxxx-xxxxxxxxxxxx",
"timestamp":1694166602.662786,
"trigger":"exit",
"type":"wifi",
"zone_id":"b83312a7-7269-4ae1-xxxx-xxxxxxxxxxxx "
}
]
}
Conguring Webhooks from the API
IN THIS SECTION
Create Webhooks from the API | 83
Update a Webhook from the API | 84
Delete Webhooks from the API | 85
Congure Device-Updowns Disconnecon Sensivity | 86
You can congure webhooks from the API, rather than using the Juniper Mist portal.
NOTE: For more informaon about the API, go to these resources:
81

• "RESTful API Overview" on page 4 (in this guide)
• "Addional RESTful API Documentaon" on page 50
When conguring webhooks, always be aware of the conguraon hierarchy.
• In an organizaon-level webhook, specify the organizaon ID: /api/v1/orgs/<org-id>/webhooks
NOTE: To nd the <org-id>, select Organizaon > Sengs from the le menu of the Juniper
Mist portal. The organizaon ID appears near the top of the Organizaon Sengs page.
• In a site-level webhook, specify the site ID: /api/v1/sites/<site-id>/webhooks
NOTE: To nd the <site-id>, select Organizaon > Site Conguraon from the le menu of
the Juniper Mist portal. Then select the site. The site ID appears near the top of the site
Conguraon page.
Example: Site Conguraon
The following funcon displays all the webhooks congured for a specic site:
/api/v1/sites/4ac1dcf4-9d8b-7211-xxxx-xxxxxxxxxxxx/webhooks
The following output is the result of the previous API call:
HTTP 200 OK
Allow: POST, OPTIONS, GET
Content-Type: application/vnd.api+json
Vary: Accept
[
{
"name": "Lobby-Zone-Events",
"url": "https://webhook.site/02747ddc-2b1f-4134-a1eb-xxxxxxxxxxxx",
"secret": "",
"enabled": true,
"topics": "zone",
"verify_cert": true,
"id": "20538707-b873-4a60-xxxx-xxxxxxxxxxxx",
"for_site": true,
82

"site_id": "4ac1dcf4-9d8b-7211-xxxx-xxxxxxxxxxxx",
"org_id": "3f12cb79-fb5e-4d4b-xxxx-xxxxxxxxxxxx",
"created_time": 1686252096,
"modified_time": 1686252096
}
]
Create Webhooks from the API
Use a POST to congure a webhook and to enable topics.
In your API call, be aware of the conguraon hierarchy and the dierent topics that are available for
organizaons and sites.
• In the API funcon, be sure to specify the organizaon ID or site ID. See "Conguring Webhooks
from the API" on page 81.
• In the topics line, be sure to specify only the topics that are appropriate for the organizaon or site
level. See "Webhook Topics" on page 58 .
Here is an example of a POST to congure a site webhook to enable site-level topics:
{
"name": "analytic",
"type": "http-post",
"url": "https://username:[email protected]/uri/...",
"secret": "secret",
"headers":{
"x-custom-1": "your_custom_header_value1",
"x-custom-2": "your_custom_header_value2"
},
"verify_cert": false,
"enabled": true,
"topics": [ "location", "zone", "vbeacon", "rssizone", "asset-raw-rssi", "device-events",
"alarms", "audits", "client-join", "client-sessions", "device-updowns", "occupancy-alerts",
"mxedge-events", "nac-accounting", "sdkclient-scan-data",]
}
83

Update a Webhook from the API
To update a webhook from the API, you send a PUT command to the webhook’s API with the topic
parameter that you want to update.
Following is an example conguraon of an exisng, organizaon-level mxedge-events webhook viewed
from the API:
[
{
"enabled": true,
"name": "mist-edge",
"url": "https://webhook.site/4ec10796-16ec-4225-aba4-xxxxxxxxxxxx",
"secret": "",
"topics": [
"mxedge-events"
],
"verify_cert": true,
"id": "a7c61a9c-a25b-4c27-xxxx-xxxxxxxxxxxx",
"for_site": false,
"site_id": "00000000-0000-0000-0000-000000000000",
"org_id": "3f12cb79-fb5e-4d4b-xxxx-xxxxxxxxxxxx",
"created_time": 1575305516,
"modified_time": 1692974137
}
]
If you want to make a change to this webhook, you need to make an API call (PUT) from your API client
to the desired API URL. In this example, the API is the URL to display all webhooks congured for the
organizaon: https://<api-endpoint>/api/v1/orgs/3f12cb79-fb5e-4d4b-xxxx-xxxxxxxxxxxxx/webhooks
NOTE: In place of <api-endpoint>, use the API endpoint for your global region. See "API
Endpoints and Global Regions" on page 9.
You will need to include the unique id for the webhook and the conguraon item you want to change.
In this example you want to change the URL for the webhook receiver to hps://
enicxxxx72vx.x.pipedream.net. To do that, you need to update (PUT) the webhook by specifying the url
and the webhook ID displayed as a sparse eldset to the organizaon’s web API:
84

PUT https://api.mist.com/api/v1/orgs/3f12cb79-fb5e-4d4b-xxxx-xxxxxxxxxxxxx/webhooks -
{"enabled":true,"name":"mist-edge","url":"https://webhook.site/4ec10796-16ec-4225-aba4-
b3ebaed32750","id":"a7c61a9c-a25b-4c27-xxxx-xxxxxxxxxxxxx","org_id":"3f12cb79-fb5e-4d4b-xxxx-xxxxxxxxxxxx"}
Delete Webhooks from the API
To delete a webhook using the API, you rst need to nd the webhook ID.
You can nd the webhook ID in the webhook response. In the following example, the id is a7c61a9c-
a25b-4c27-xxxx-xxxxxxxxxxxx
[
{
"enabled": true,
"name": "mist-edge",
"url": "https://webhook.site/4ec10796-16ec-4225-xxxx-xxxxxxxxxxxx",
"secret": "",
"topics": [
"mxedge-events"
],
"verify_cert": true,
"id": "a7c61a9c-a25b-4c27-xxxx-xxxxxxxxxxxx",
"for_site": false,
"site_id": "00000000-0000-0000-0000-000000000000",
"org_id": "3f12cb79-fb5e-4d4b-xxxx-xxxxxxxxxxxx",
"created_time": 1575305516,
"modified_time": 1692974137
}
]
To delete this webhook, make an API call (DELETE) from your API client.
DELETE https://api.mist.com/api/v1/orgs/3f12cb79-fb5e-4d4b-xxxx-xxxxxxxxxxxxx/webhooks/a7c61a9c-a25b-4c27-a14e-
xxxxxxxxxxxx
As detailed below, this call species the API endpoint, the organizaon ID, the resource (webhooks), and
webhook ID (a7c61a9c-a25b-4c27-xxxx-xxxxxxxxxxxx).
85

Aer you delete the webhook, the Juniper Mist API will return an HTTP 200 OK response.
Congure Device-Updowns Disconnecon Sensivity
You can tune the device-updowns webhook to allow for a custom me threshold. This seng enables
you to determine when a device is down. The threshold values can be anything from 0-30 minutes:
• A threshold of 0 represents no threshold.
• Anything over 30 minutes will automacally reset to 0.
A device that stays down during the threshold will trigger a device-updown event.
You can congure this threshold seng only on a per-site basis.
To set a threshold for devices at a specic site, issue a PUT command to the API.
Here is an example:
https://api.mistsys.com/api/v1/sites/{site_id}/setting/device_updown_threshold:15
Conguring Webhooks in the Juniper Mist Portal
IN THIS SECTION
Add a Webhook in the Juniper Mist Portal | 87
Update a Webhook in the Juniper Mist Portal | 89
Delete a Webhook in the Juniper Mist Portal | 89
86

You can congure webhooks in the Juniper Mist portal, rather than using the API.
Keep in mind, everything that you can congure in the portal is a result of an API. And all changes that
you make in the portal actually are calls to the RESTful API. In fact, clicking save is simply a call to the
appropriate API to make an update.
Although there are more APIs available than are implemented in the portal, you might nd it convenient
to use the portal for certain conguraon tasks.
When using the portal to congure webhooks, be aware of the conguraon hierarchy. Go to the
appropriate page for the webhooks that you want to congure.
• Organizaon-level webhooks—From the le menu of the Juniper Mist portal, select Organizaon >
Sengs.
• Site-level webhooks—From the le menu of the Juniper Mist portal, select Organizaon > Site
Conguraon.
• Site-level webhooks—/api/v1/sites/{site_id}/webhooks
Add a Webhook in the Juniper Mist Portal
1. In the Juniper Mist™ portal, navigate to the organizaon or site sengs:
• For organizaon-level webhooks, select Organizaon > Sengs.
• For site-level webhooks, select Organizaon > Site Conguraon, and then select the site.
2. Scroll down to the Webhooks secon, and click Add Webhook.
3. Enter the informaon:
• Name—Enter a name to idenfy this webhook.
• Webhook Type—Unless you are sending webhooks to a Splunk installaon, select HTTP Post.
• URL—Enter the URL of desnaon you want Mist to send the webhooks to.
87

• Topics—Select the topics you want to receive webhooks for. You must select at least one.
4. (Oponal) Click Advanced Sengs for addional opons.
• Verify Cercate—This opon is enabled by default. If you do not want Mist to verify that the
cercate of the webhook receiver is valid, click No. Although this method is not secure, it does
provide some exibility if your webhook receiver does not have a valid signed cercate. We do
not recommend this method, for security reasons.
• Secret (HTTP-POST only)—Using a secret allows you to specify a secret (like a password) used to
calculate a pair of HTTP headers. A secret enables you to verify that the message is coming from
Juniper Mist and has not been modied.
88

• Custom Headers—The Custom Headers conguraon enables you to specify any custom headers
needed for your webhook receiver. Some receivers (or their proxies) require a token-based
authencaon method, user-based authencaon, or a method to present custom headers to
indicate the type of data being sent.
NOTE: Keep these cauons in mind when considering whether to use a secret or custom
headers:
• When a secret is provided, two HTTP headers will be added:
• X-Mist-Signature: HMAC_SHA1 (secret, body)
• X-Mist-Signature-v2: HMAC_SHA256 (secret, body)
• If the headers format is invalid, “X-Mist-Error”: “headers format invalid” will be sent.
• If the total bytes of the headers exceed 1000, “X-Mist-Error”: “headers too big” will be
sent.
• If any header value is not a string, “X-Mist-Error”: “header[%s] not a string” will be sent.
5. Click Add.
Update a Webhook in the Juniper Mist Portal
Updang a webhook in the portal is nearly the same as adding a webhook.
1. From the le menu of the Juniper Mist portal, navigate to the organizaon or site sengs:
• For organizaon-level webhooks, select Organizaon > Sengs.
• For site-level webhooks, select Organizaon > Site Conguraon, and then select the site.
2. Scroll down to the Webhooks secon, and click the webhook that you want to update.
3. Make the conguraon changes, and then click Save.
For more informaon about the opons, see the informaon in "Add a Webhook in the Juniper Mist
Portal" on page 87.
Delete a Webhook in the Juniper Mist Portal
If you no longer need a webhook, delete it.
89
To delete a webhook:
1. From the le menu of the Juniper Mist portal, navigate to the organizaon or site sengs:
• For organizaon-level webhooks, select Organizaon > Sengs.
• For site-level webhooks, select Organizaon > Site Conguraon, and then select the site.
2. Scroll down to the Webhooks secon, and click the webhook that you want to delete.
3. Click Delete.
Congure Zone Entry and Exit Events (Use Case)
Webhooks are one-way messages from a source server or applicaon to a desnaon server or
applicaon. The webhooks methodology is “re and forget,” meaning that you use webhooks primarily
to schedule event-driven messages for alerng and monitoring. In a Juniper Mist network, you can use
webhooks to send messages based on Organizaon or Site topics. This means that you use webhooks
primarily to schedule event-driven messages for alerng and monitoring.
For this use case, from the Juniper Mist API you set up a webhook nocaon whenever a device enters
or exits a zone. This nocaon is useful for a site with building automaon. A user who enters or
leaves a dened zone in Juniper Mist (such as a room) and has a tracked device in hand can trigger an
event that is sent from Juniper Mist to the building automaon system to turn the lights on or o.
To set up webhooks in the Juniper Mist portal, you need the following conguraon items (and may
want to use the listed oponal item as well):
• Name for the webhook instance (required)
• URL (desnaon to receive the Juniper Mist webhooks (required)
• Streaming API in the Site Webhooks secon (select the “Zone Entry/Exit Events” topic to stream to
the desnaon) (required)
• Secret, like a password, to authencate communicaon from Juniper Mist to the webhook
desnaon (oponal)
Aer you have this informaon, you can congure the webhook in the Site Sengs
1. From the le menu of the Juniper Mist portal, select Organizaon > Site Conguraon.
2. Click Add Webhook, enter the informaon, and click Add.
For more informaon about the elds to complete, see "Add a Webhook in the Juniper Mist Portal"
on page 87.
90

Anyme a device enters or exits a zone, Juniper Mist will create a webhook POST to the specied
URL. The incoming request payload, as formaed in JavaScript Object Notaon (JSON), looks like
this:
{
“topic”: “zone”,
“events”: [
{
“mac”: “807d3axxxxx”,
“map_id”: “2d0d2bd7-78b8-4f4b-9454-xxxxxxxxxxxxx”,
“site_id”: “010412fe-xxxx-xxxx-xxxx-99ff83111031d”
“timestamp”: 1633109338.539088,
“trigger”: “exit”,
“type”: “wifi”,
“zone_id”: “33294994-6a5f-4804-xxxx-xxxxxxxxxxxx”
}
]
}
Using this informaon, you can acvate other automaons in a third-party system, such as turning
o the lights in zone 33294994-6a5f-4804-xxxx-xxxxxxxxxxxx based on the trigger of exit.
Tesng Webhooks
By tesng webhooks, you can verify the conguraon process as well as inspect and parse the event
messages you will receive from Mist. If you do not have a webhook receiver available to you, you can
use a public, free service. Many such services enable you to receive and inspect the incoming webhook
POST messages from Juniper Mist. These public sites create a random URL that you can use on a
temporary basis. The data that you received is ephemeral and is deleted as soon as you close your
browser. Using one of these sites from your browser, you can idenfy parameter data from the message
payloads to help create your workow.
Aer you congure your webhook, you can trigger it and view those messages as they are received on
the public webhook receiver.
Two of these free tesng webhook receivers are:
• hps://webhook.site/
• hps://public.requestbin.com/
91

These sites are not Juniper maintained and are to be used at your own risk.
This is an excellent me to test end-to-end connecvity from your respecve Mist cloud instance to
your dened webhook receiver. This validates that no devices (a rewall or router) are blocking
communicaons between the two endpoints.
This can be done from the API by issuing a POST (from your REST client) to, in this case, your site, the
congured webhook (id) as seen in this example:
POST
/api/v1/sites/4ac1dcf4-9d8b-7211-xxxxxx-xxxxxxxxxxxx/webhooks/18ff1f91-a9e0-c3b7-xxxx-
xxxxxxxxxxx/ping
A successful result looks like this:
{
"topic": "ping",
"events": [
{
"site_id": "4ac1dcf4-9d8b-7211-xxxxxx-xxxxxxxxxxxx",
"id": "18ff1f91-a9e0-c3b7-xxxx-xxxxxxxxxxx",
"name": "my webhook",
"timestamp": 1461220784
}
]
}
92


WebSocket API Overview
IN THIS SECTION
WebSocket API Endpoint | 94
Authencaon Opons | 95
WebSocket Streaming Channels | 95
You can use WebSockets in your Juniper Mist network. The WebSocket protocol can open a
bidireconal communicaon session between a client and a server. You can send messages to the server
and receive real-me, event-driven responses without having to poll the server for a reply.
The inial client request and server response use the HTTP protocol to establish the WebSocket
communicaon. From then on, the client can subscribe to one or more topics (streaming channels) to
stream data.
You and other administrators can use WebSockets in very specic use cases, such as data visualizaon
dashboards or maps that must reect real-me data values.
Examples
• Populate a custom dashboard with the live status of Juniper Mist access points (APs) and real-me
locaon data of Bluetooth Low Energy (BLE) assets.
• Stream device data and stascs (such as transmit and receive packets) on an hourly basis to an
external, operaonal dashboard like Grafana. Although the device stascs are robust, you can easily
parse them to abstract the desired data for display.
WebSocket API Endpoint
The API endpoint depends on the global region that your organizaon is associated with. See "API
Endpoints and Global Regions" on page 9 .
94

Authencaon Opons
Juniper Mist requires authencaon to establish a connecon to the WebSocket API. You can use these
methods:
• "Create API Tokens" on page 10
• HTTP login with Juniper Mist login credenals
• API call to an external OAuth2 provider
WebSocket Streaming Channels
Aer Juniper Mist establishes a streaming connecon with a client, the client needs to subscribe to at
least one channel to send and receive messages. Messages go back and forth via the bidireconal
WebSocket protocol. To stop sending and receiving messages from a channel, you can unsubscribe from
it.
NOTE: All channels require that you specify the site ID. To nd a site ID in the Juniper Mist
portal, select Organizaon > Site Conguraon from the le menu, and then click the site.
Once you are logged in, you can view further informaon on each WebSocket.
NOTE: Your documentaon link will depend on the region (cloud) you have logged in to.
Table 10: WebSocket
Documentaon
Names Streaming Channels Documentaon
Discovery of BLE Assets /sites/:site_id/stats/maps/:map_id/
discovered_assets
hps://api.mist.com/api/v1/docs/
Site#assets
BLE Asset Locaon /sites/:site_id/stats/maps/:map_id/
assets
hps://api.mist.com/api/v1/docs/
Site#assets
BLE Asset RF Glass Info /sites/:site_id/assets/:asset_id/diag hps://api.mist.com/api/v1/docs/
Site#locaon
95

Table 10: WebSocket Documentaon
(Connued)
Names Streaming Channels Documentaon
SDK Client Locaon /sites/:site_id/stats/maps/:map_id/
sdkclients
hps://api.mist.com/api/v1/docs/
Site#locaon
SDK Client RF Glass Info /sites/:site_id/
sdkclients/:sdkclient_id/diag
hps://api.mist.com/api/v1/docs/
Site#locaon
Wi-Fi (Client Locaon /sites/:site_id/stats/maps/:map_id/
clients
hps://api.mist.com/api/v1/docs/
Site#client-stats
Wi-Fi Client Stats /sites/:site_id/stats/clients hps://api.mist.com/api/v1/docs/
Site#client-stats
Wi-Fi Client RF Glass Info /sites/:site_id/clients/:client_mac/
diag
hps://api.mist.com/api/v1/docs/
Site#locaon
Unconnected Clients /sites/:site_id/stats/maps/:map_id/
unconnected_clients
hps://api.mist.com/api/v1/docs/
Site#locaon
Devices /sites/:site_id/devices hps://api.mist.com/api/v1/docs/
Site#device
Device Stats /sites/:site_id/stats/devices hps://api.mist.com/api/v1/docs/
Site#device
Commands from Devices /sites/:site_id/
devices/:device_id/cmd
hps://api.mist.com/api/v1/docs/
Site#device
Streaming PCAP /sites/:site_id/pcaps hps://api.mist.com/api/v1/docs/
Site#subscribe-to-streaming-pcap
RELATED DOCUMENTATION
hps://datatracker.ie.org/doc/html/rfc6455
96

Stream Device Data with a WebSocket (Use Case)
SUMMARY
In this example, we will discuss the Juniper Mist use
case of streaming device data with a WebSocket.
IN THIS SECTION
Communicate with a MIST WebSocket
Endpoint | 97
A WebSocket is a protocol that provides full-duplex communicaon over a TCP connecon. A
WebSocket API provides a way for a client to communicate with an endpoint. Juniper Mist uses this
protocol to stream near-real-me data to a client. A client will make a request for the data it wants to
receive by subscribing to a channel. The client makes the request only once, and the server will stream
the channel data to the client as updates are made.
This method of communicaon is good for receiving event-driven data in near–real me. Its primary use
is for collecng device data. You and other network administrators can then feed this data into a custom
event display, a nocaon system, an external logging facility, and much more.
Using WebSocket is especially helpful if the informaon that your organizaon needs isn’t available
navely within the Juniper Mist portal.
In this use case, we show how to congure a client to request and subscribe to a site’s device stascs.
Using a WebSocket requires the following elements:
• Authencaon
• HTTP header conguraon
• WebSocket Connecon URL (wss://api-ws.mist.com/api-ws/v1/stream). Please verify your URL
based on your geographical locaon.
Communicate with a MIST WebSocket Endpoint
To communicate with the Juniper Mist WebSocket endpoint, you use an applicaon called Postman.
Postman is a GUI API plaorm for building and using APIs. You can build scripts that make mulple API
calls. This API also enables you to make WebSocket calls.
The following steps describe how you can connect to the Juniper Mist WebSocket, starng with adding
the URL to the input box next to the Connect buon:
97

1. Click Connect.
The Messages pane shows that the client tried to connect and was immediately disconnected. This is
because the Juniper Mist WebSocket requires authencaon.
2. To x the authencaon problem, add a custom HTTP header to the request.
a. Under the KEY heading, create a new “Authorizaon” key.
b. In the VALUE input box, enter the word token followed by a space and then the Juniper Mist
authorizaon token.
c. Select the check box on the le of the KEY column to make it acve.
d. Click Connect to establish the WebSocket session with Mist.
3. Once connected, switch to the Message heading in Postman.
This is where you tell Mist which data you want, by subscribing to the device stascs stream.
The following example requests device stasc data for the specied site.
{
"subscribe": "/sites/c1947558-268d-4d31-xxxx-xxxxxxxxxxxxxx/stats/devices"
}
4. With this informaon entered in the Messages input box, click Send.
Postman presents your request with an Up Arrow and the Juniper Mist response with a Down Arrow.
The following example shows what you can expect to see in a response from Juniper Mist.
{
"event": "channel_subscribed",
"channel": "/sites/c1947558-268d-4d31-xxxx-xxxxxxxxxxxx/stats/devices"
}
Within a few seconds of subscribing, you should start to see events streaming into the Messages
pane in JSON format (default):
1. {
2. "event": "data",
3. "channel": "/sites/c1947558-268d-4d31- xxxx - xxxxxxxxxxxx /stats/devices",
4. "data": "{\"mac\": \"5c5b35f15ed8\", \"last_seen\": 1686592607, \"uptime\": 6259614,
\"version\": \"0.9.22801\", \"_partition\": 48, \"_offset_apbasic\": 4639768722, \"ip_stat\":
{\"dns\": [\"10.10.12.11\", \"10.10.12.12\"], \"ips\": {\"vlan12\":
\"10.10.12.25/25,fe80:0:0:0:5e5b:35ff:fef1:5ed8/64\"}, \"gateway\": \"10.10.12.1\", \"ip6\":
98

\"fe80:0:0:0:5e5b:35ff:fef1:5ed8\", \"netmask6\": \"/64\", \"ip\": \"10.10.12.25\", \"netmask
\": \"255.255.255.128\", \"dhcp_server\": \"10.10.12.1\"}, \"ip\": \"10.10.12.25\", \"ble_stat
\": {\"tx_pkts\": 9073, \"tx_bytes\": 105431, \"rx_pkts\": 393432193, \"rx_bytes\":
2772782221, \"tx_resets\": 0}, \"_time\": 1686592607.62131}"
5. }
You can see the same output in the following formats:
• Text
1. {"event": "data", "channel": "/sites/c1947558-268d-4d31-xxxx-xxxxxxxxxxxx/stats/devices",
"data": "{\"mac\": \"5c5b35fxxxxx\", \"last_seen\": 1686592607, \"upme\": 6259614, \"version\":
\"0.9.22801\", \"_paron\": 48, \"_oset_apbasic\": 4639768722, \"ip_stat\": {\"dns\":
[\"10.10.12.11\", \"10.10.12.12\"], \"ips\": {\"vlan12\":
\"10.10.12.25/25,fe80:0:0:0:5e5b:35:fef1:5ed8/64\"}, \"gateway\": \"10.10.12.1\", \"ip6\":
\"fe80:0:0:0:5e5b:35:fef1:5ed8\", \"netmask6\": \"/64\", \"ip\": \"10.10.12.25\", \"netmask\":
\"255.255.255.128\", \"dhcp_server\": \"10.10.12.1\"}, \"ip\": \"10.10.12.25\", \"ble_stat\":
{\"tx_pkts\": 9073, \"tx_bytes\": 105431, \"rx_pkts\": 393432193, \"rx_bytes\": 2772782221,
\"tx_resets\": 0}, \"_me\": 1686592607.62131}"}
• HTML
1. {"event": "data", "channel": "/sites/c1947558-268d-4d31-xxxx-xxxxxxxxxxxx/stats/devices",
"data": "{\"mac\":
2. \"5c5b35fxxxxx\", \"last_seen\": 1686592607, \"upme\": 6259614, \"version\": \"0.9.22801\",
\"_paron\": 48,
3. \"_oset_apbasic\": 4639768722, \"ip_stat\": {\"dns\": [\"10.10.12.11\", \"10.10.12.12\"], \"ips
\": {\"vlan12\":
4. \"10.10.12.25/25,fe80:0:0:0:5e5b:35:fef1:5ed8/64\"}, \"gateway\": \"10.10.12.1\", \"ip6\":
5. \"fe80:0:0:0:5e5b:35:fef1:5ed8\", \"netmask6\": \"/64\", \"ip\": \"10.10.12.25\", \"netmask\":
\"255.255.255.128\",
6. \"dhcp_server\": \"10.10.12.1\"}, \"ip\": \"10.10.12.25\", \"ble_stat\": {\"tx_pkts\": 9073,
\"tx_bytes\": 105431,
7. \"rx_pkts\": 393432193, \"rx_bytes\": 2772782221, \"tx_resets\": 0}, \"_me\":
1686592607.62131}"}
• XML
1. {"event": "data", "channel": "/sites/c1947558-268d-4d31-xxxx-xxxxxxxxxxxx/stats/devices",
"data": "{\"mac\": \"5c5b35fxxxxx\", \"last_seen\": 1686592607, \"upme\": 6259614, \"version\":
\"0.9.22801\", \"_paron\": 48, \"_oset_apbasic\": 4639768722, \"ip_stat\": {\"dns\":
99

[\"10.10.12.11\", \"10.10.12.12\"], \"ips\": {\"vlan12\":
\"10.10.12.25/25,fe80:0:0:0:5e5b:35:fef1:5ed8/64\"}, \"gateway\": \"10.10.12.1\", \"ip6\":
\"fe80:0:0:0:5e5b:35:fef1:5ed8\", \"netmask6\": \"/64\", \"ip\": \"10.10.12.25\", \"netmask\":
\"255.255.255.128\", \"dhcp_server\": \"10.10.12.1\"}, \"ip\": \"10.10.12.25\", \"ble_stat\":
{\"tx_pkts\": 9073, \"tx_bytes\": 105431, \"rx_pkts\": 393432193, \"rx_bytes\": 2772782221,
\"tx_resets\": 0}, \"_me\": 1686592607.62131}"}
You will connue to receive messages unl you either disconnect or unsubscribe from the channel by
sending a message.
{
"unsubscribe": "/sites/c1947558-268d-4d31-xxxx-xxxxxxxxxxxxxx/stats/devices"
}
Once you receive the data, you can do any number of things with it, such as:
• Create a custom display or dashboard of events.
• Archive the data long term.
• Create custom monitoring and alerts.
• Create more automaons based on results.
Using a WebSocket represents another opon for you and other administrators to create your own
Mist customizaons based on your organizaon’s needs.
100


ServiceNow Integraons
SUMMARY
You can integrate your Juniper Mist organizaons with ServiceNow to view device informaon and
Marvis Acons in ServiceNow and to set up ServiceNow workows for common Mist tasks.
You can integrate Juniper Mist data into ServiceNow by using the following applicaons from the
ServiceNow website.
• Juniper Mist Automated Provisioning (JMAP)—This integraon provides tools to automate Day 0 and
Day1+ directly from ServiceNow.
• Can be used for a single organizaon or with your managed service provider (MSP) account.
• Can be used to automate network infrastructure and services deployments from ServiceNow:
creang and conguraon organizaons and sites, managing licenses, claiming devices, and more.
• Provides “acons” to easily create automaon work ows with ServiceNow.
• For more details, including the JMAP installaon instrucons and admin guide, go to Service
Now's JMAP page.
• Service Graph Connector (SGC) for Juniper Mist—This integraon provides the ability to import your
Juniper Mist device inventory into ServiceNow so that you can monitor and manage devices in
ServiceNow.
• You use this integraon with individual organizaons, but it does not yet support an MSP view.
• If you have a Marvis Virtual Network Assistant subscripon for Juniper Mist, you also can set up
auto-ckeng to automacally create/update/close incidents based on Marvis detecons, and
link them to the related CI.
• Mist Edge devices are not included.
• For more details, including the SGC installaon instrucons and admin guide, go to Service Now's
SGC page.
102

Integrate Splunk with Mist Webhooks
IN THIS SECTION
Conguring Mist Webhooks to Point to Your Splunk Instance | 106
Splunk can be hosted in the cloud or on-premise. If you are running managed Splunk Cloud, you will
need to raise a cket with your Splunk support to have HEC congured. For self-service Splunk, or
Splunk Enterprise (on-premise) the following instrucons help you congure HTTP Event Collecon
(HEC) to receive webhooks from Mist.
HEC is a method by which Splunk can receive an HTTP POST request that includes a payload of data.
This enables cloud services like Mist to send data to Splunk using webhooks. Webhooks requires IP
reachability from the Mist Cloud to your Splunk instance. In other words, you need a publicly accessible
URL for your Splunk server with the HTTP port open.
Conguring HEC in Splunk
1. In your Splunk GUI, go to Sengs > Data Inputs
2. Go to HTTP Event Collector > Add New
3. Provide a Name, and Source Name Override.
If your organizaon uses Splunk Output Groups, select the appropriate output group. Otherwise,
ignore the Output Group selecon.
103

4. Click Next
5. Congure the following elds:
a. For the Source type, click the Select buon and select _json from the menu
b. For the App context, click the Search & Reporng tab
c. For the Index, select network from the Available items list
You can use an exisng index type as we have done in the example, or you can create your own.
104

6. Click Review
7. Verify the sengs and click Submit
8. Record the Token Value. You will need this for the Mist Webhook conguraon.
9. Navigate back to Sengs > Data Inputs > HTTP Event Collector
10. Click Global Sengs in the upper right corner
11. Specify the default Source type as _json.
105

Port 8088 is the default. You can specify a default index if needed
This completes the HEC setup in Splunk.
12. You can test the Splunk HEC conguraon by execung the following command in a Linux CLI. The
Linux machine must be able to reach the Splunk instance over the network.
curl -k 'https://<FQDN OF SPLUNK>:<HEC PORT>/services/collector' \ --header "Authorization:
Splunk <HEC TOKEN>" \
--data '{"event": "hello world"}'
The result of the previous step should look similar to: {“text”:”Success”,”code”:0}. If you do not see a
success message, conrm that there are no rewalls blocking the HEC port on the Splunk instance.
Conguring Mist Webhooks to Point to Your Splunk Instance
IN THIS SECTION
Before you Begin | 107
106

Before you Begin
You must have the following informaon ready so that you can complete the Mist conguraon:
• The FQDN of your Splunk HEC instance
• The port number HEC is listening on (Default is 8088)
• Your Splunk HEC Token
You can congure webhooks in Mist at either the Org level, or the Site level. For this example, we
congure an Org level webhook and the topics we will be subscribing to will be “audits”, “alarms”, and
“device-events”.
1. Log in to the Mist portal for your organizaon
2. Navigate to Organizaon > Sengs and copy your Organizaon ID
3. Navigate to hps://api.mist.com/api/v1/orgs/:org_id/webhooks.
NOTE: You must substute your real Organizaon ID for "org_id" in the URL above.
4. In the following JSON code block, make the following substuons:
107

• Substute the fully qualied domain name (FQDN) of your Splunk instance for <FQDN of
SPLUNK>
• Substute the port on which your Splunk instance is listening for <PORT>
• Substute your actual Splunk token for <SPLUNK TOKEN>
{
"name": "Splunk Webhook",
"type": "splunk",
"url": "https://<FQDN of SPLUNK>:<PORT>/services/collector", "splunk_token": "<SPLUNK TOKEN>",
"enabled": true,
"topics": [
"audits",
"alarms",
"device-events"
],
"verify_cert": true}
5. Aer substuon, copy the enre block of JSON and paste it into the Content box at the boom of
the page
6. Click the POST buon when you're ready.
108

You can now verify the conguraon is in the top eld of the window and that the id eld contains data.
This conrms that Mist and Splunk can communicate.
RELATED DOCUMENTATION
hps://docs.splunk.com/Documentaon/Splunk/8.1.3/Data/UsetheHTTPEventCollector
hps://api.mist.com/api/v1/docs/Site#webhooks
hps://api.mist.com/api/v1/docs/Org#org-webhooks
109


Automaon Tools
SUMMARY
This topic talks about a few automaon tools that
you can use with Juniper Mist
TM
. We make no
reccommendaon regarding any of the tools
discussed below. We provide the informaon and
examples for informaonal purposes only.
IN THIS SECTION
Automaon Tools Overview | 111
Addional Automaon Resources | 124
Automaon
Tools Overview
The enre Juniper Mist™ GUI is built on top of the robust Mist API. This architecture makes Mist
administraon highly customizable, exible, and scalable. Using automaon tools, you can perform tasks
or groups of tasks not available in the GUI.
Automaon begins by idenfying and understanding the tasks to be performed. Most automaon tools
are designed for machine-to-machine transacons. Because of this design, automaon tools are not
always intuive for humans to understand and congure. Thankfully, many tools exist that help you
interact with machine-based interfaces and even create your own automaon scripts. The Juniper Mist
API is just such a tool.
Postman
Postman is a tool to help you automate Juniper Mist management tasks. Postman can do many
things, but you will use it as an API client. According to the Postman web site (www.postman.com),
the Postman API client is the foundaonal tool of Postman. This client enables you to easily
explore, debug, and test your APIs while also enabling you to dene complex API requests for
HTTP, REST, SOAP, GraphQL, and WebSockets.
Postman provides its own API GUI client to interact with a REST API interface, and many others.
Postman allows users to set up reusable environments and use variables for consistency and
eciency when tesng. You can visually organize each individual request into an order, inspect
and store responses for reuse, and even have Postman help generate programmac code such as
Python.
Here is a short video on using variables in Postman to interact with the Juniper Mist API.
Video: Automaon for Access Switching
111
Postman is an excellent development tool. You can use it to test individual conguraon changes
and then put them together into collecons. This video is an excellent example of using Postman
and a web browser to put together API requests to congure 802.1x in a switching template.
With the popularity of Postman, Juniper developers have published collecons in the public
Postman workspaces. Collecons are a method of organizing API requests and documentaon into
groups. You can import, export, and share collecons.
Here is a short video demonstrang the use of Postman collecons and the Juniper Mist API.
The Postman collecons incorporate many Juniper Mist capabilies. They also include collecons
for gathering client informaon, Mist Edge devices, switching, soware-dened WAN (SD-WAN),
and many other objects. You can nd these collecons, which include the Juniper Mist cloud APIs,
Mist cloud WebSocket, and Mist Runner Collecons, from this link: hps://www.postman.com/
juniper-mist/workspace/mist-systems-s-public-workspace.
Python
Python is an object-oriented programming language. It’s a popular language for many reasons. One
reason is that Python is highly exible and extensible. Compared to other programming languages,
it is easy to learn and work with. Python is used for web development, data sciences, networking,
and the Internet of Things (IoT), to name a few uses. It is open source and works on mulple
plaorms.
For more informaon about geng started with Python, check out the Python Soware
Foundaon at hps://www.python.org/about/gengstarted/.
Juniper Networks supports Python use in many forms, such as direct script execuon and toolkit
scripts: hps://www.juniper.net/documentaon/us/en/soware/junos/automaon-scripng/
topics/concept/junos-script-automaon-python-scripts-overview.html
Python Script Examples
Leveraging the robust API library in Juniper Mist, you can automate tasks using Python. In this
secon, you will see some simple Python scripts that make a series of calls to the Mist API to
gather informaon or make changes to Mist.
These scripts are meant to serve only as examples and may or may not work in your environment
due to possible variances in your environment.
Display WLANs on a Specic Site
112

This is a simple example script that connects to the Mist API and displays all the wireless LANs
(WLANs) for a specic site:
import requests
import json
url = 'https://api.mist.com/api/v1/sites/00000000-0000-0000-0000-000000000000/wlans'
##Set the API request headers
headers = {
'Content-Type': 'application/json',
'Authorization': 'Token
a7c61a9ca25b4c27a14ea7c61a9ca7c61a9ca25b4c27a14e653b5af5db02a25ba7c61a9ca25b4c27a14e653b5af
5db024c27a14e653b5af5db026xxxxxxxxxxx'
}
results = requests.get{url, headers=headers}
wlans = json.loads{results.text}
##Print each wlan and wlan_id
for wlan in wlans:
print{wlan["ssid"], ">", wlan ["id"]}
user:$ python3 simple-script.py
mist-prod > a7c61a9c-a25a-274c-a7c61a9c-a25b
mist-test > a7c61a9c-a25b-4c27-a7c61a9c-a25b
Comparing RSSI (Windows)
You execute this Python script on a Windows laptop. The script gathers the current signal quality
percentage, not received signal strength indicator (RSSI), from a Windows laptop. The script then
gets the RSSI from the access point (AP) to which the laptop is connected by parsing for the
wireless adapter’s MAC. The script makes these requests simultaneously and displays the client’s
signal quality on the same line as the AP’s RSSI. The script runs unl you send a Ctrl+ccommand
from your keyboard to break out of the script execuon.
The script makes use of the netsh wlan show interface Windows command. This is the command’s
output:
C:\Users\user>netsh wlan show interface
113

There is 1 interface on the system:
Name : Wi-Fi
Description : Intel(R) Wi-Fi 6E AX210 160MHz
GUID : aa7a439e-fe66-494c-xxxx-xxxxxxxxxxxx
Physical address : 70:cd:xx:xx:xx:xx
State : connected
SSID : wi-fi
BSSID : d4:20:xx:xx:xx:xx
Network type : Infrastructure
Radio type : 802.11ax
Authentication : WPA2-Personal
Cipher : CCMP
Connection mode : Auto Connect
Channel : 149
Receive rate (Mbps) : 516
Transmit rate (Mbps) : 574
Signal : 83%
Profile : hoth
Hosted network status : Not available
This is the script itself:
import requests
import json
import os
import time
import random
import string
import subprocess
##Set the API request headers
headers = {
'Content-Type': 'application/json',
'Authorization': 'Token <YOUR_API_TOKEN>'
}
##Function to get (strip) the "Signal" quality percentage from Windows from the "netsh
wlan show interface" command
def get_clientsignal{}:
114

results = subprocess.check_output(["netsh", "wlan", "show", "interface"]).decode()
lines = results.split('\r\n')
d = {}
for line in lines:
if ':' in line:
vals = line.split(':')
if vals[0].strip() != ''and vals[1].strip() != '':
d[vals[0].strip()] = vals[1].strip()
for key in d.keys():
if key == "Signal":
return (d[key])
##Function to get (strip) the "Physical address" MAC from Windows from the "netsh wlan
show interface" command
def get_windowsmac():
results = subprocess.check_output(["netsh", "wlan", "show", "interface",]).decode()
lines = results.split('\r\m')
d = {}
for line in lines:
inf ': ' in line:
vals = line.split(':')
print(vals)
if vals[0].strip() != '' and vals[1].strip() != '':
d[vals[0].strip()] = vals[1].strip()
for key in d.keys():
if key == "Physical address":
client_mac = (d[key])
return (client_mac)
##Main Section
###Define variables
client_mac = get_windowsmac()
client_mac = client_mac.replace(":", "")
###input your site_id in the API URL
url = ('https://api.mist.com/api/v1/sites/<YOUR_SITE_ID>/{}'.format(client_mac))
115

client_rssi = 0
my_rssi = 0
###Loop through every 3 seconds and print the results to the terminal
while True:
results = requests.get(url, headers=headers)
client = json.loads(results.text)
client_rssi = get_clientsignal()
my_rssi = client['rssi']
print('Windows Signal', '=', client_rssi, ' ', my_rssi, '=', 'AP rssi')
time.sleep(3)
When you run the python script, the resulng output should look like this:
C:\Users\user>python client-signal.py
Windows Signal = 83% -59 = AP rssi
Windows Signal = 83% -59 = AP rssi
Windows Signal = 83% -62 = AP rssi
Windows Signal = 83% -62 = AP rssi
Windows Signal = 83% -62 = AP rssi
Windows Signal = 83% -62 = AP rssi
Windows Signal = 83% -62 = AP rssi
Windows Signal = 83% -62 = AP rssi
Windows Signal = 83% -62 = AP rssi
Windows Signal = 83% -62 = AP rssi
Windows Signal = 83% -62 = AP rssi
Windows Signal = 83% -62 = AP rssi
Windows Signal = 83% -62 = AP rssi
Windows Signal = 83% -62 = AP rssi
Windows Signal = 83% -62 = AP rssi
Windows Signal = 83% -62 = AP rssi
Windows Signal = 83% -62 = AP rssi
Windows Signal = 83% -62 = AP rssi
Windows Signal = 83% -62 = AP rssi
Windows Signal = 83% -62 = AP rssi
Windows Signal = 83% -62 = AP rssi
Windows Signal = 83% -62 = AP rssi
Windows Signal = 83% -58 = AP rssi
Traceback (most recent call last):
File “client-signal.py, line 71, in <module> time.sleep(3)
116

KeyboardInterrupt
C:\Users\user>
The Juniper Mist AP reports its stascs approximately every 60 seconds. This is the reason the
AP RSSI only changed twice during the me the script was running.
Comparing RSSI (MacOS)
This Python script is executed on a MacBook laptop. It is nearly idencal to the previous Windows
script. The script simultaneously gathers the RSSI from the MacBook and gets the RSSI from the
AP to which the laptop is connected by parsing for the wireless adapter’s MAC address. It makes
these requests simultaneously and displays the client’s signal quality on the same line as the AP’s
RSSI. The script runs unl you send a Ctrl+c command to break out of the script execuon. To
access the command on the Mac OS, you must include the absolute path to the command: /
SystemLibrary/PrivateFrameworks/Apple802111.framework/Versions/A/Resources/airport -I.
This is what the airport -I command displays:
Mac:Desktop user$ /SystemLibrary/PrivateFrameworks/Apple802111.framework/Versions/A/
Resources/airport -I
agrCtlRSSI: -60
agrExtRSSI: 0
agrCtlNoise: -93
agrExtNoise: 0
state: running
op mode: station
lastTxRate: 486
maxRate: 450
lastAssocStatus: 0
802.11 auth: open
link auth: wpa2-psk
BSSID: 5c:5b:xx:xx:xx:xx
SSID: SSID-1
MCS: 8
channel: 120, -1
This is the script itself:
import requests
import json
import os
import time
117

import random
import string
##Set the API request headers
headers = {
'Content-Type': 'application/json',
'Authorization': 'Token <YOUR_API_TOKEN>'
##Function to get (strip) the "RSSI" quality percentage from MacOS from the "airport -I"
command
def get_clientsignal{}:
input = os.popen( '/SystemLibrary/PrivateFrameworks/Apple802111.framework/
Versions/A/Resources/airport -I)
return int(**.join([x.split()[1] for x in input if 'agrCtlRSSI' in x]))
##Function to get (strip) the MAC from MacOS from the "ifconfig" command
def get_macbookmac():
input = os.popen('ifconfig en0')
return ''.join([xsplit()[1]for x in input if 'ether' in x])
##Main Section
###Define variables
client_mac = get_macbookmac()
client_mac = client_mac.replace(":", "")
###input your site_id in the API URL
url = ('https://api.mist.com/api/v1/sites/<YOUR_SITE_ID>/{}'.format(client_mac))
client_rssi = 0
my_rssi = 0
###Loop through every 3 seconds and print the results to the terminal
while True:
results = requests.get(url, headers=headers)
client = json.loads(results.text)
client_rssi = get_clientsignal()
my_rssi = client['rssi']
118

print('Macbook rssi', '=', client_rssi, ' ', my_rssi, '=', 'AP rssi')
time.sleep(3)
When the script runs, it gathers the RSSI informaon from the MacBook and the connected AP
(through a Mist API call) and prints its output on a single line. The script runs unl you cancel it by
issuing the Ctrl+c command.
Mac:Desktop user$ python3 client-signal.py
Macbook rssi = -61 -57 = AP rssi
Macbook rssi = -61 -57 = AP rssi
Macbook rssi = -61 -57 = AP rssi
Macbook rssi = -61 -57 = AP rssi
Macbook rssi = -61 -57 = AP rssi
Macbook rssi = -61 -59 = AP rssi
Macbook rssi = -61 -59 = AP rssi
Macbook rssi = -63 -59 = AP rssi
Macbook rssi = -64 -59 = AP rssi
Macbook rssi = -65 -59 = AP rssi
Macbook rssi = -63 -59 = AP rssi
The Juniper Mist AP reports its stascs approximately every 60 seconds. This is why the AP RSSI
changes only once in the example output.
Random Password Creaon for a Guest Portal
When you congure a WLAN for a guest portal, use the Guest Portalconguraon to dene the
landing page. This is the page for guests to log on to their wireless network. This conguraon
page enables you to gather informaon about guests such as their full names, e-mail addresses,
and company details. You can add custom elds if you need users to gather addional types of
informaon.
You can congure the guest portal to use an alphanumeric passphrase for authorizaon. This is a
manual process, but you can automate it to run regularly, such as daily, to create a new random
password that you distribute to guests each day.
This image shows the current congured passphrase for the guest portal:
119

Below is a Python script to create a new, random password for a guest portal. This script will send
a PUTcommand to the API to change the passphrase.
import requests
import json
120

import random
import string
url = 'https://api.mist.com/api/v1/sites/<YOUR_SITE_ID>/wlans'
##Set the API request headers
headers = {
'Content-Type': 'application/json',
'Authorization': 'Token <YOUR_API_TOKEN>'
}
results = requests.get(url, headers=headers)
wlans = json.loads(results.text)
wlanid = None
portal = None
##Search for the guest SSID, mist_guest
for wlan in wlans:
print(wlan["ssid"], ">", wlan["id"])
if wlan ["ssid"] == "mist_guest":
wlanid = wlan["id"]
portal = wlan["portal"]
if wlanid:
##This function generates a 6 alphanumeric random string
thisisnew = ''.join(random.choice(string.ascii_letters) for _ in range(6))
print("New Password is:", thisisnew)
portal["password"] = thisisnew
##This takes the results and issues a PUT for the new password in the guest portal
configuration
results = requests.put(url+"/{}".format(wlanid), headers=headers, data='{"portal":
' + json.dumps(portal) +'}')
This is the output from the script. It lists the wlan name and the wlan_idunl it nds the mist_guest
WLAN (dened in the script) and resets the passphrase with the newly generated, random
passphrase:
Mac:Desktop user$ python3 client_guest_password.py
Mist-1 > 38fn03d0f9d-nfd3-xxxx-xxxx-xxxxxxxxxxxx
Mist-2 > p3j9n30lmsl-nfd3-xxxx-xxxx-xxxxxxxxxxxx
Mist-3 > 3knlso2k4ls-df9n-xxxx-xxxx-xxxxxxxxxxxx
mist_guest > 9djn3axc93nn-89sb-xxxx-xxxx-xxxxxxxxxxxx
121

New Password is: UiCnPW
Mac:Desktop user$
You can verify the passphrase change by going back to the WLAN conguraon, or WLAN
template page, and checking the guest portal conguraon. When you click Reveal, you will see
the new passphrase.
122

123

Addional Automaon Resources
For detailed informaon and examples, use these resources:
Table 11: Juniper Mist Automaon Resources
Resource Descripon Where to Find It
Python scripts demonstrang
possibilies of Mist APIs.
hps://github.com/tmunzer/
mist_library
Examples of Python scripts using
the Mist APIs. These scripts are
using the mistapi Python package
to simplify the authencaon
process.
To view script examples, go
to:hps://github.com/tmunzer/
mist_library and browse the scripts
directory.
MISTAPI - Python Package to use
Mist APIs
This package is built from the Mist
OpenAPI specicaons and is
designed to simplify the use of the
Mist APIs with Python scripts.
To learn more about the package,
go to: hps://pypi.org/project/
mistapi/
Mist API Labs Proof-of-Concept and prototype
applicaons and scripts created to
demonstrate the possibilies of
Juniper-Mist APIs and some of the
use cases.
Go to: Mist-Lab Demo Apps and in
the Search box, enter webhooks.
Mist Postman Webhook Samples Provides precongured examples of
POST webhook syntax.
Browse:hps://www.postman.com/
juniper-mist/workspace/mist-
systems-s-public-workspace
124
